Embedding Hidden Messages with Stable Diffusion and ControlNet
Remember those Magic Eye books from when you were a kid - where you’d have to squint really hard to see what was hidden within a pattern or image? Imagine how hard that must have been to create on MSDOS or Windows 95 or, even worse, by hand.
With Stable Diffusion and the Odyssey mac app, it’s simple to hide or embed messages within images in totally unique and creative ways. Like all of Odyssey’s workflows, you could just write the words you wanted hidden within an image and click generate making it an ideal project for those looking into easy AI projects or generative AI use cases.
Here's a step-by-step guide on how to use Stable Diffusion and ControlNet within Odyssey for this purpose:
Step 1 - Add your text
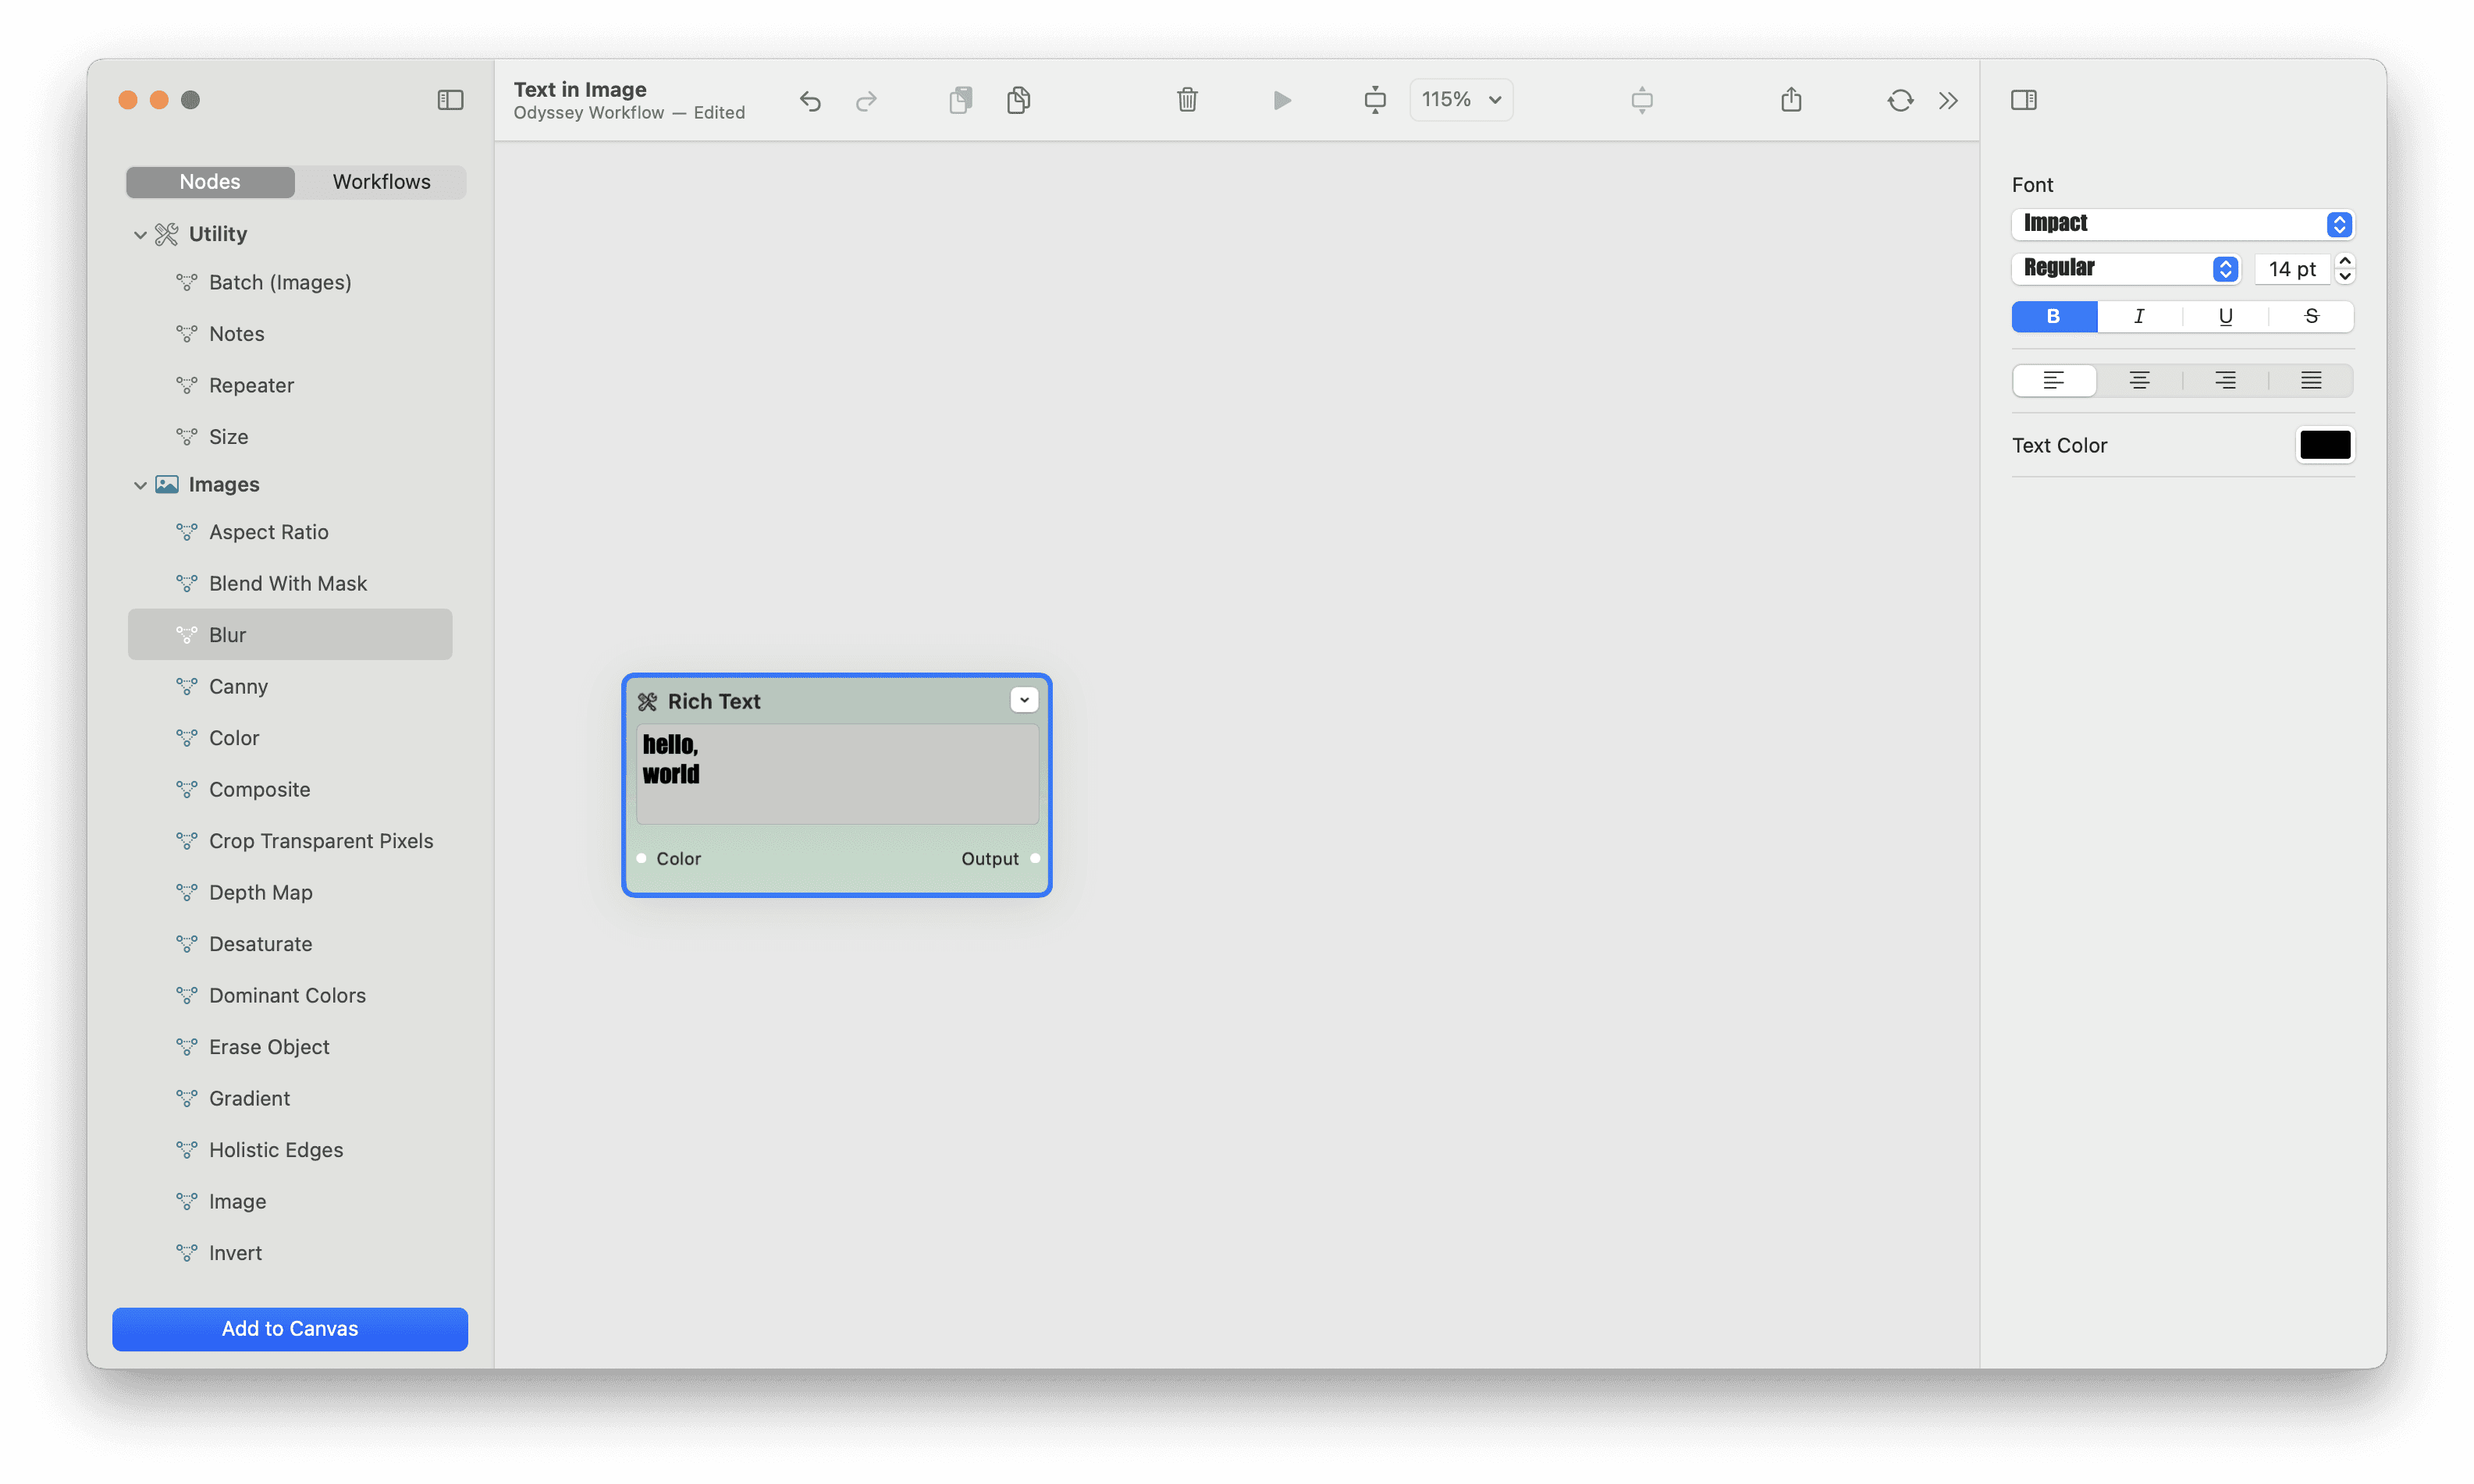
To start, drag a ‘rich text node’ onto the Odyssey canvas and select a font.
If you want two lines of text, simply hold down control and press return.
Let’s go with the classic hello, world.
While any font will work, it’s often best to choose a bolder, bulkier font. This will make the text show through more clearly.
Step 2 - Convert text to an image
Next, you’ll need to convert your text to an image. Simply add the text to image node. Font size multiplier dictates the size of your image while ‘padding’ will help make sure the entirety of the text is within your frame.
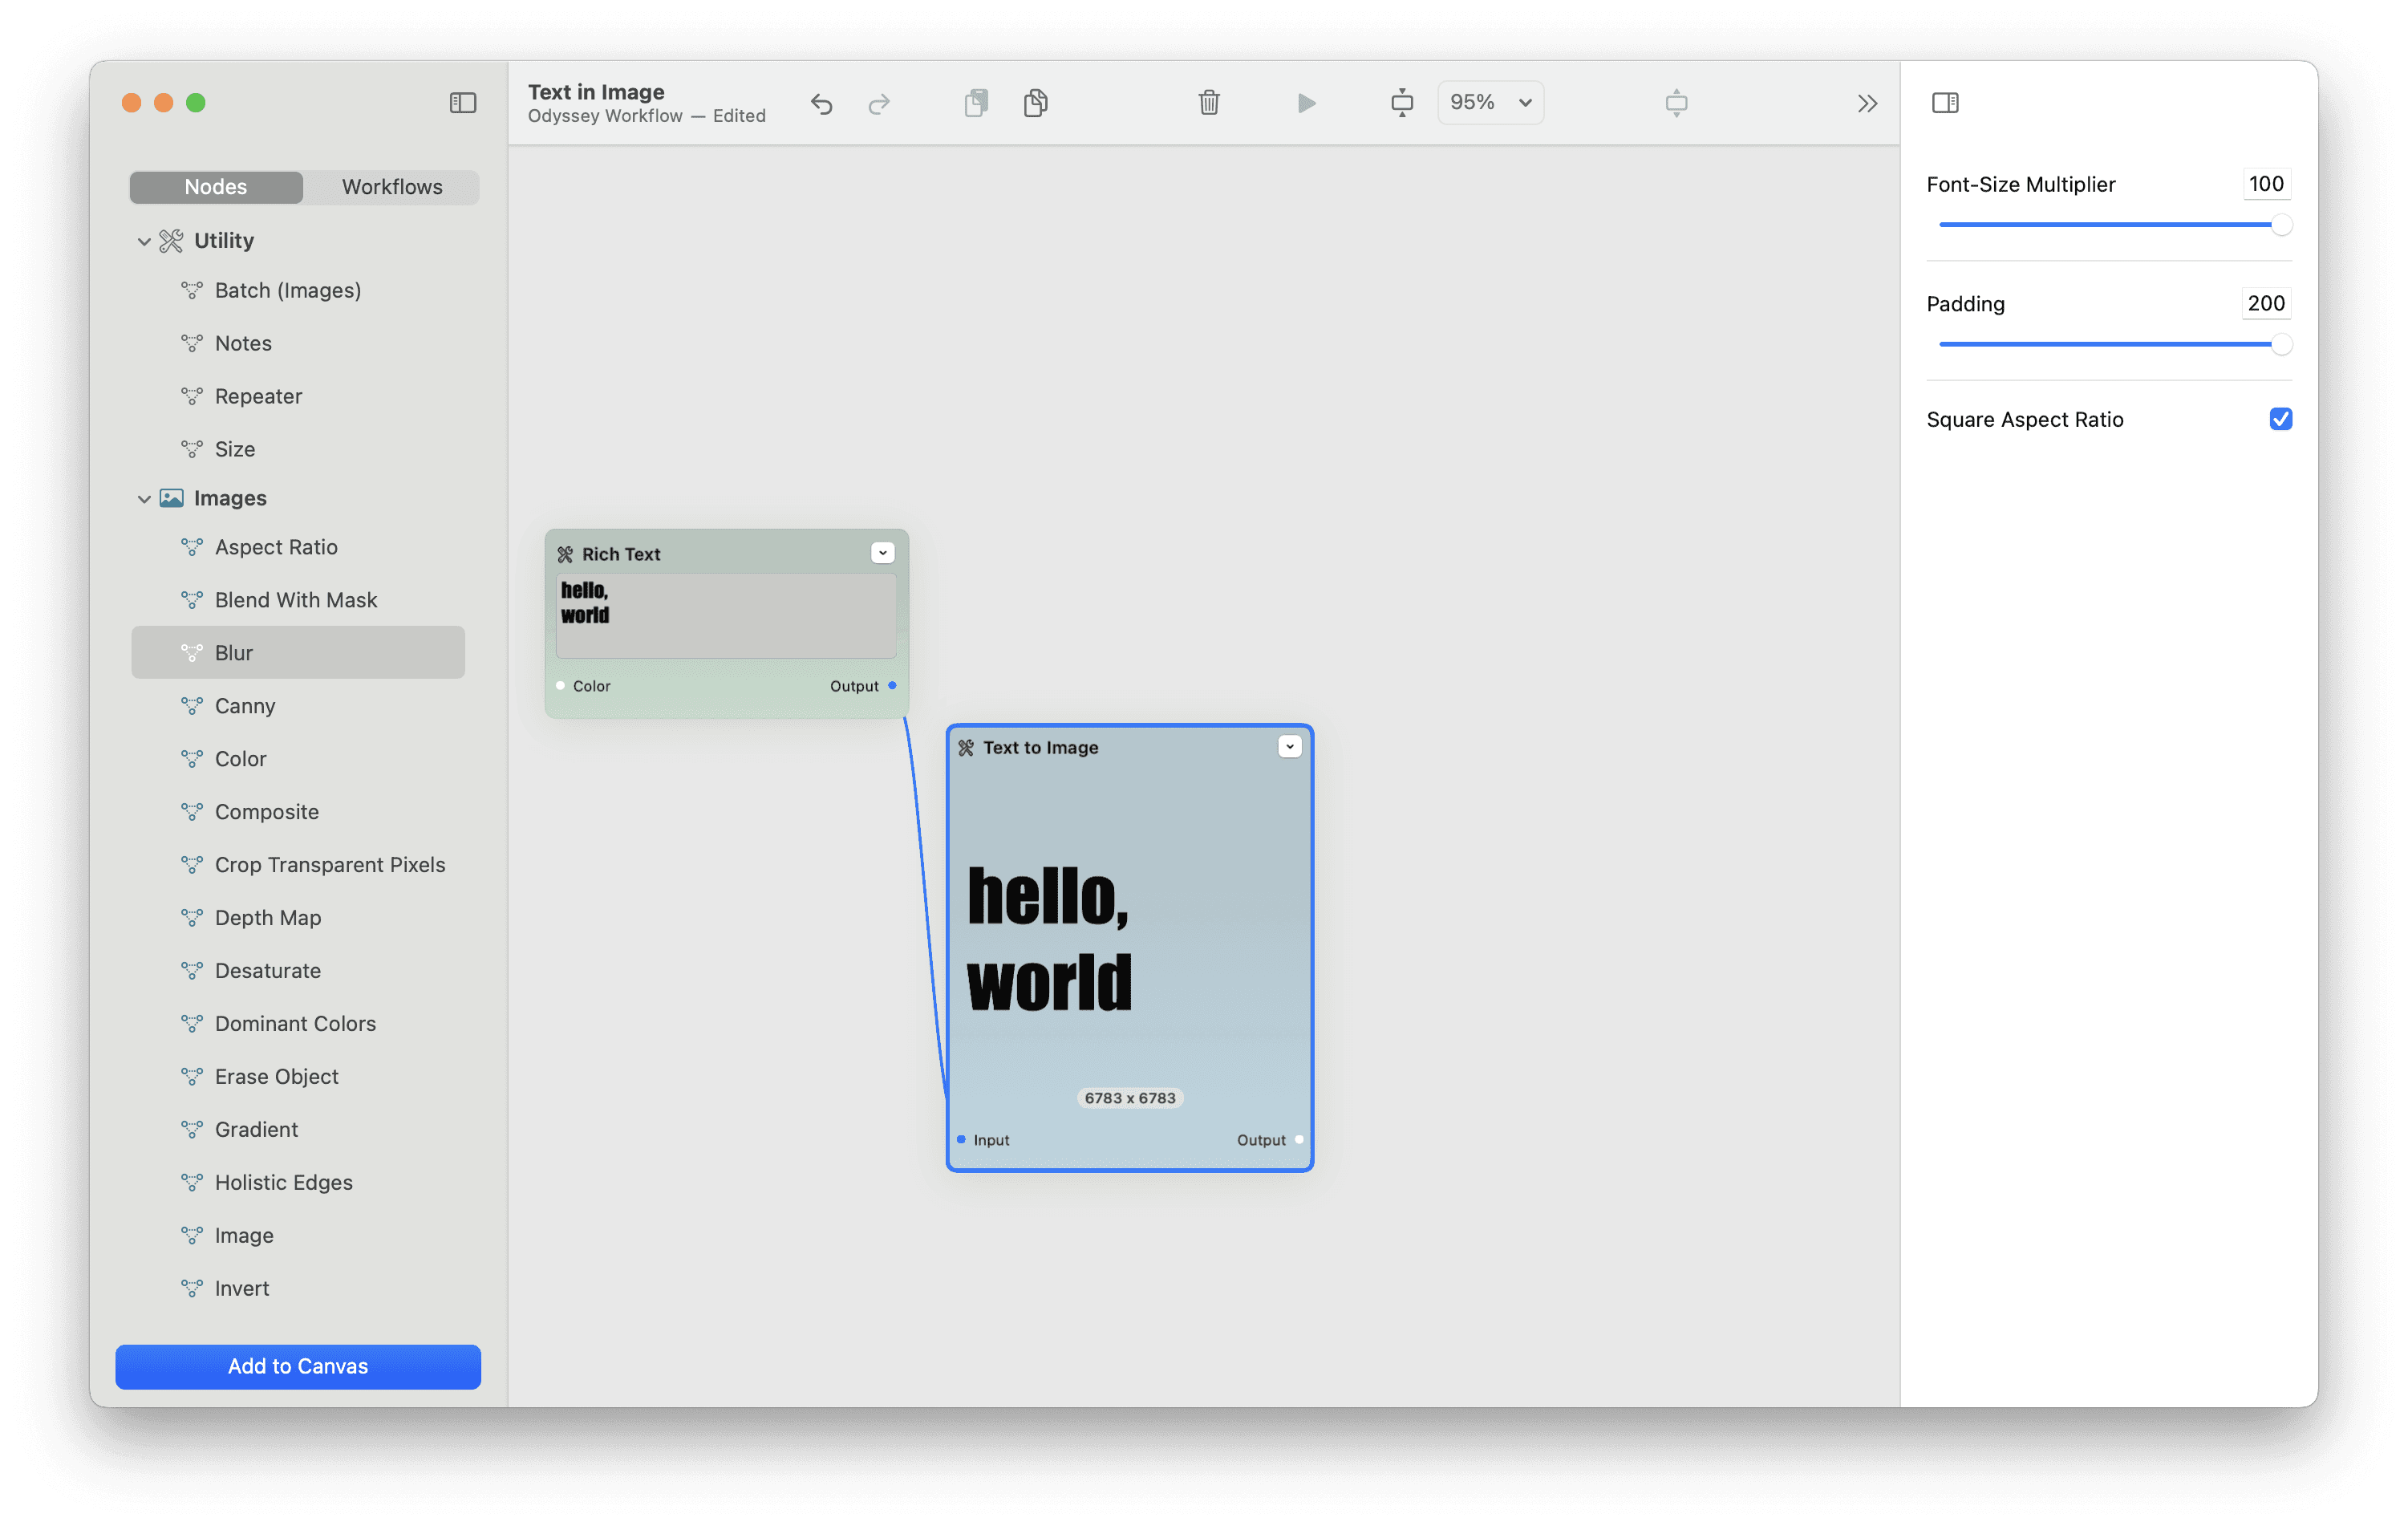
Ultimately we need a 512 x 512 image for ControlNet so check off “square aspect ratio” then connect the text image to a resize node to bring it down to 512 x 512.
Step 3 - Position your text
Drag in a color node and a composite node then add your text on top of a white background.
Within the composite node, you can move the text around. Wherever you end up setting the text on the composite node is where it will end up in your final, Stable Diffusion image.
Similarly, you can make the text smaller or larger within the image.
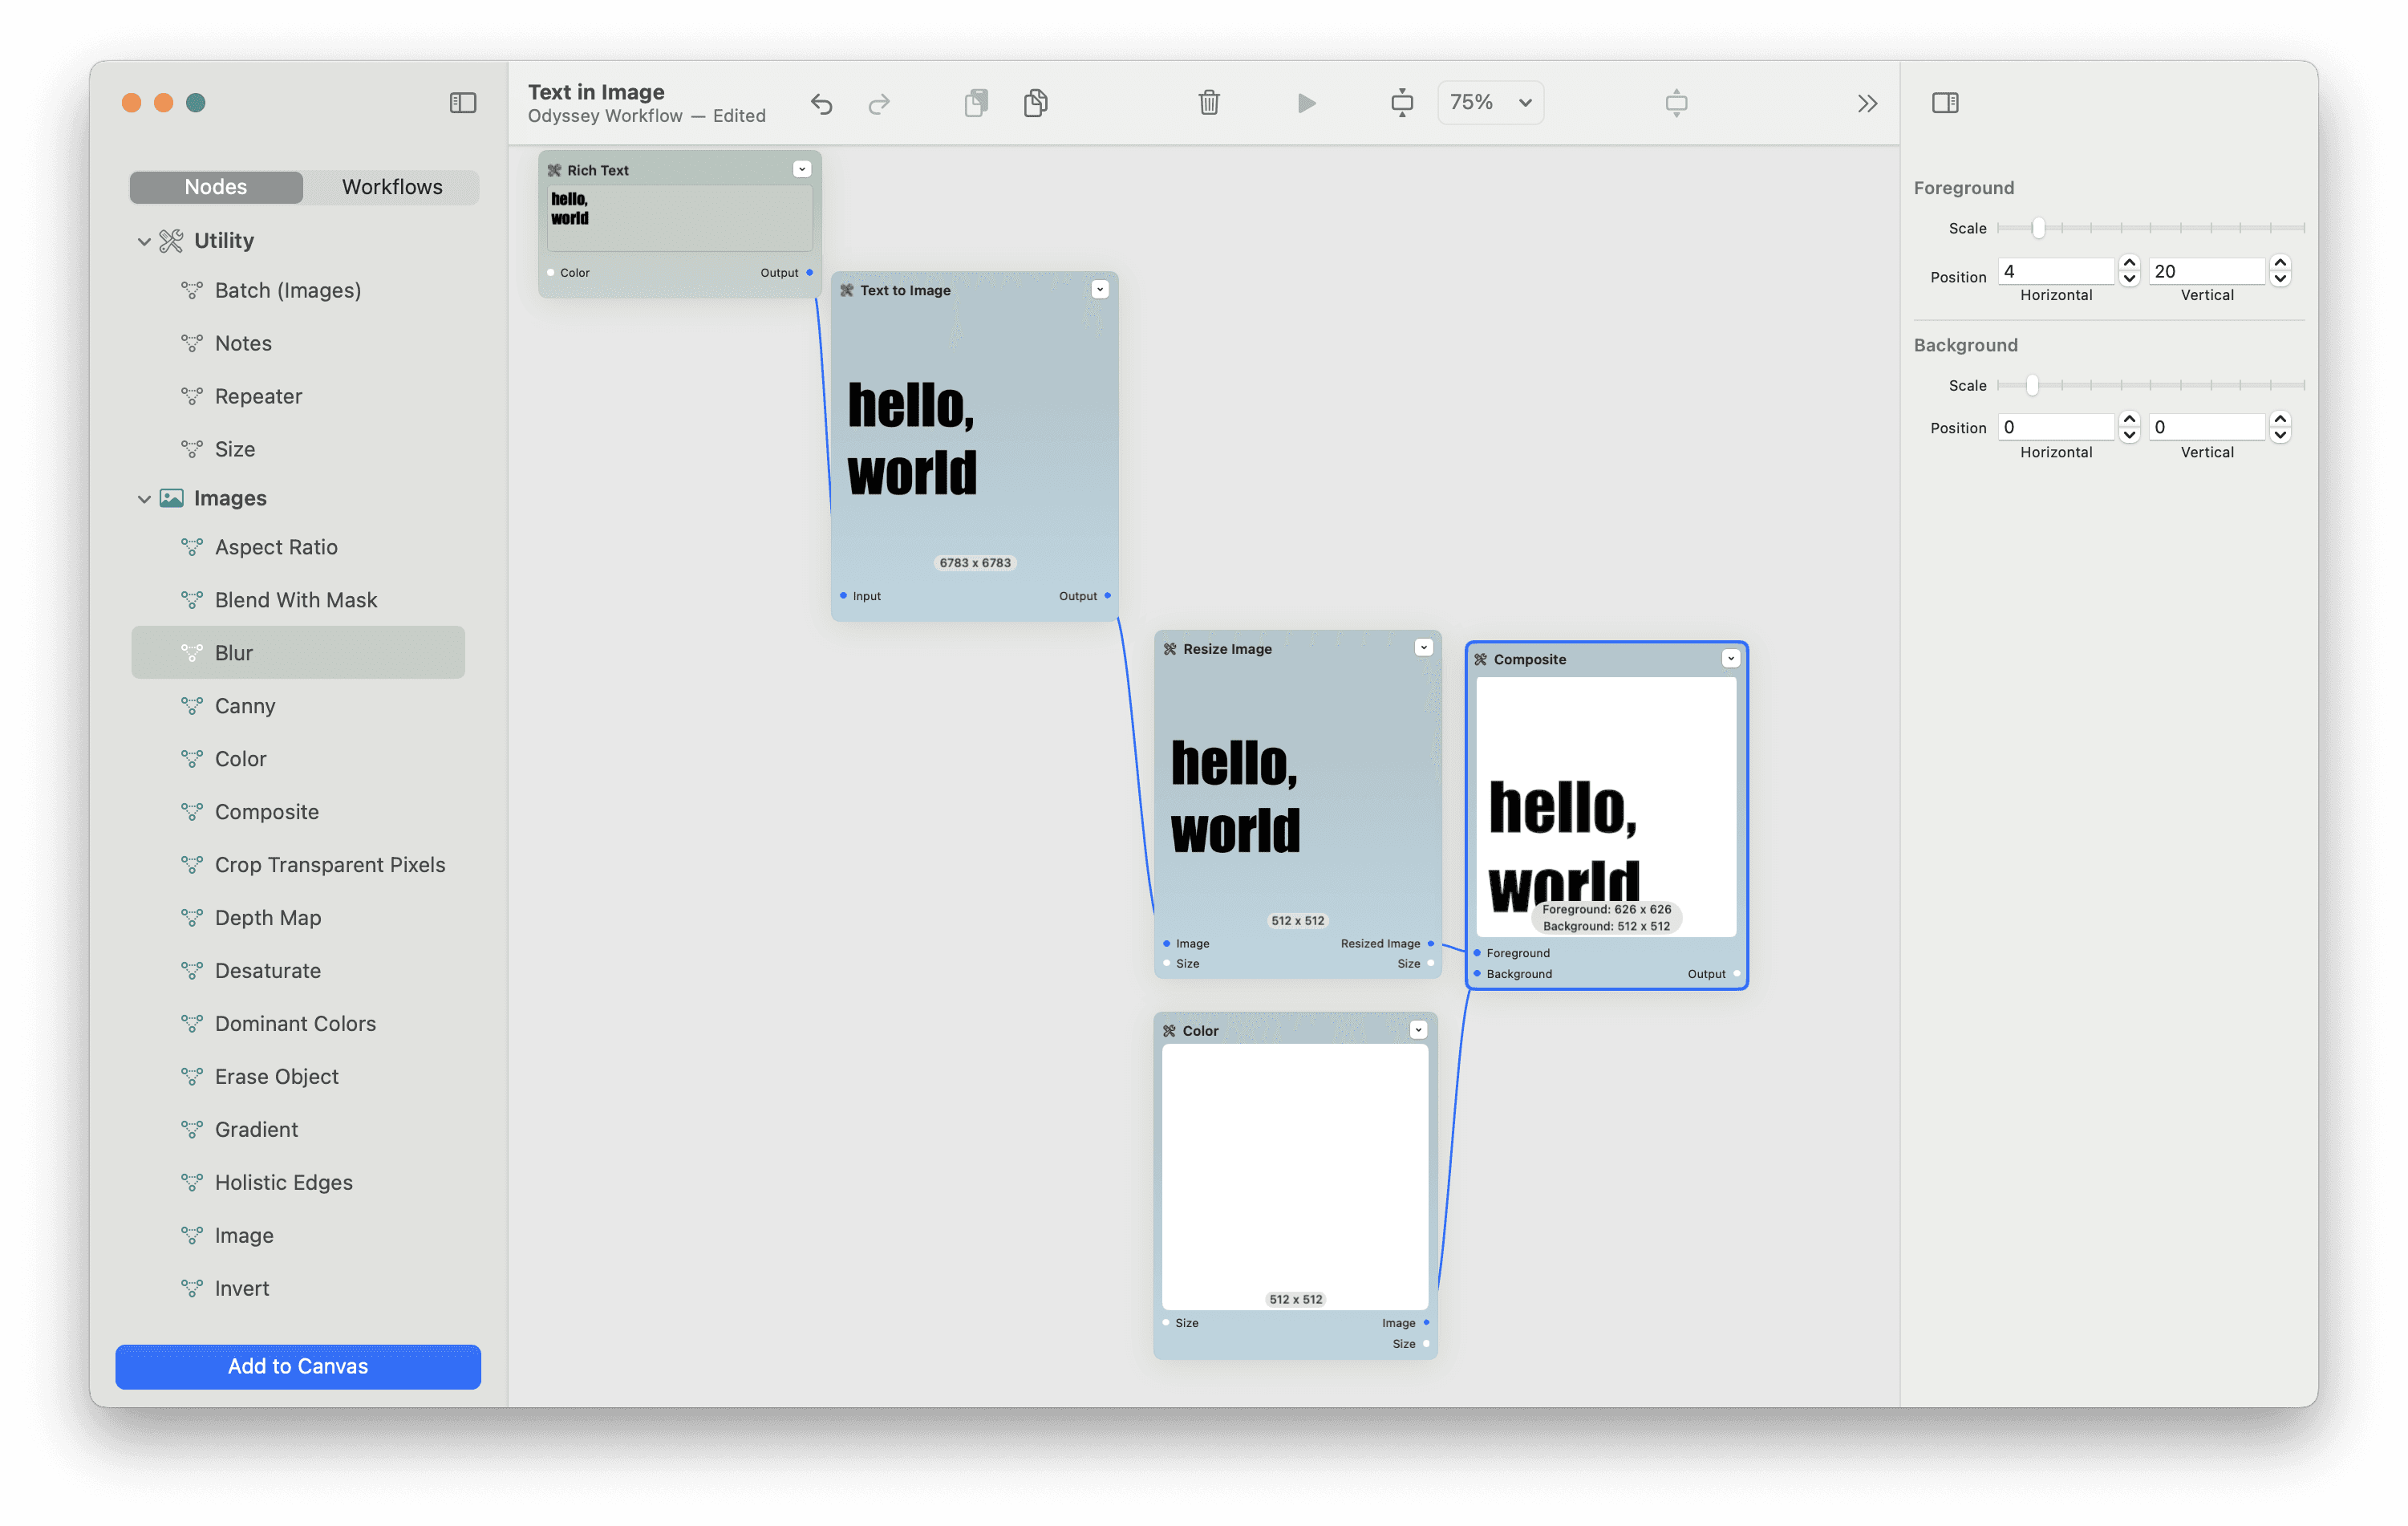
Before connecting your text to the composite node, you can also do things like add a rotate node if you wanted it to sit at an angle in your final image. For our workflow, we’re going to place the text in the bottom right of the frame.
Step 4 (optional) - Blur the image
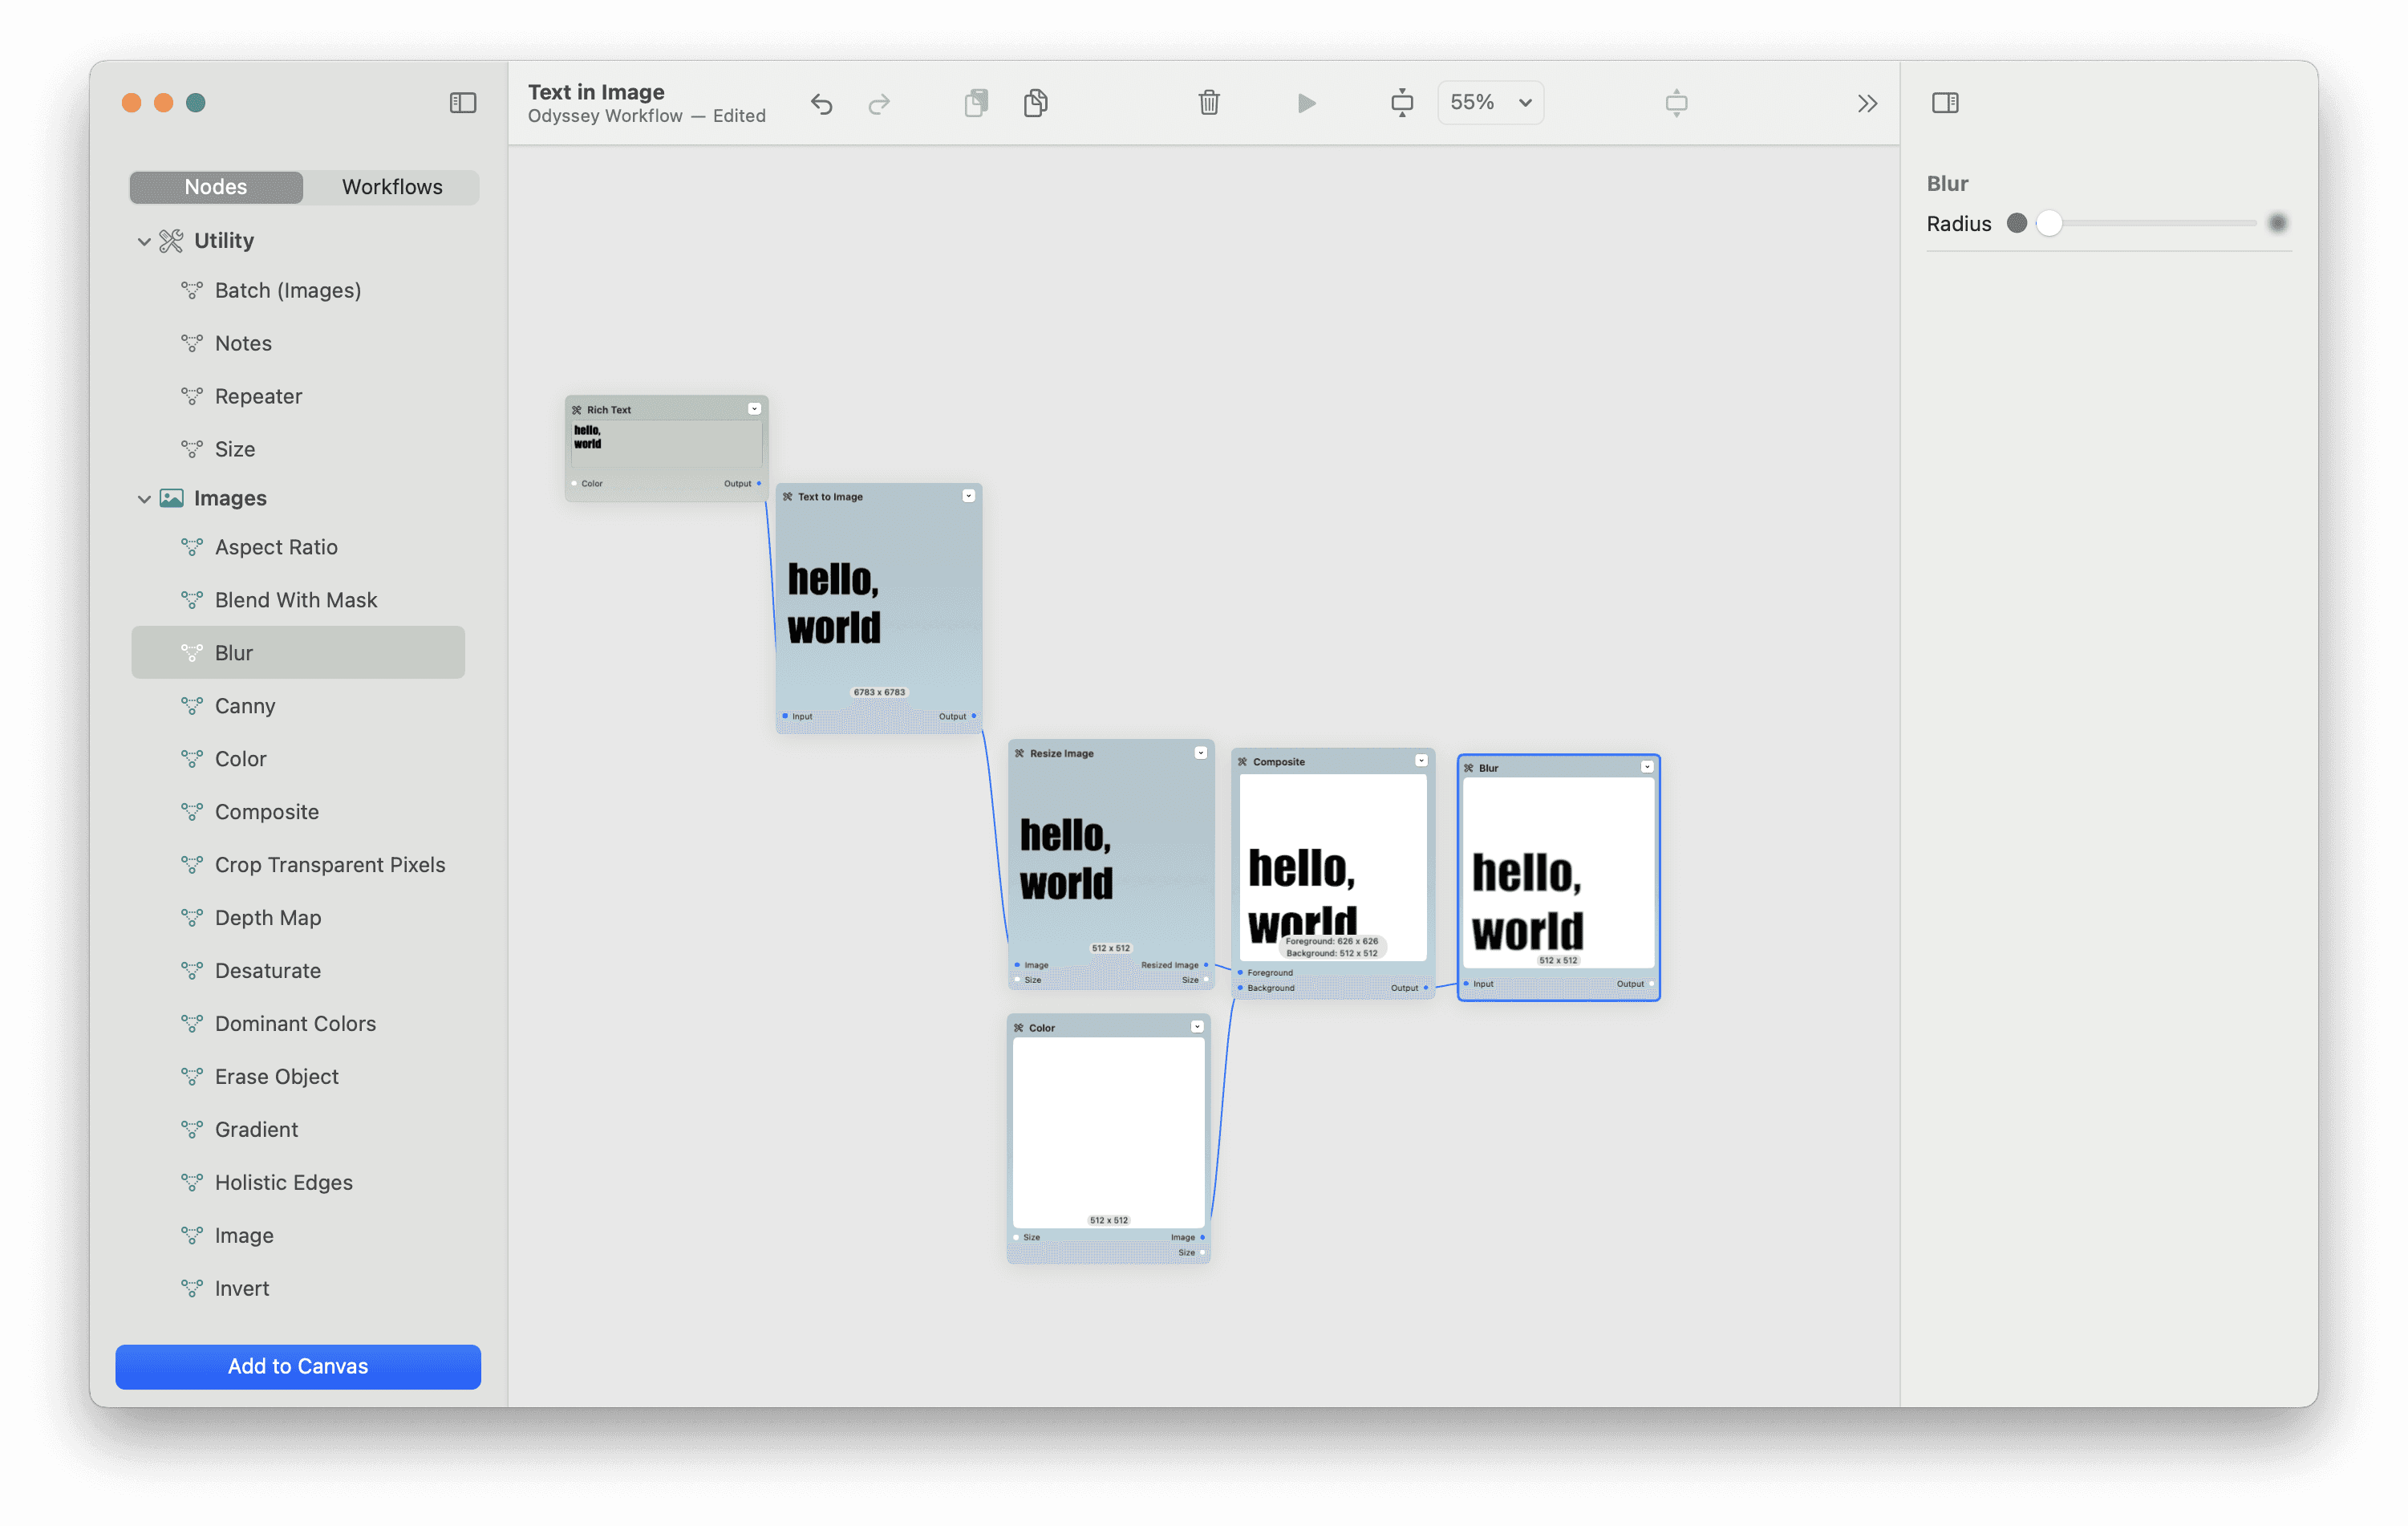
When you want your text to really blend into the surroundings, one way to achieve the effect is to very slightly blur the image. The blurred lines on the font cause Stable Diffusion to paint a bit more within the text you want to embed.
But it’s definitely not required. If you wanted to use this workflow to create a text effect that was still quite clear, there’s no need to blur anything.
Step 5 - Add a prompt and select your model
We use the prompt:
incredibly vibrant jungle with a lush cascading waterfall, ultra hd, realistic, perfect composton, beatiful detailed, intricate, insanely detailed octane render, trending on artstation, 8k artistic photography, photorealistic concept art, soft, natural volumetric lighting, cinematic, perfect, light
To get a fun, dynamic jungle scene with the negative prompt:
cartoon, 3d, bad art, blurry, pixelated, ugly, tiling, close up, blurry, sketch, lackluster, weird objects, text, watermark, grainy, strange colors, deviant art
But any prompt will do. The one thing to keep in mind is that while the effect can be magical, the model will sometimes struggle to engrain the text in an image if there isn’t an immediately clear way to do so.
We like to use either Realistic Vision or DreamShaper for this workflow to help improve the quality of the final image - but any model that supports ControlNet will do.
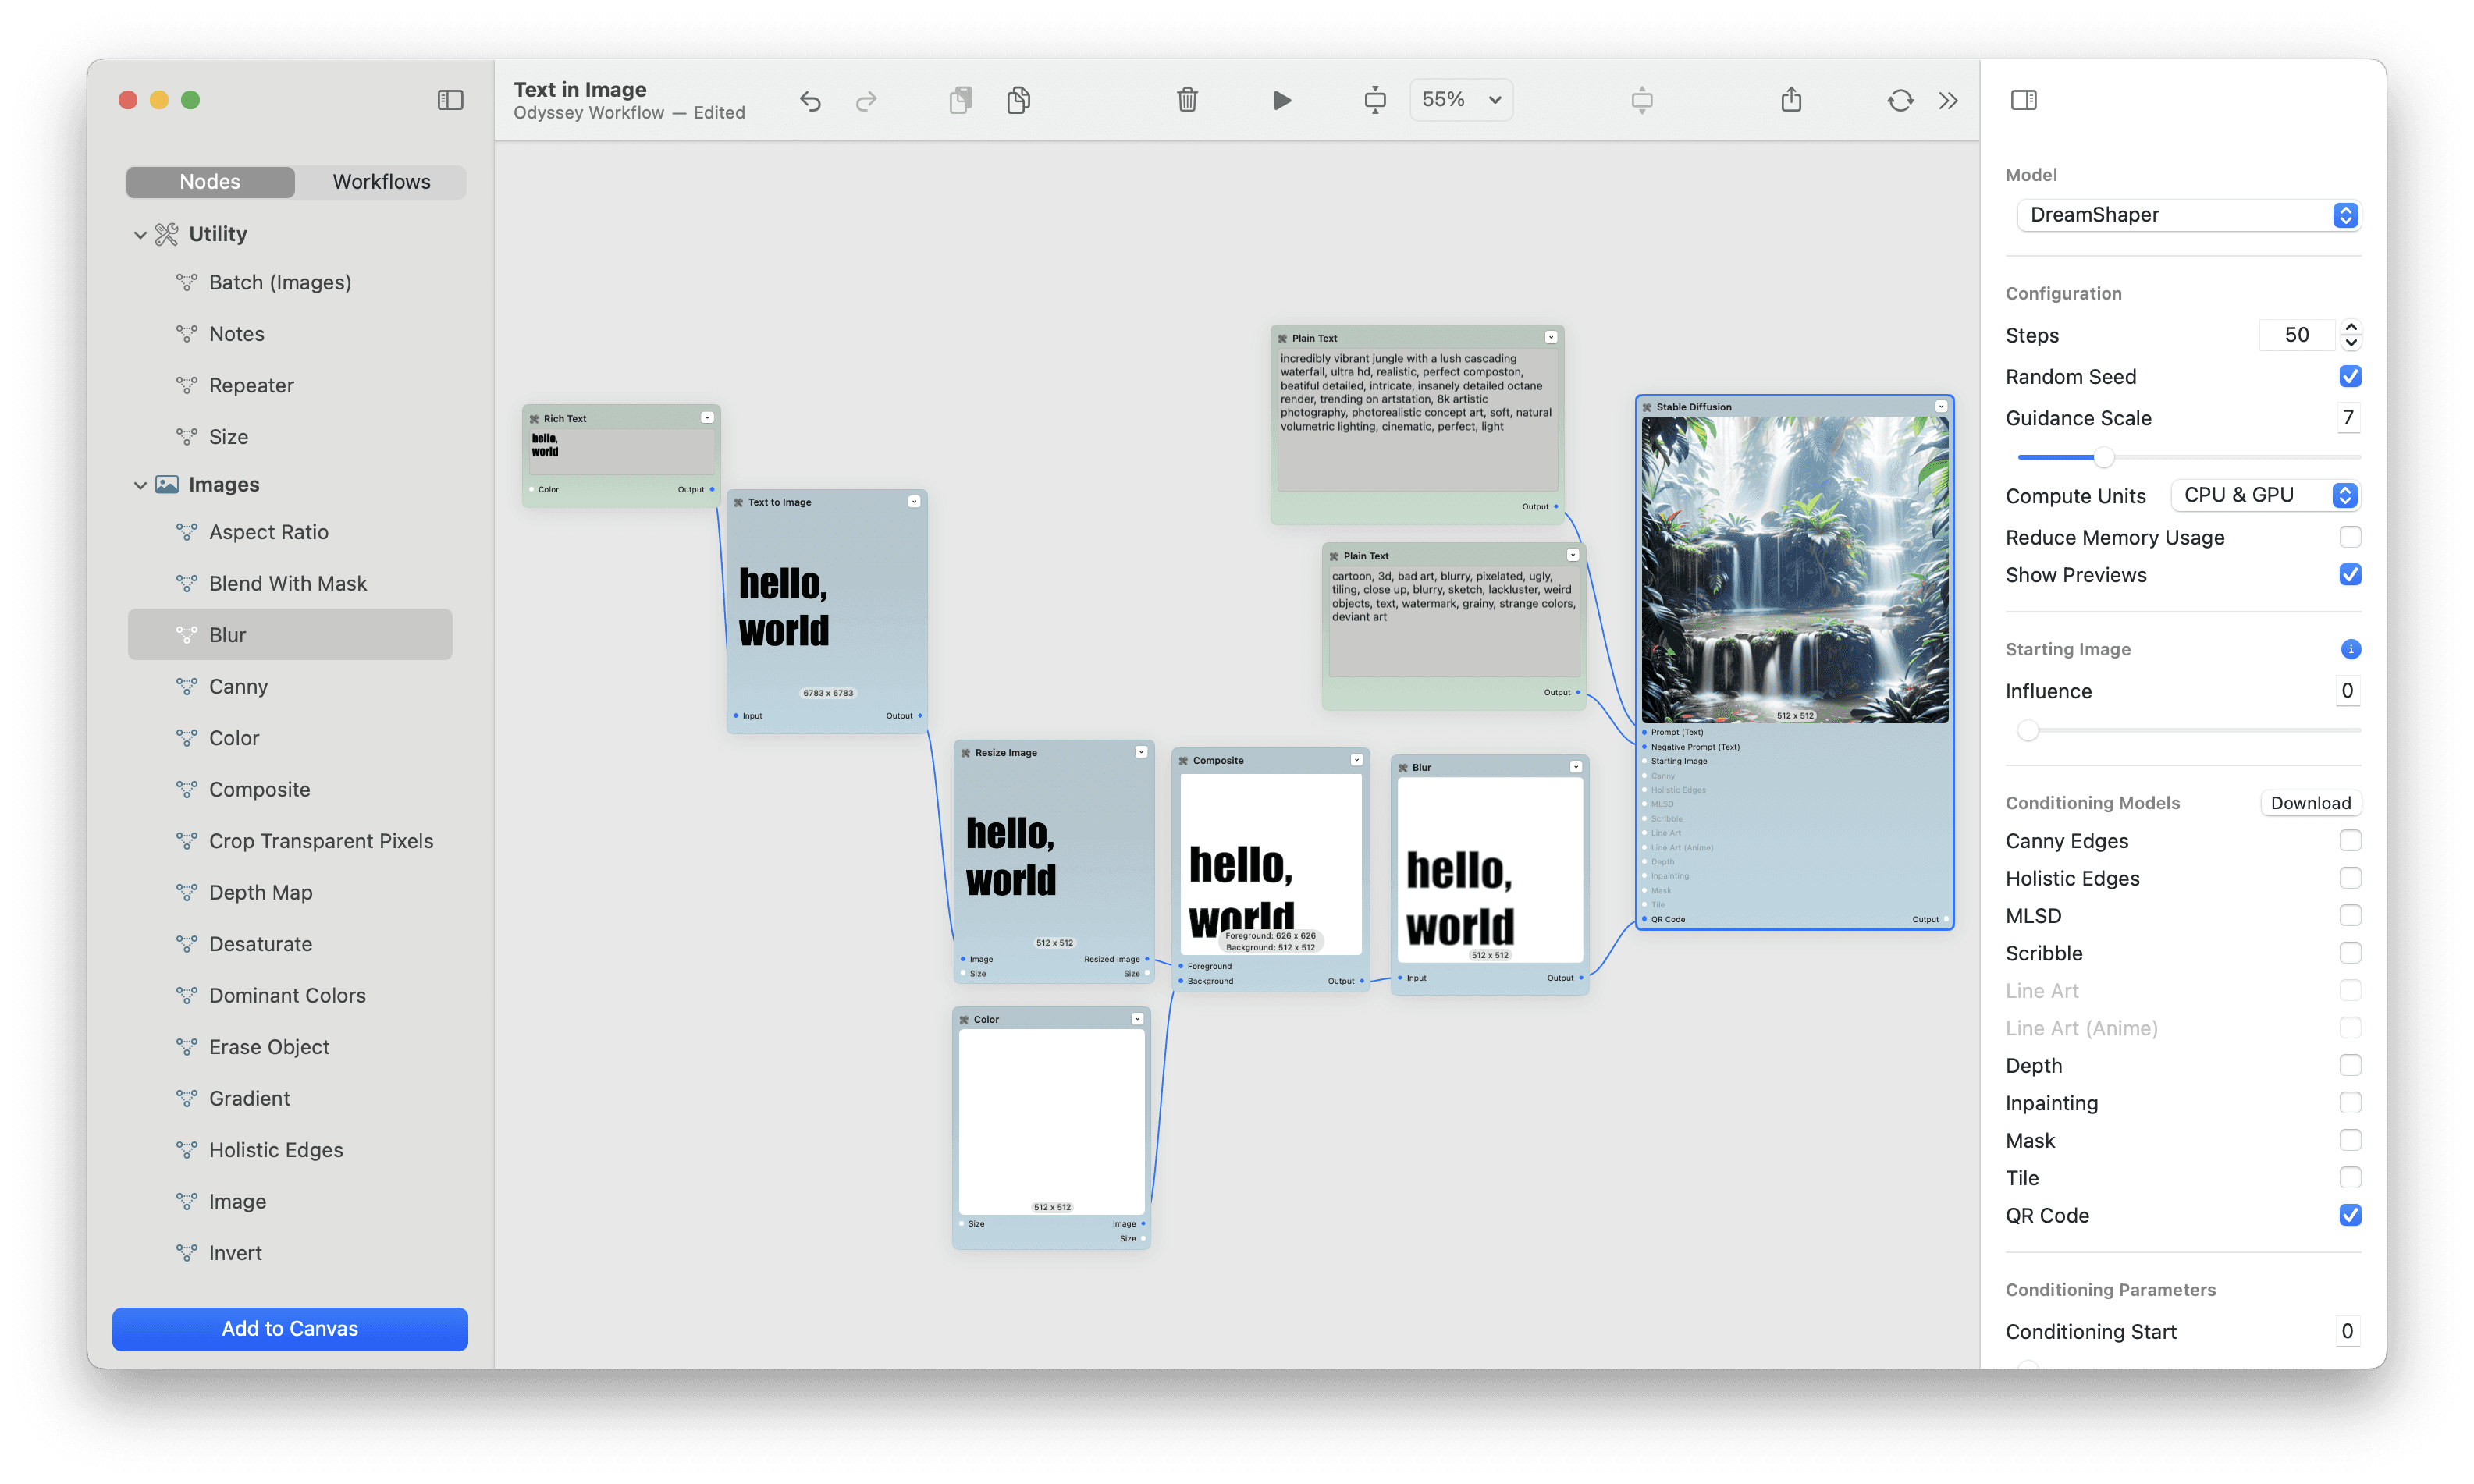
Step 6 - Set your ControlNet settings
Connect your input text to the “QR Code” ControlNet model. This is a common ControlNet model we use throughout our workflows and it yields some incredible results.
For our default settings for this workflow:
Steps: 50
Guidance scale: 12
Conditioning start: 0 and conditioning end: 1- we’ve found that running the entirety of the generation period with the text engrained helps make the text more coherent. If you had a very simple word or character, you could either start the the conditioning at 0.25 or end it at 0.75 - but these often result in the text getting so distorted you can’t even make it out.
Conditioning Strength: 2
Conditioning Guidance: 10
The higher your strength and lower your guidance, the more clear the words will be in the image. The lower your strength and guidance, the more the words will be hidden. Ultimately this all depends on the effect you’re trying to achieve. If you want someone to squint at a thumbnail in order to find your word, then lower strength is better.
Let’s take a look at how strength and guidance impact the final output.

Step 7 - Click run!
Realistically, you can skip all the above steps and just type in some text. But we think the fun is in experimentation!

Conclusion
Whether you're an amateur or professional steganographer, hiding text within an image is a fun and create way to leverage AI. Odyssey's easy-to-use text in image workflow lets you add digital watermarks, trigger AR applications, create interactive learning materials, hide discount codes or promo messages, or just send unique personalized puzzles to your friends.