Embed a logo in an AI Generated Image
If you’re a designer, marketer, or just run your own business, a fun way to express your brand identity is to take your logo and embed it into an environment.
What do we mean by embedding it into an environment? Well, with Stable Diffusion, ControlNet, and the Odyssey Mac app, you’re able to take the outline of your logo and form an image around it.
This workflow lets you create evocative and unique ways to display your logo that are perfect for social media platforms and landing pages.
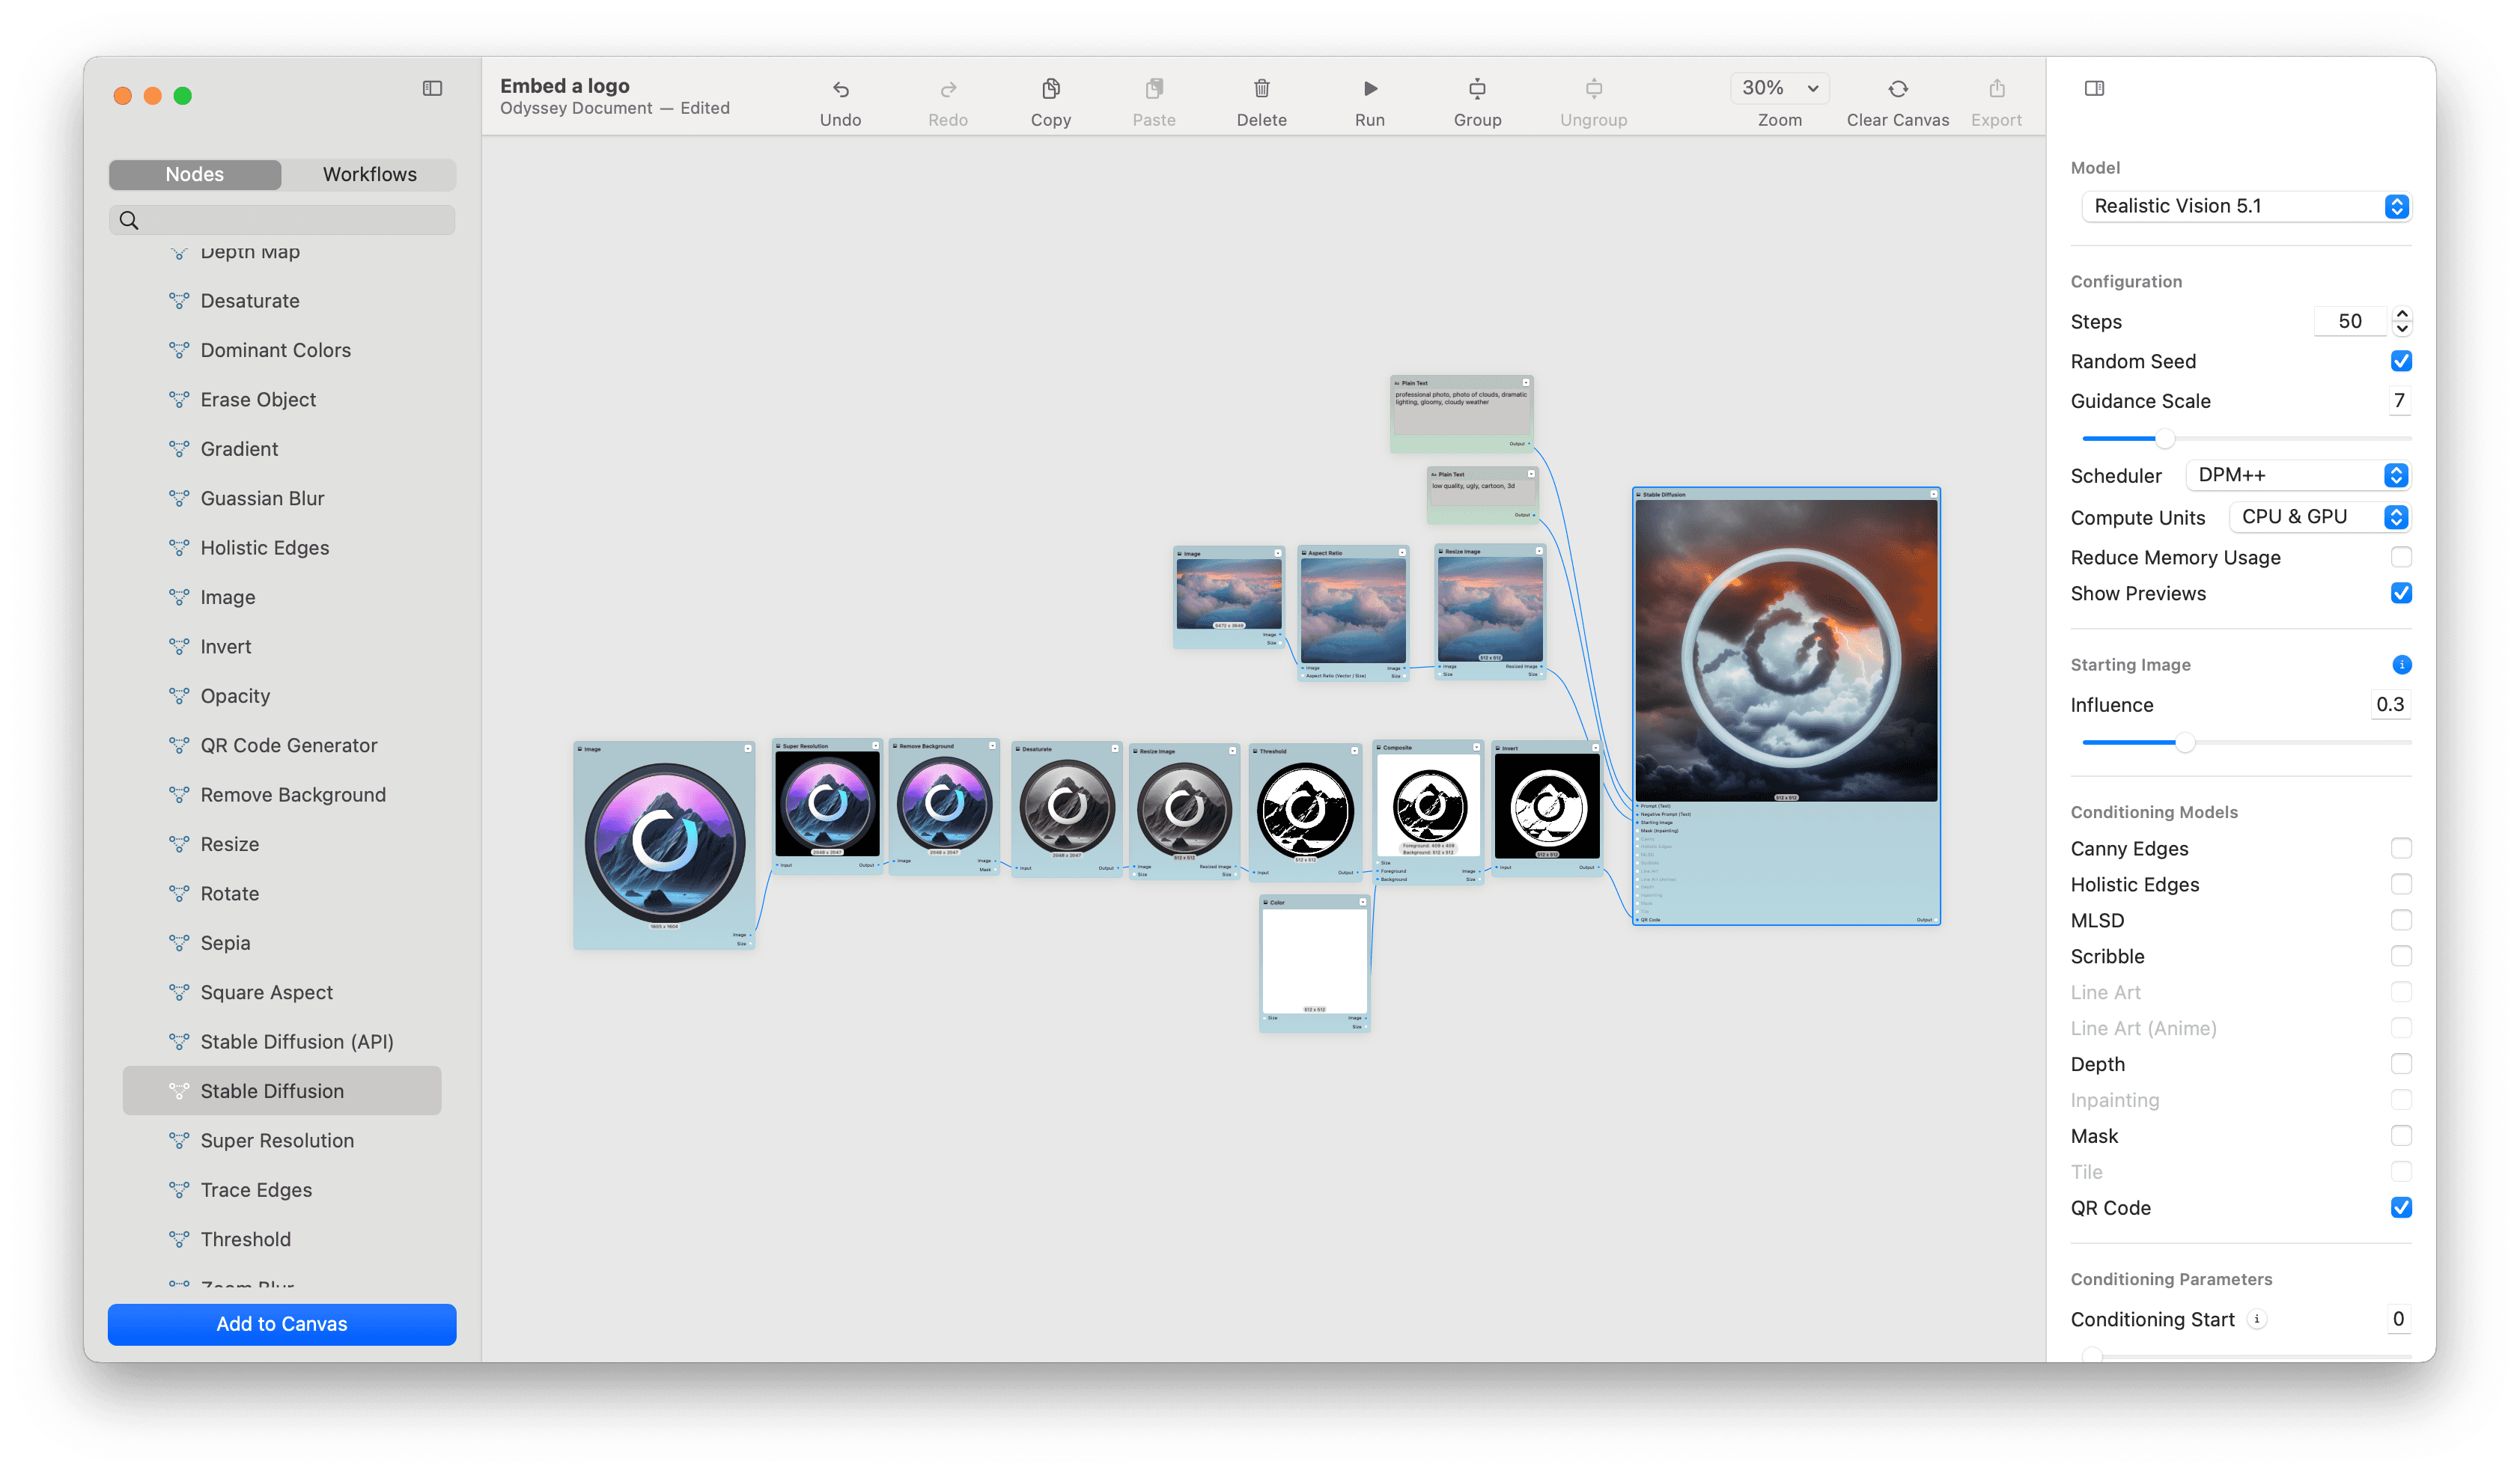
Running this workflow is as simple as uploading your logo and clicking a button. But like all of our workflows, there’s a lot more customizability that can come from knowing how it all works. Here’s a step-by-step guide on embedding your logo in an image with the Odyssey Mac app:
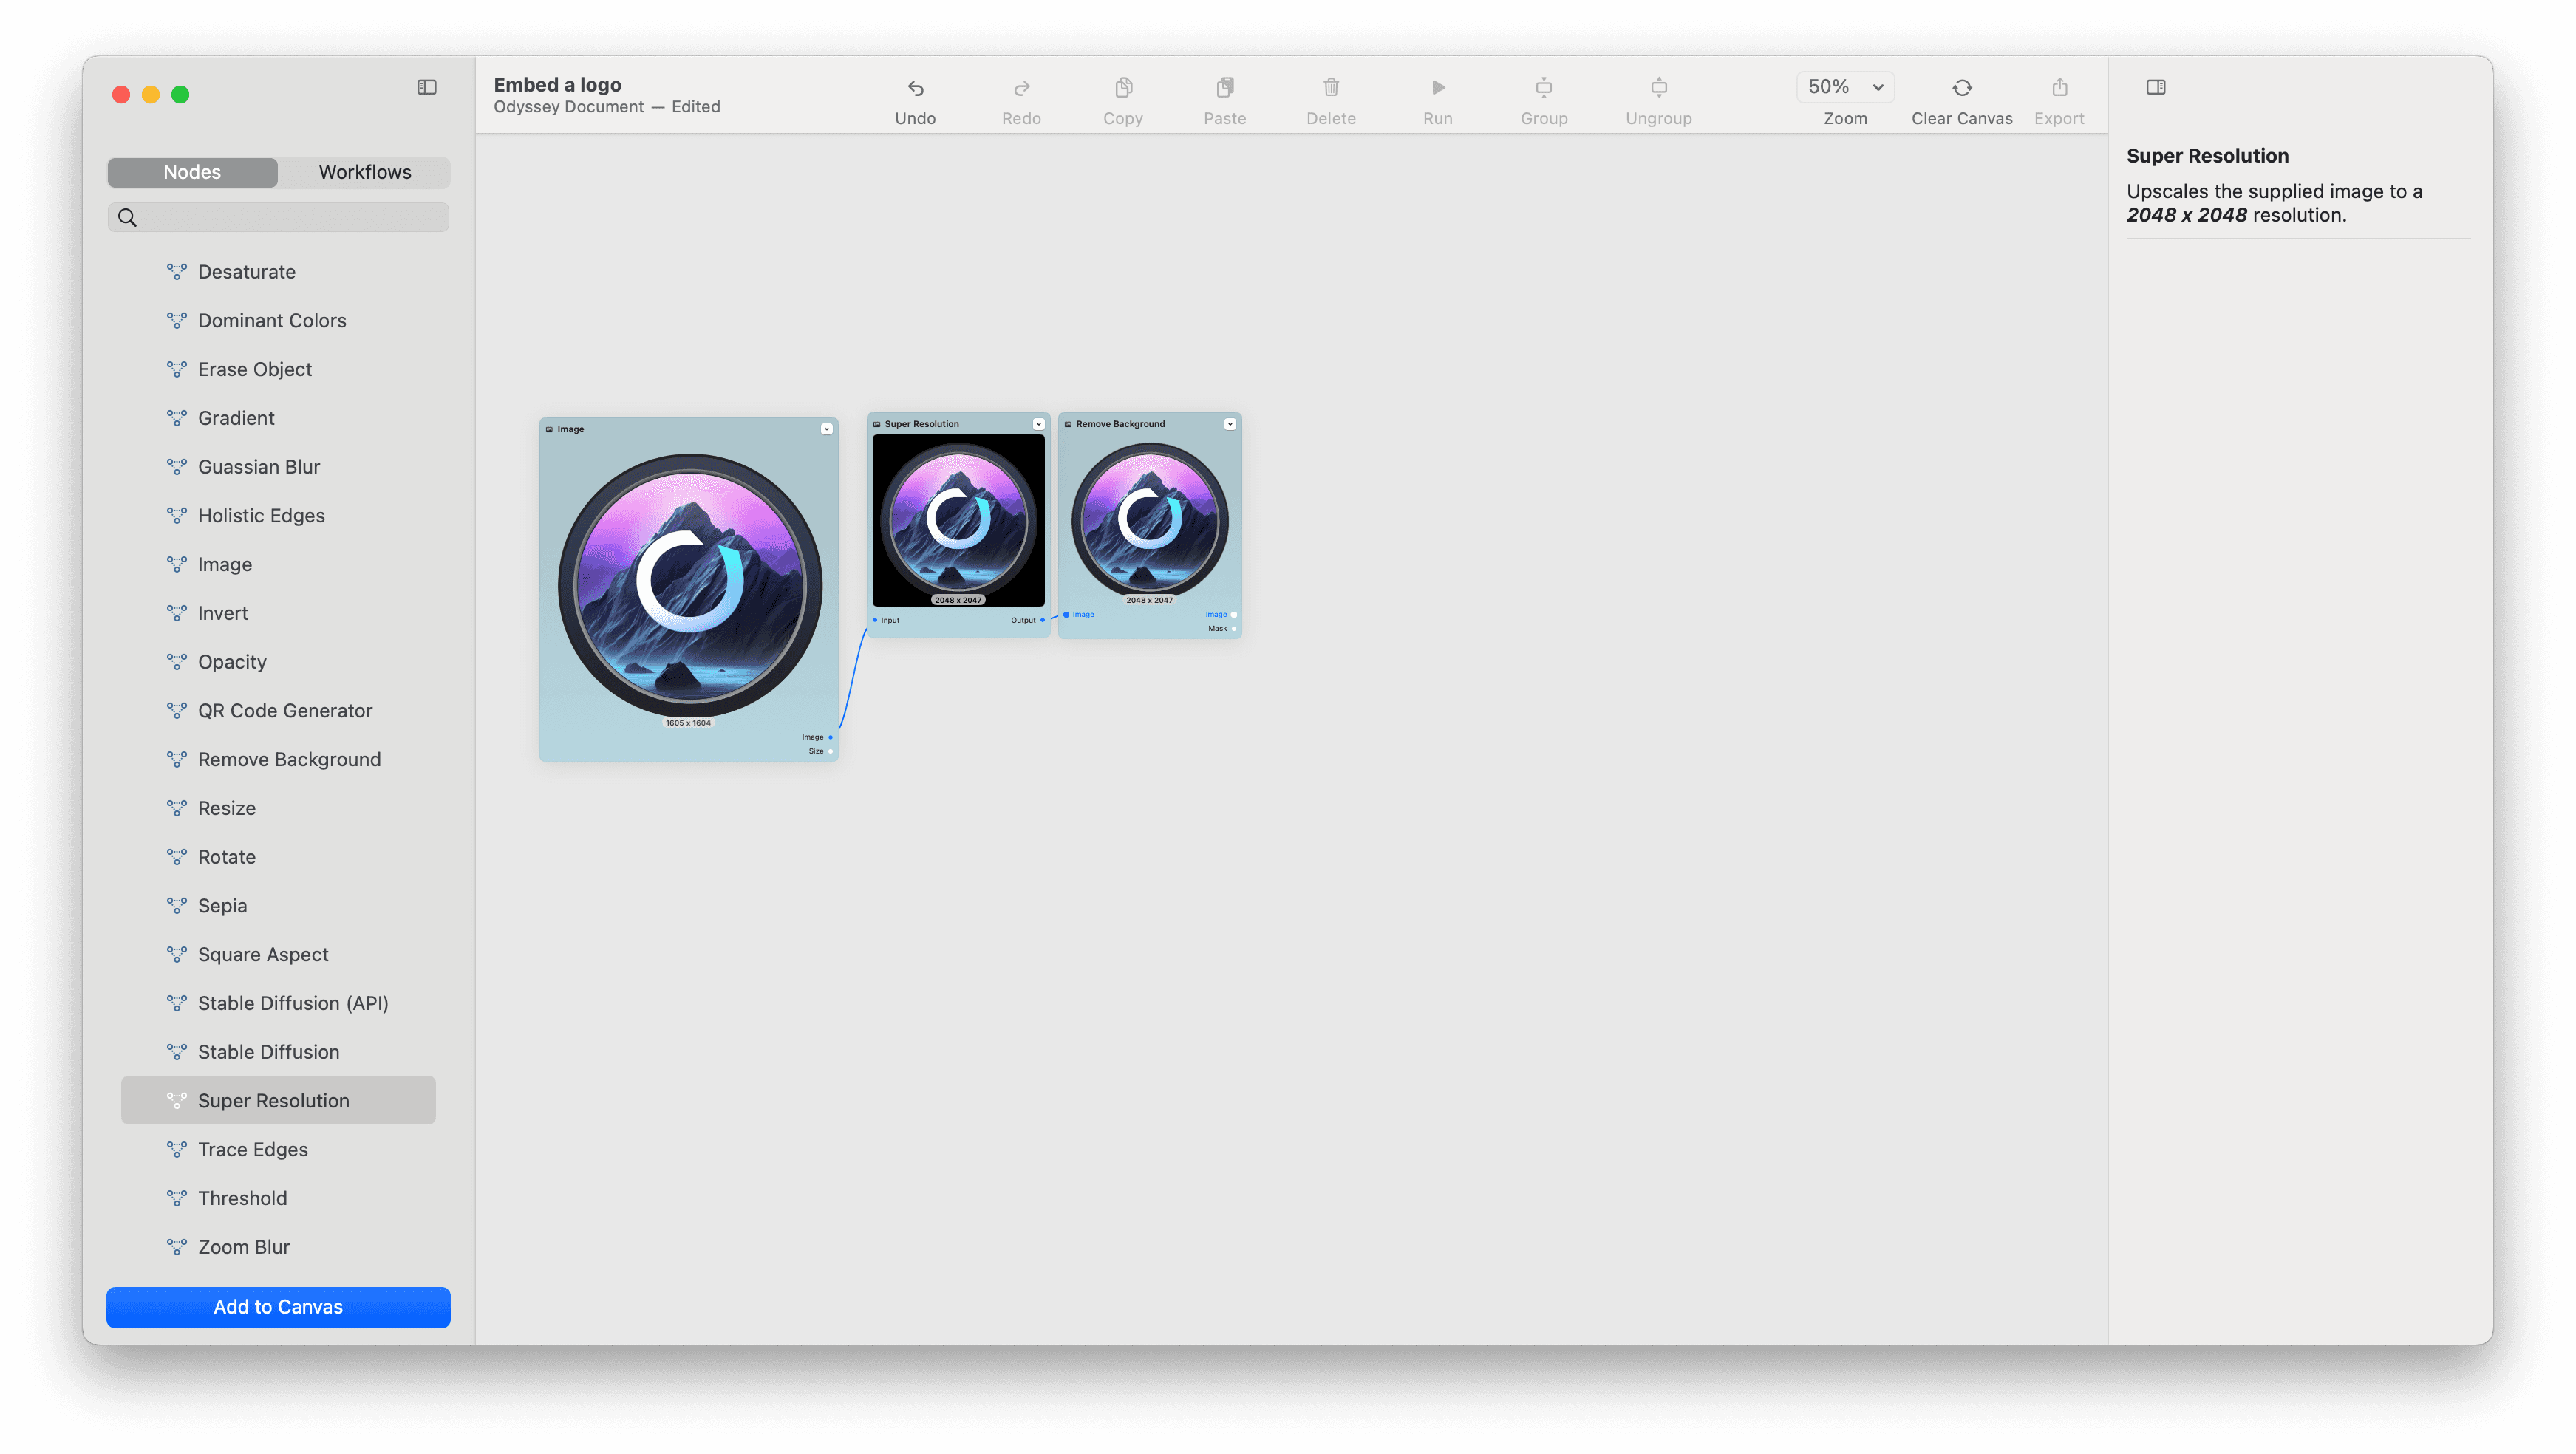
Step 1 - Add your logo
To start, drag or paste your logo onto the Odyssey canvas. We want our logo to be on a transparent background and relatively large to work with.
If you don’t have a transparent PNG or your logo is too small, simply drag in the super resolution and remove background nodes. Then connect your logo to them.
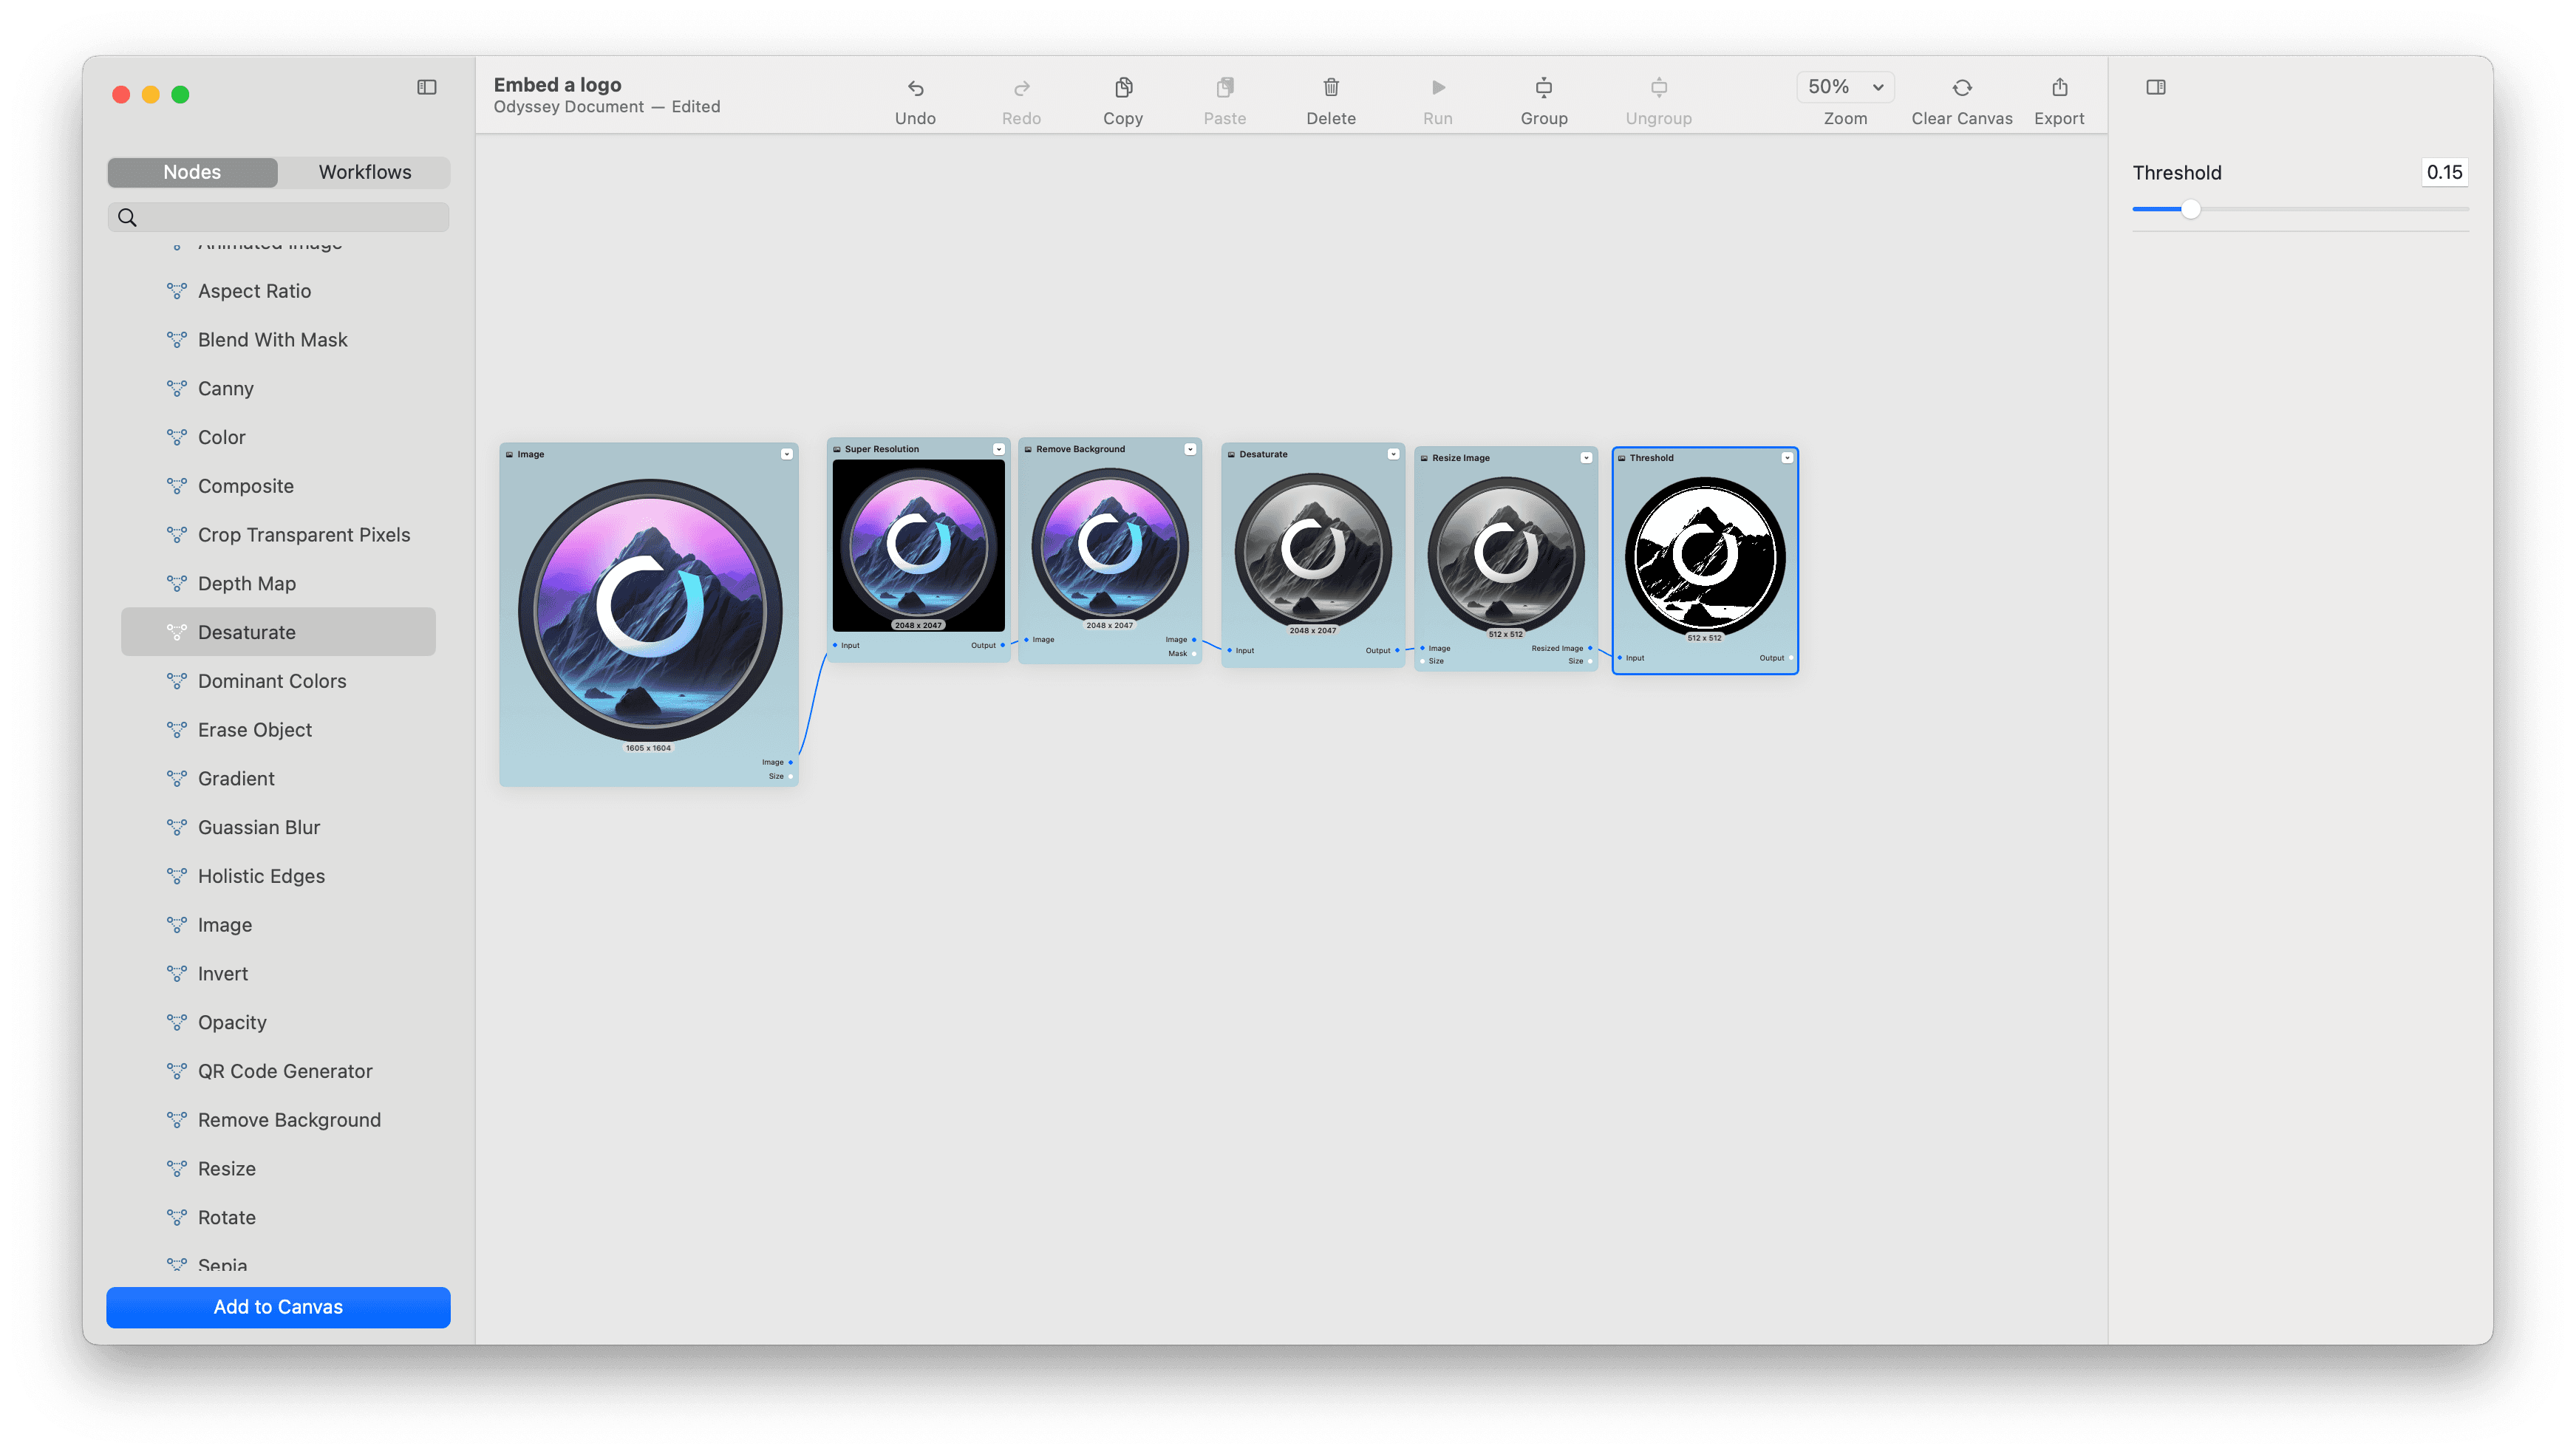
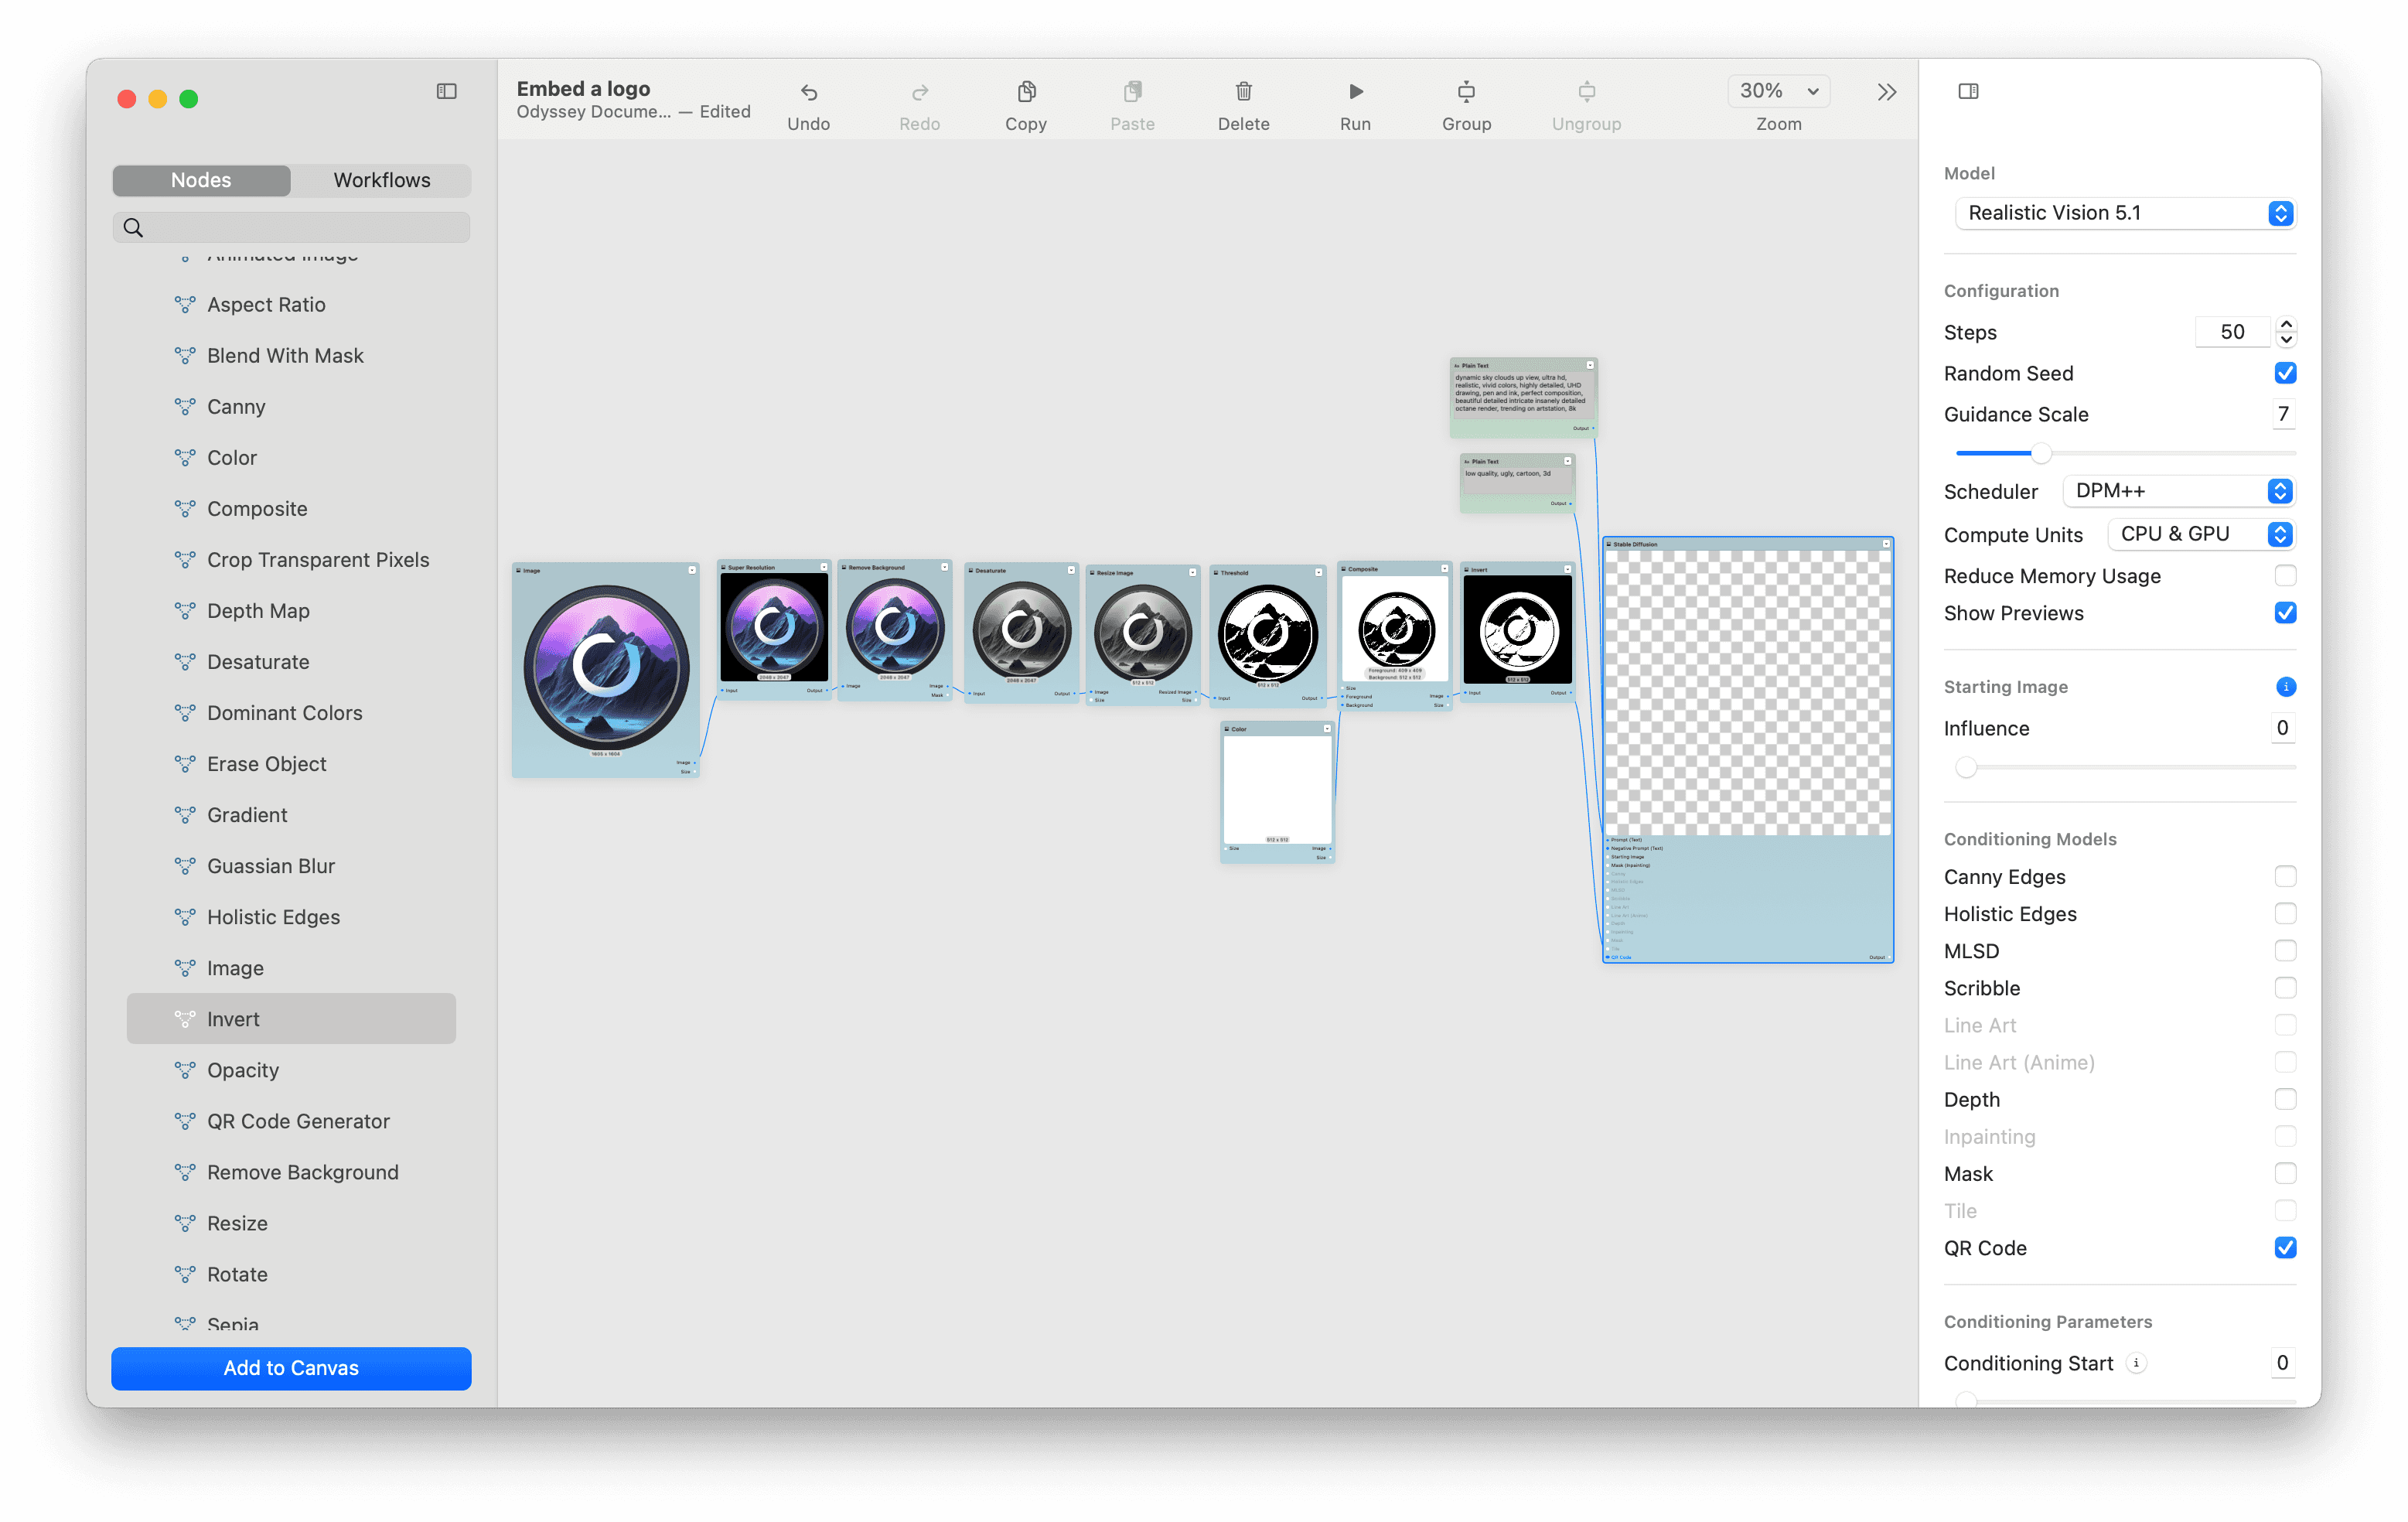
Step 2 - Prepare your logo for ControlNet
To get a great output, there are some treatments we need to do to a logo to make sure it gets into the right format for ControlNet.
First, since our logo is very colorful, we’re going to use a desaturate node to bring down the saturation level.
We’re then going to resize it down to 512 x 512 to better fit our Stable Diffusion model.
Finally, we’re going to use a threshold node to change the logo to black and white. We find that about 0.15 preserves enough detail in the image but it will really depend on the amount of detail of your logo and how much you want to retain in the final image.
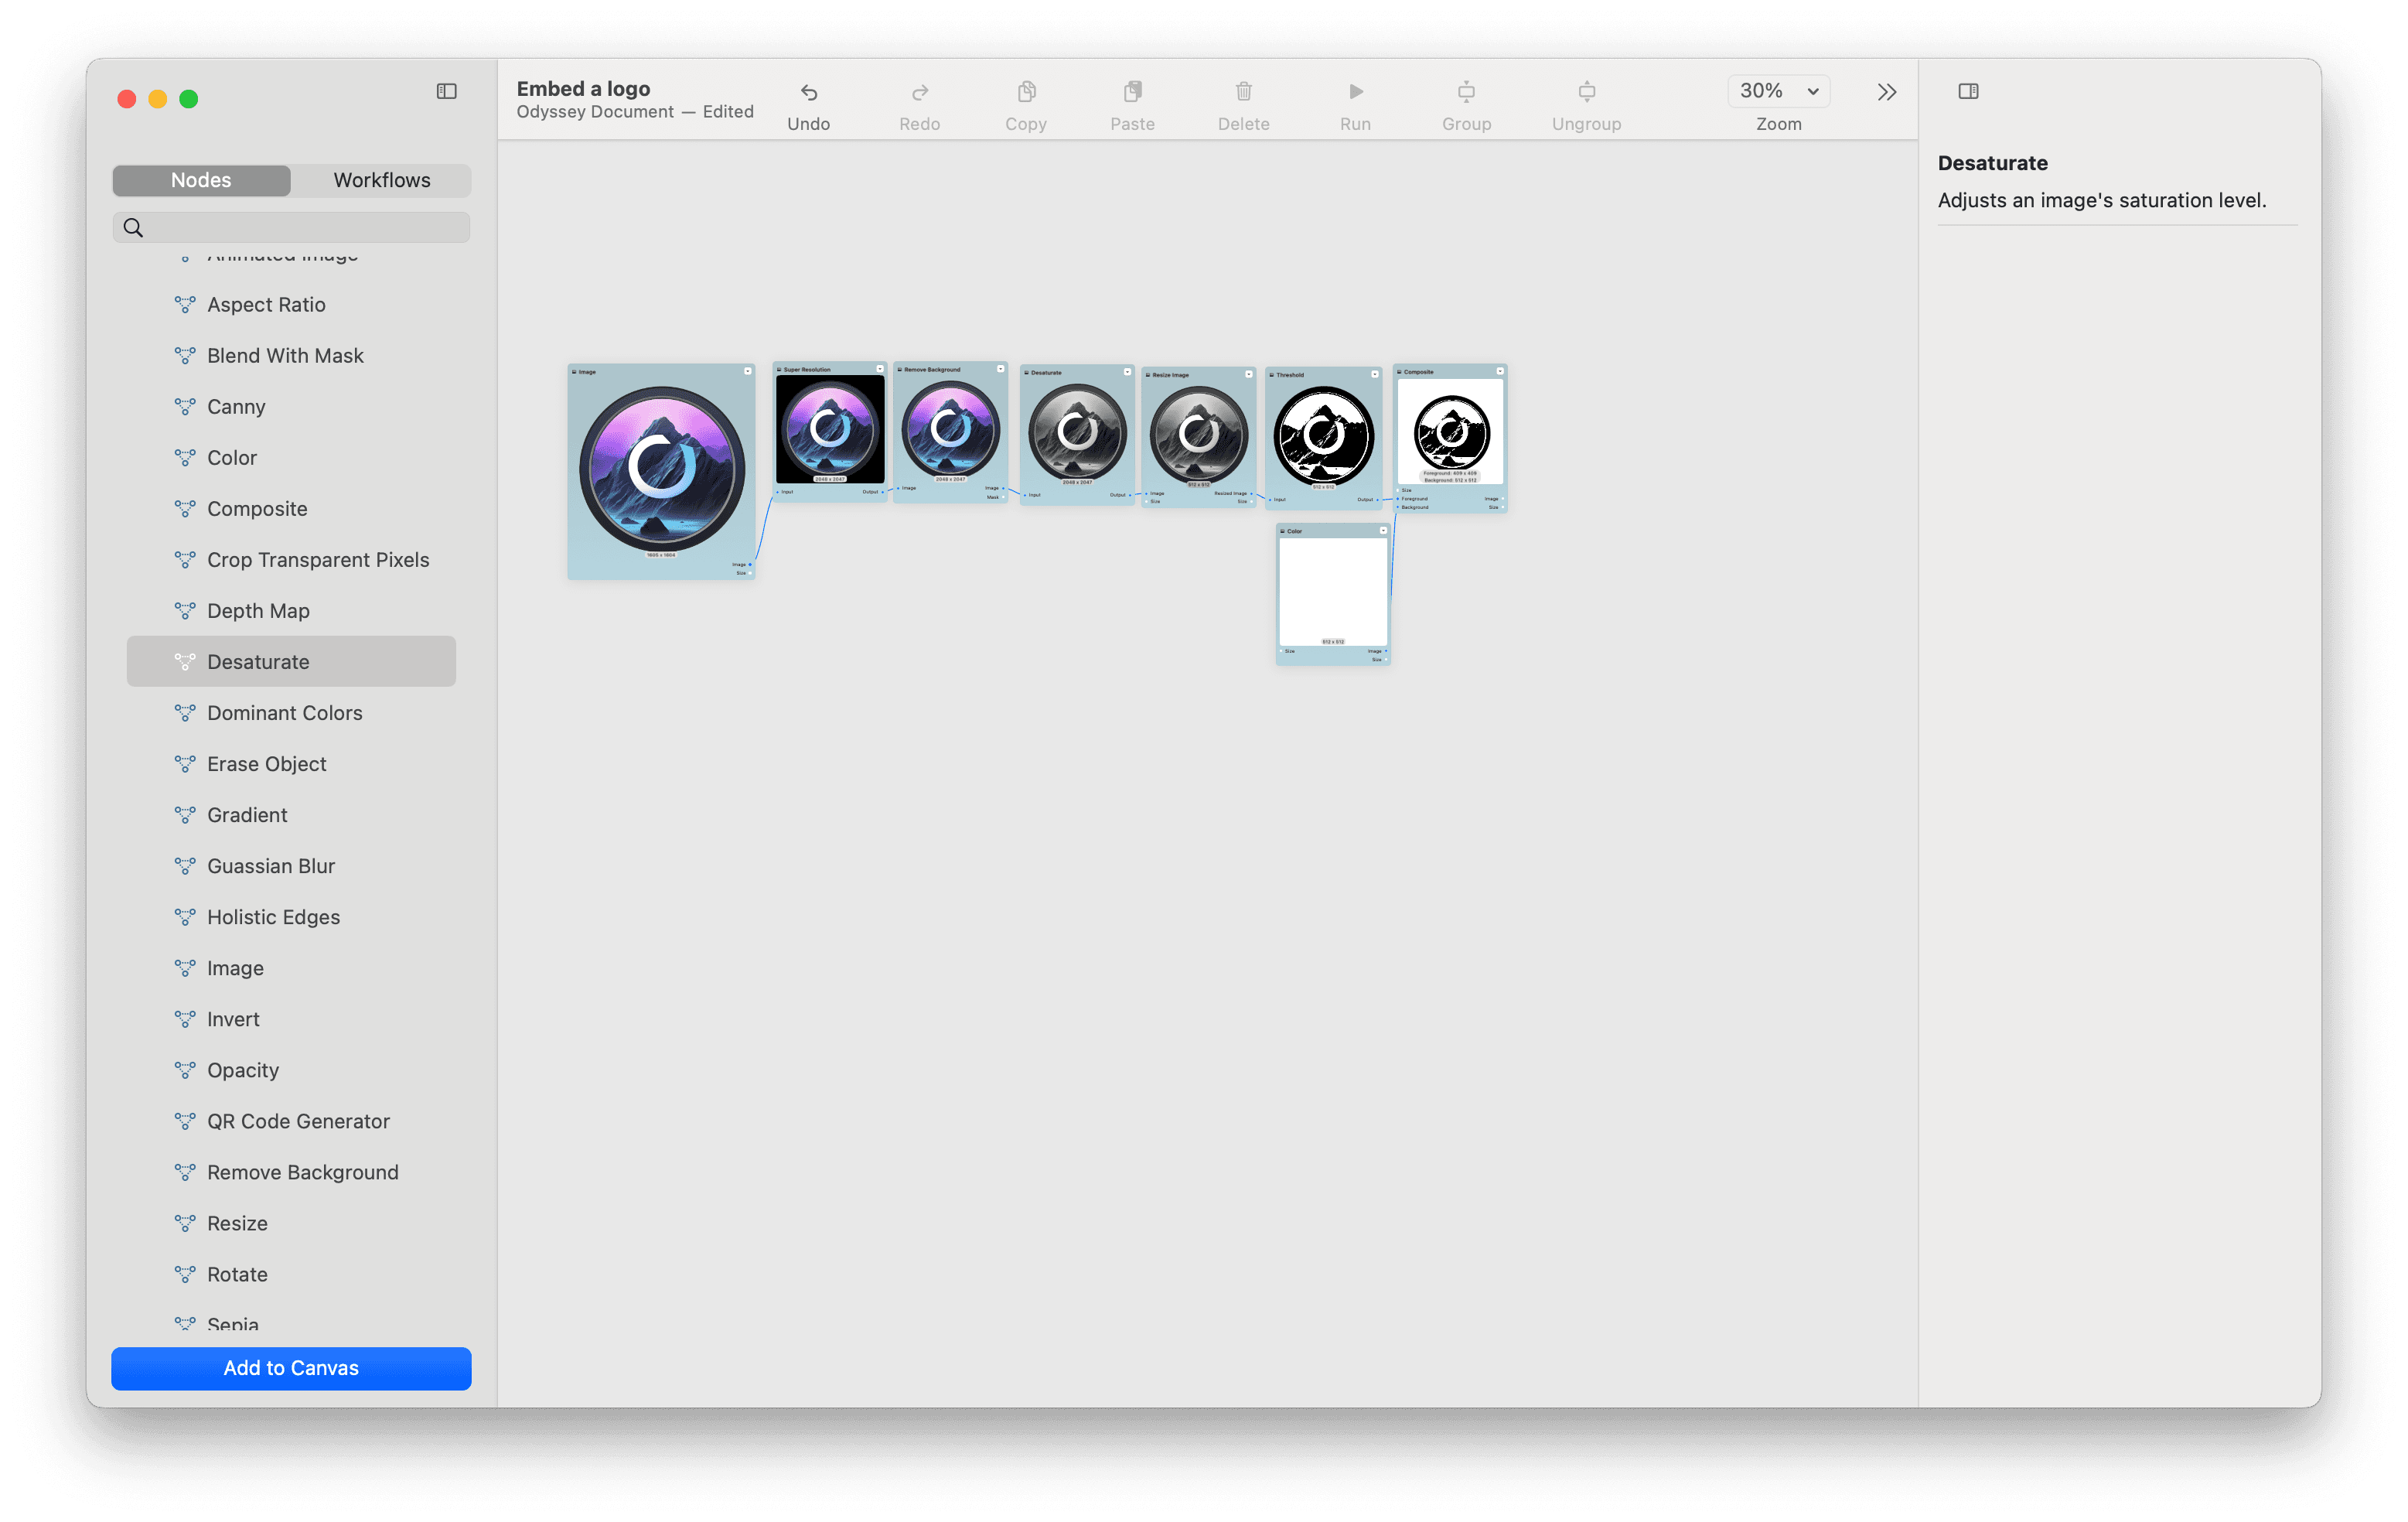
Step 3 - Position your logo
Now it’s time to position your logo. This step is definitely optional - but as of right now, the entirety of the image is your logo. This means that the area that Stable Diffusion can draw into is relatively small - so we want to give it more freedom to paint around our logo.
To do this, drag in a color node and a composite node. Place your logo in the foreground and the color in the background. Then resize or position your logo.
We like to make it smaller and in the center.
Step 4 - Invert and connect to ControlNet
Then, drag a invert node onto your canvas and connect. The invert node simply swaps the black and white in an image. This helps Stable Diffusion get a better result.
Next, let’s drag in a Stable Diffusion node.
Select your model. For this workflow, we like to use Realistic Vision because it supports ControlNet and outputs a high-quality result.
Check off QR code as the conditioning model you’d like to use then connect your prepared image to QR Code. QR Code Monster is an all-purpose ControlNet model that’s excellent for embedding logos, text, and more into an image.
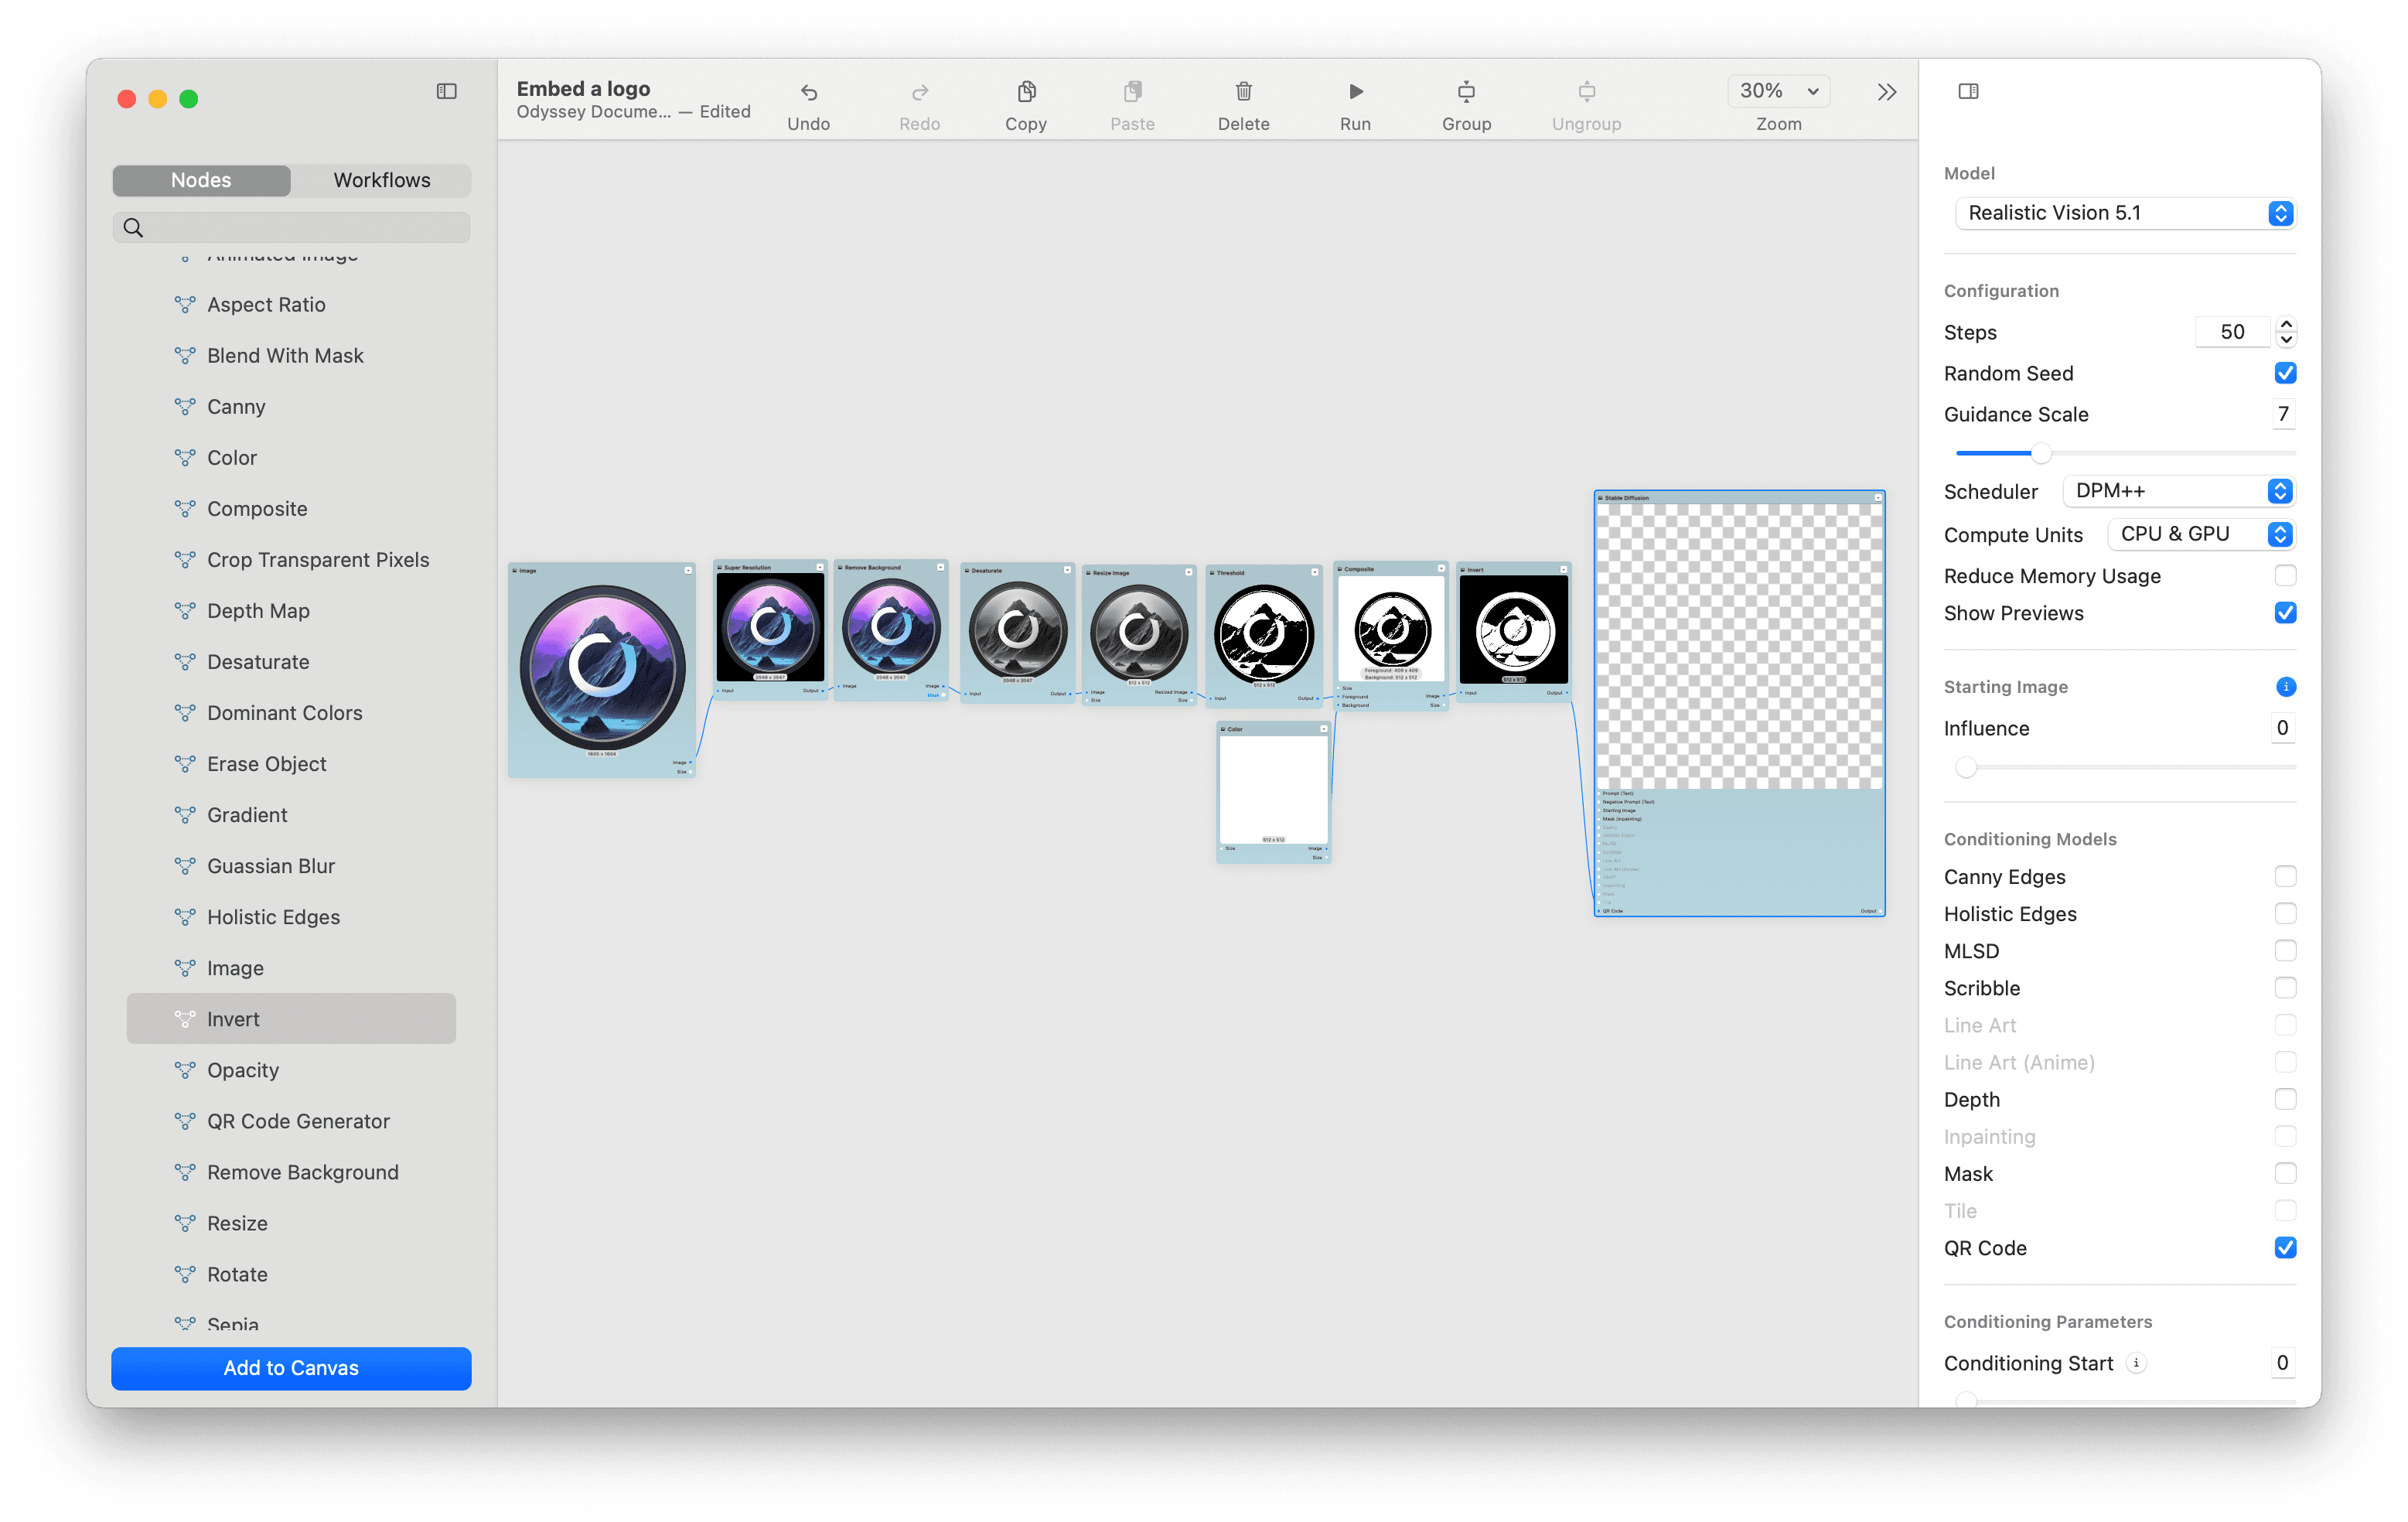
Step 5 - Add your prompt and run your model
For this workflow, we set the steps to 50 and the guidance scale to 7. With ControlNet, we start at 0, end at 1, set the strength to 2, and the conditioning guidance to 7.
Changing these values will alter how dramatically your logo appears within an image. It’s fun to generate a logo once, then mess around with these values a bit to see what works the best.
From there, we add our prompt and our negative prompt. For this workflow we used the prompt:
dynamic sky clouds up view, ultra hd, realistic, vivid colors, highly detailed, UHD drawing, pen and ink, perfect composition, beautiful detailed intricate insanely detailed octane render, trending on artstation, 8k artistic photography, photorealistic concept art, soft natural volumetric cinematic perfect light
And the negative promptlow quality, ugly, cartoon, 3d
But any prompt will do.
Let’s go ahead and click run!
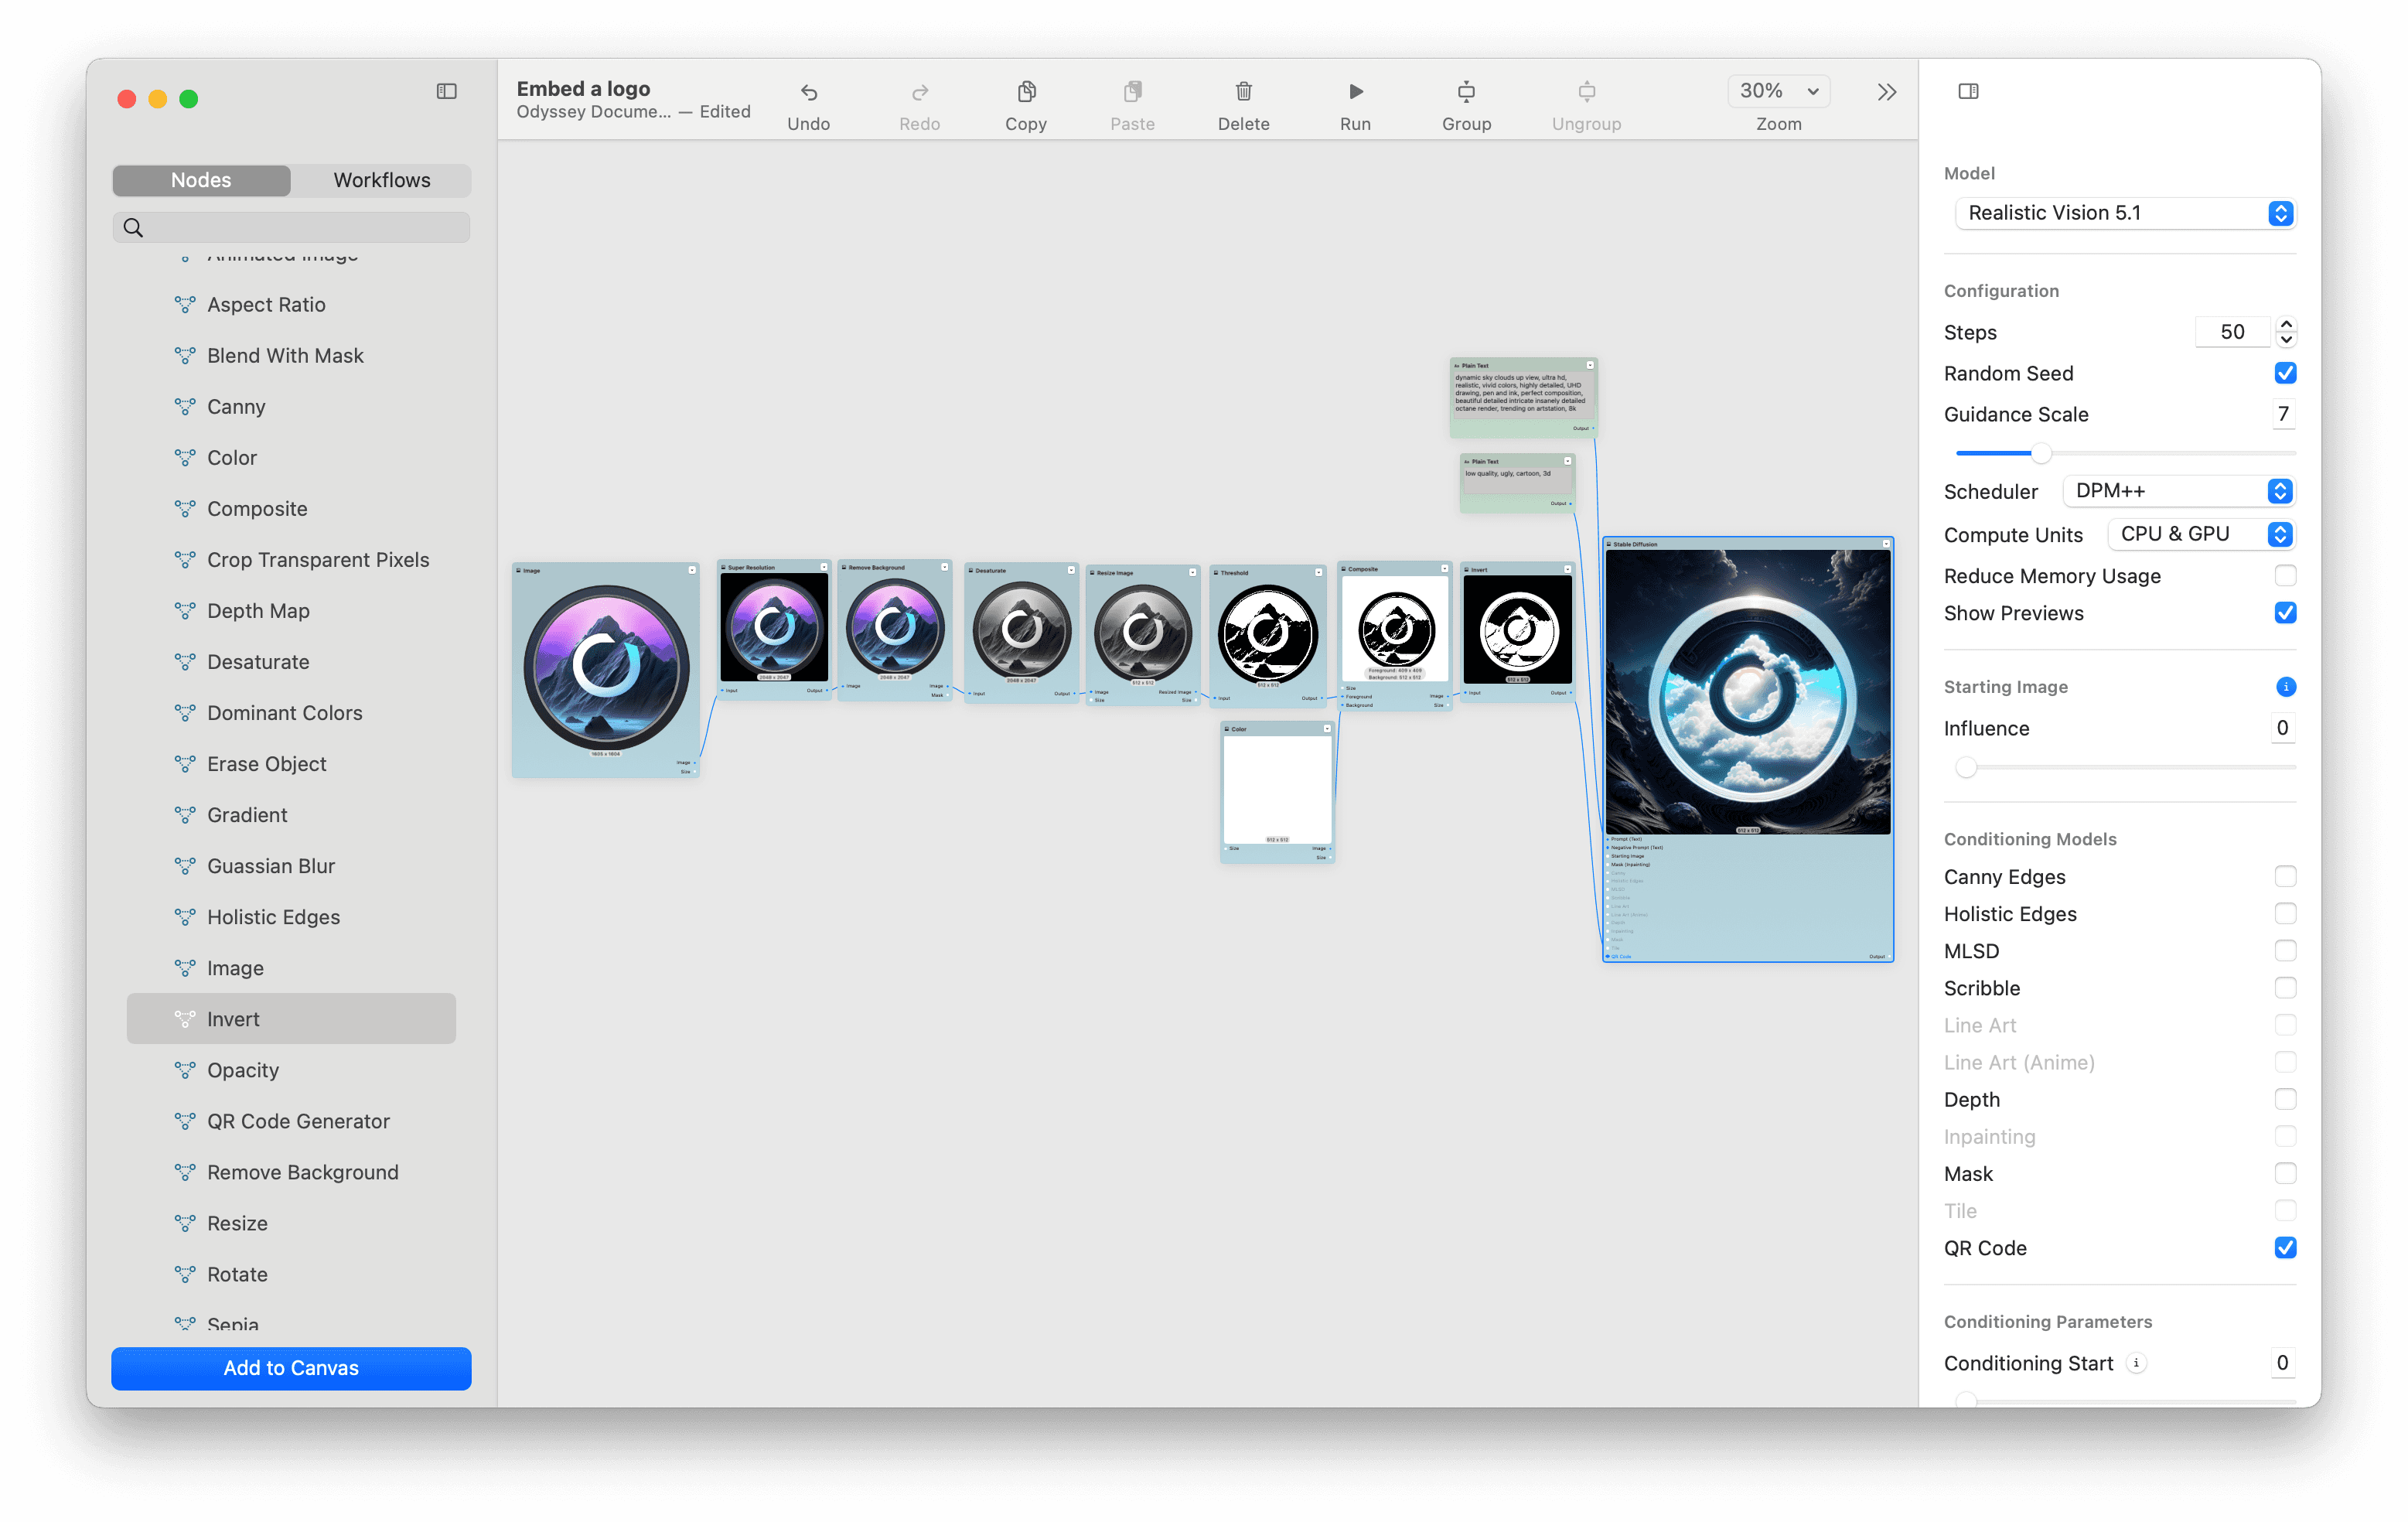
As you can see, the resulting image is a completely transformed version of our logo. While it keeps the integrity of the original logo, it changes the entire vibe of the logo to give us a new treatment.
Step 6 (optional) - Go deeper and experiment
Now that you know how to embed a logo, let’s take a look at a few more ways to control your output.
Let’s say I wanted my logo to show up in a very realistic photograph of clouds. And I wanted the clouds to really overtake my logo - so it was less clear what it was.
To start, let’s take this realistic photograph of clouds. Let’s set the aspect ratio to 1:1 then resize it down to 512 x 512 for our model.
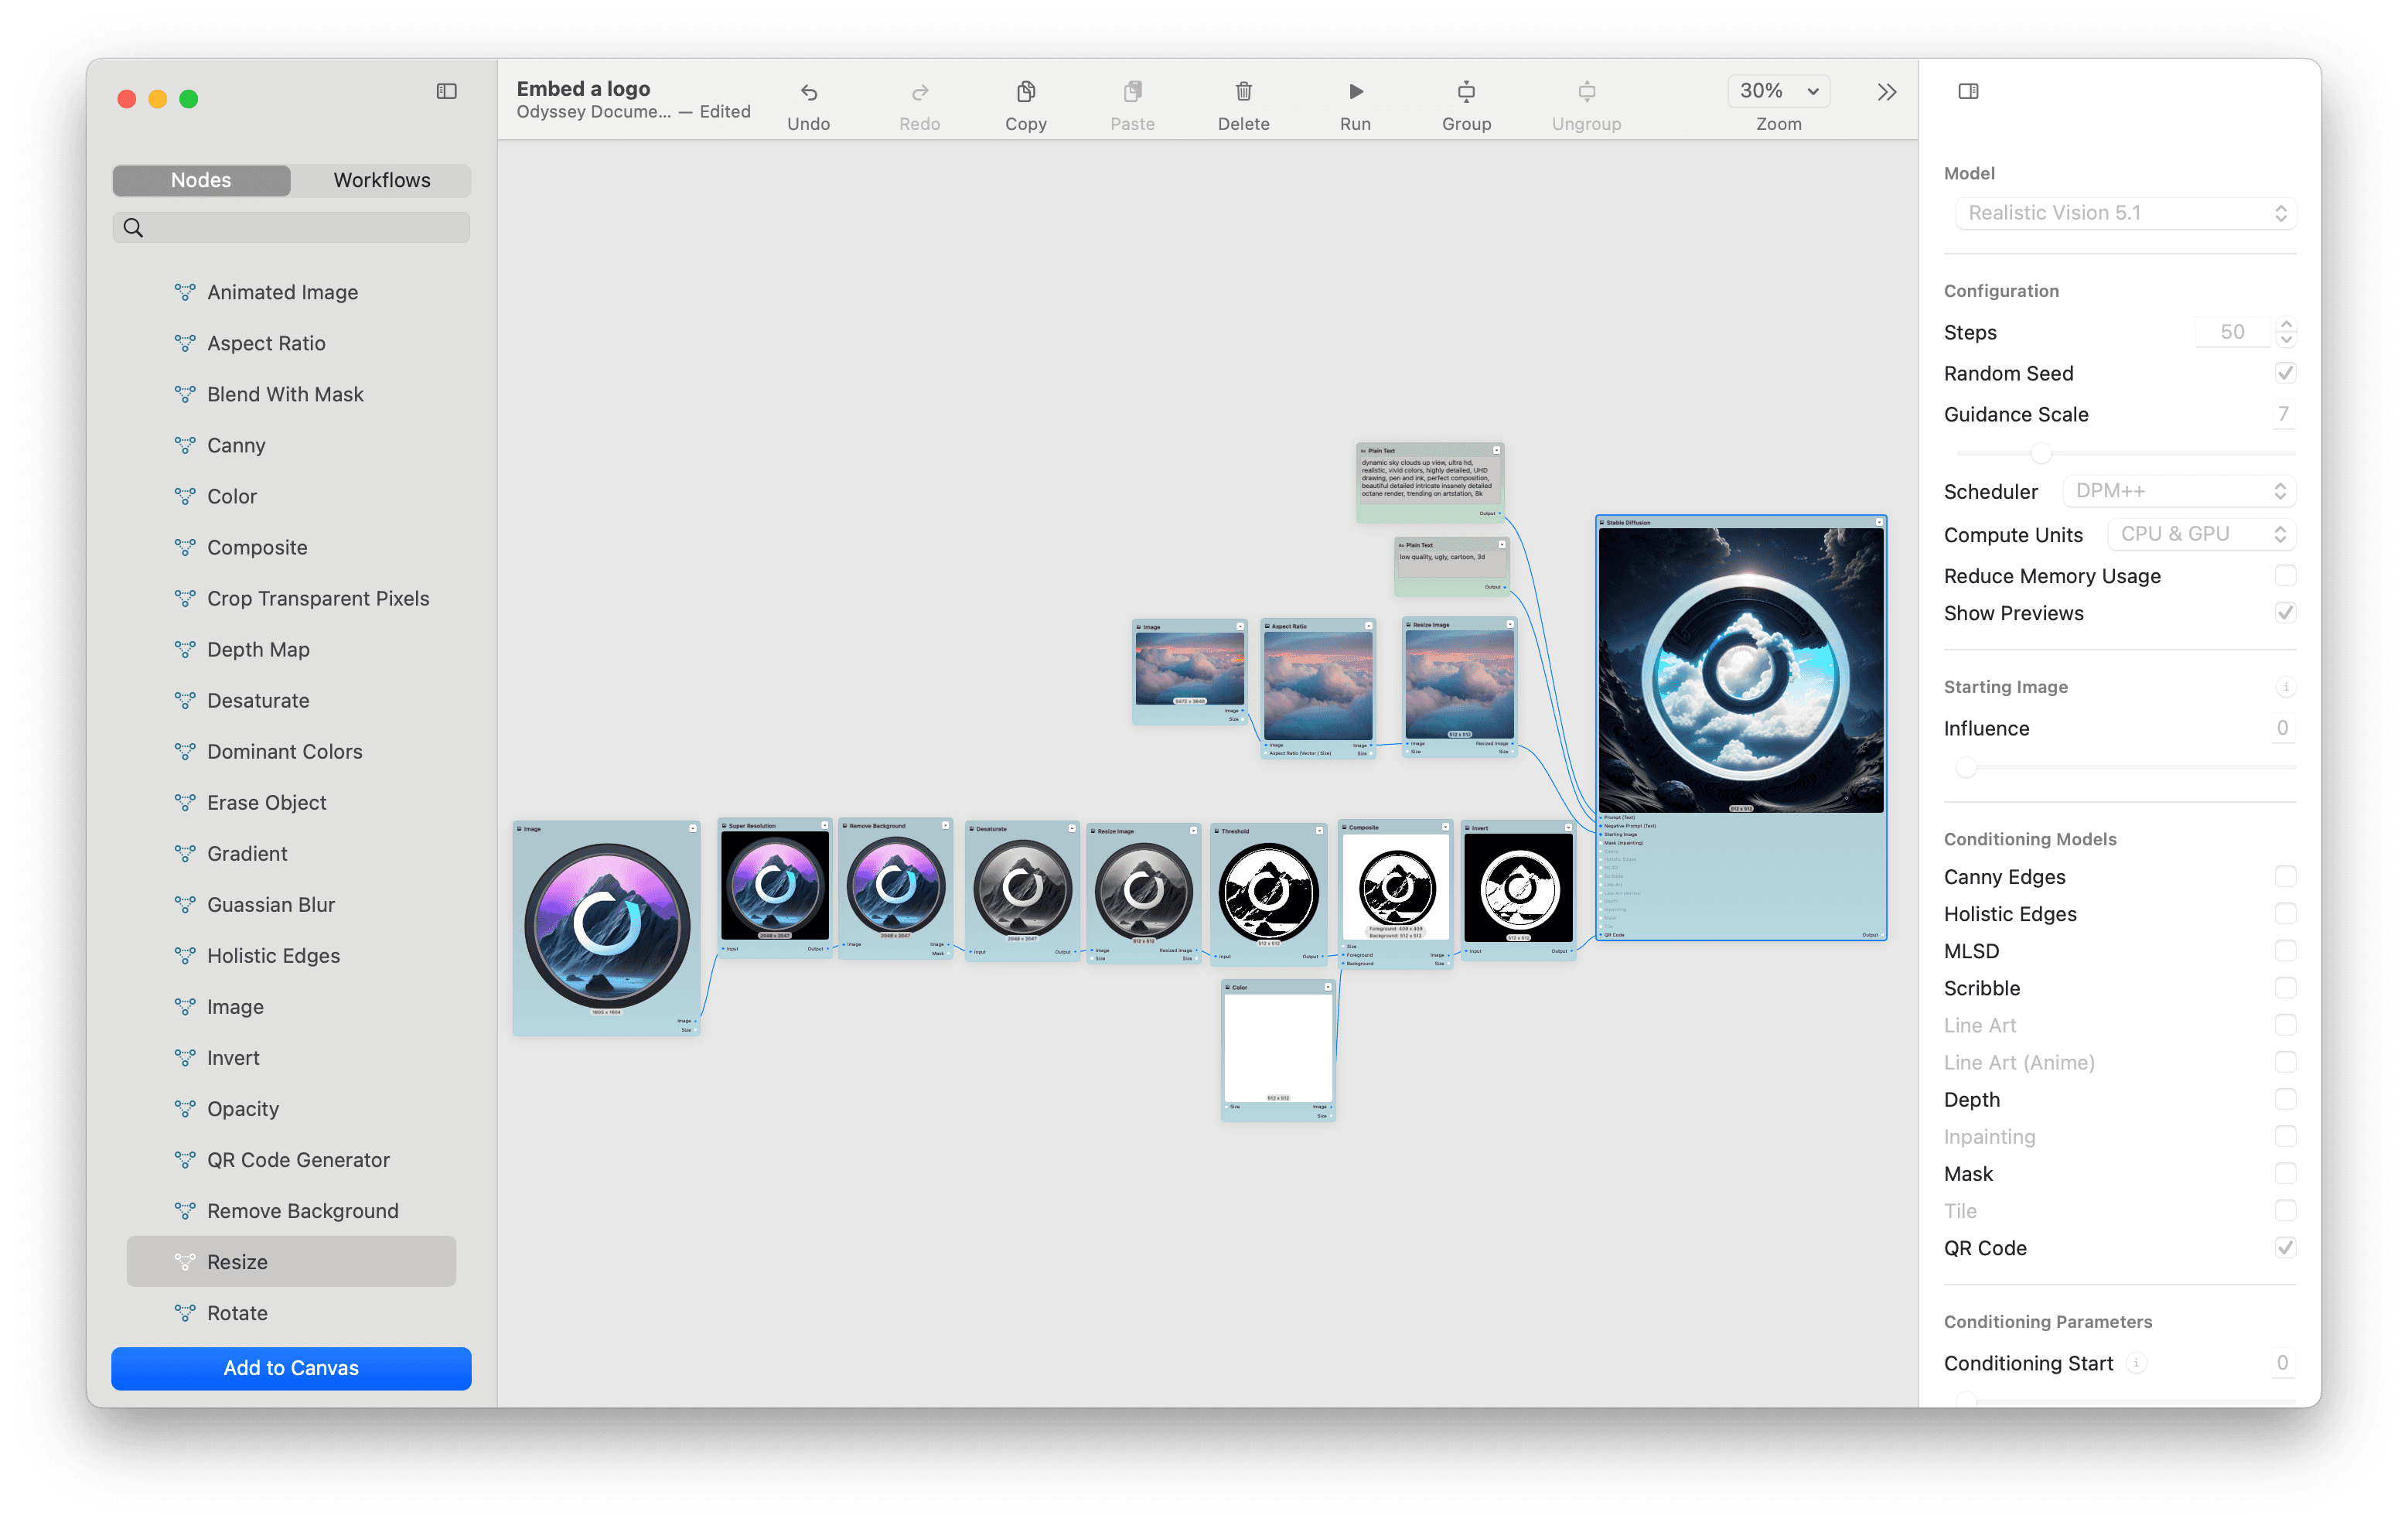
Next, let’s connect the image to the starting image input on our Stable Diffusion node and set the influence to 0.3. This will control how much the final image looks like the input image.
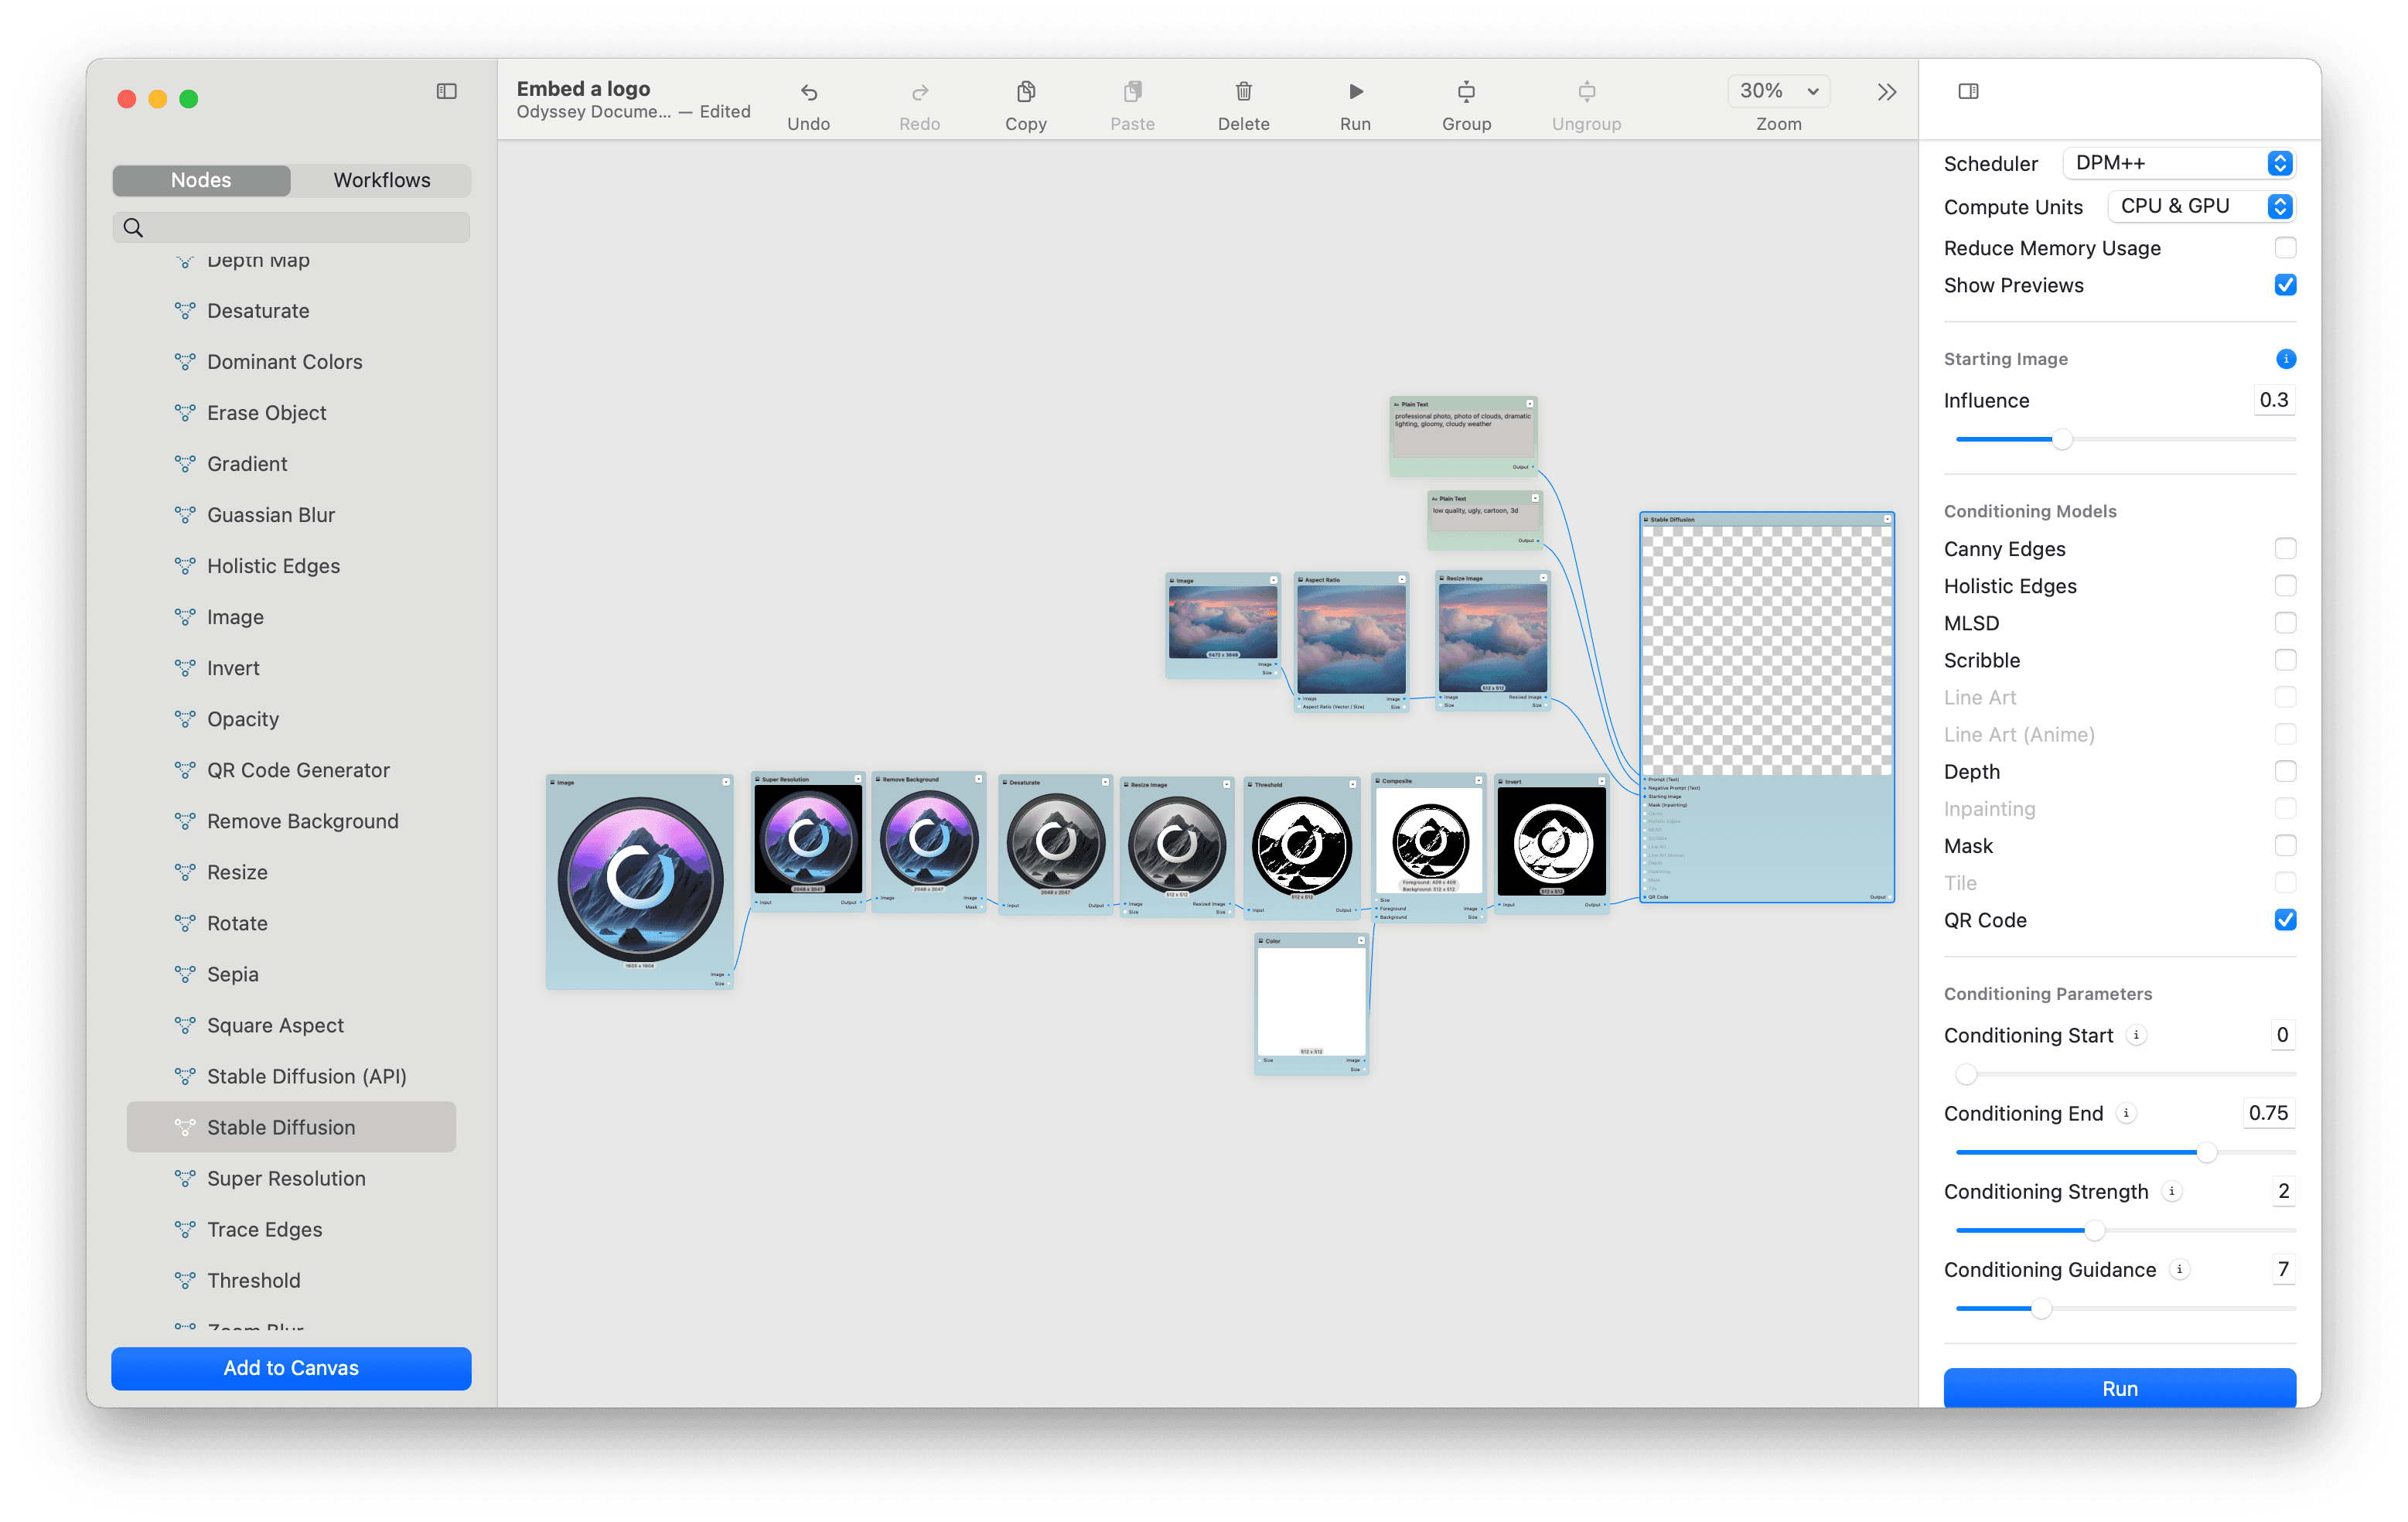
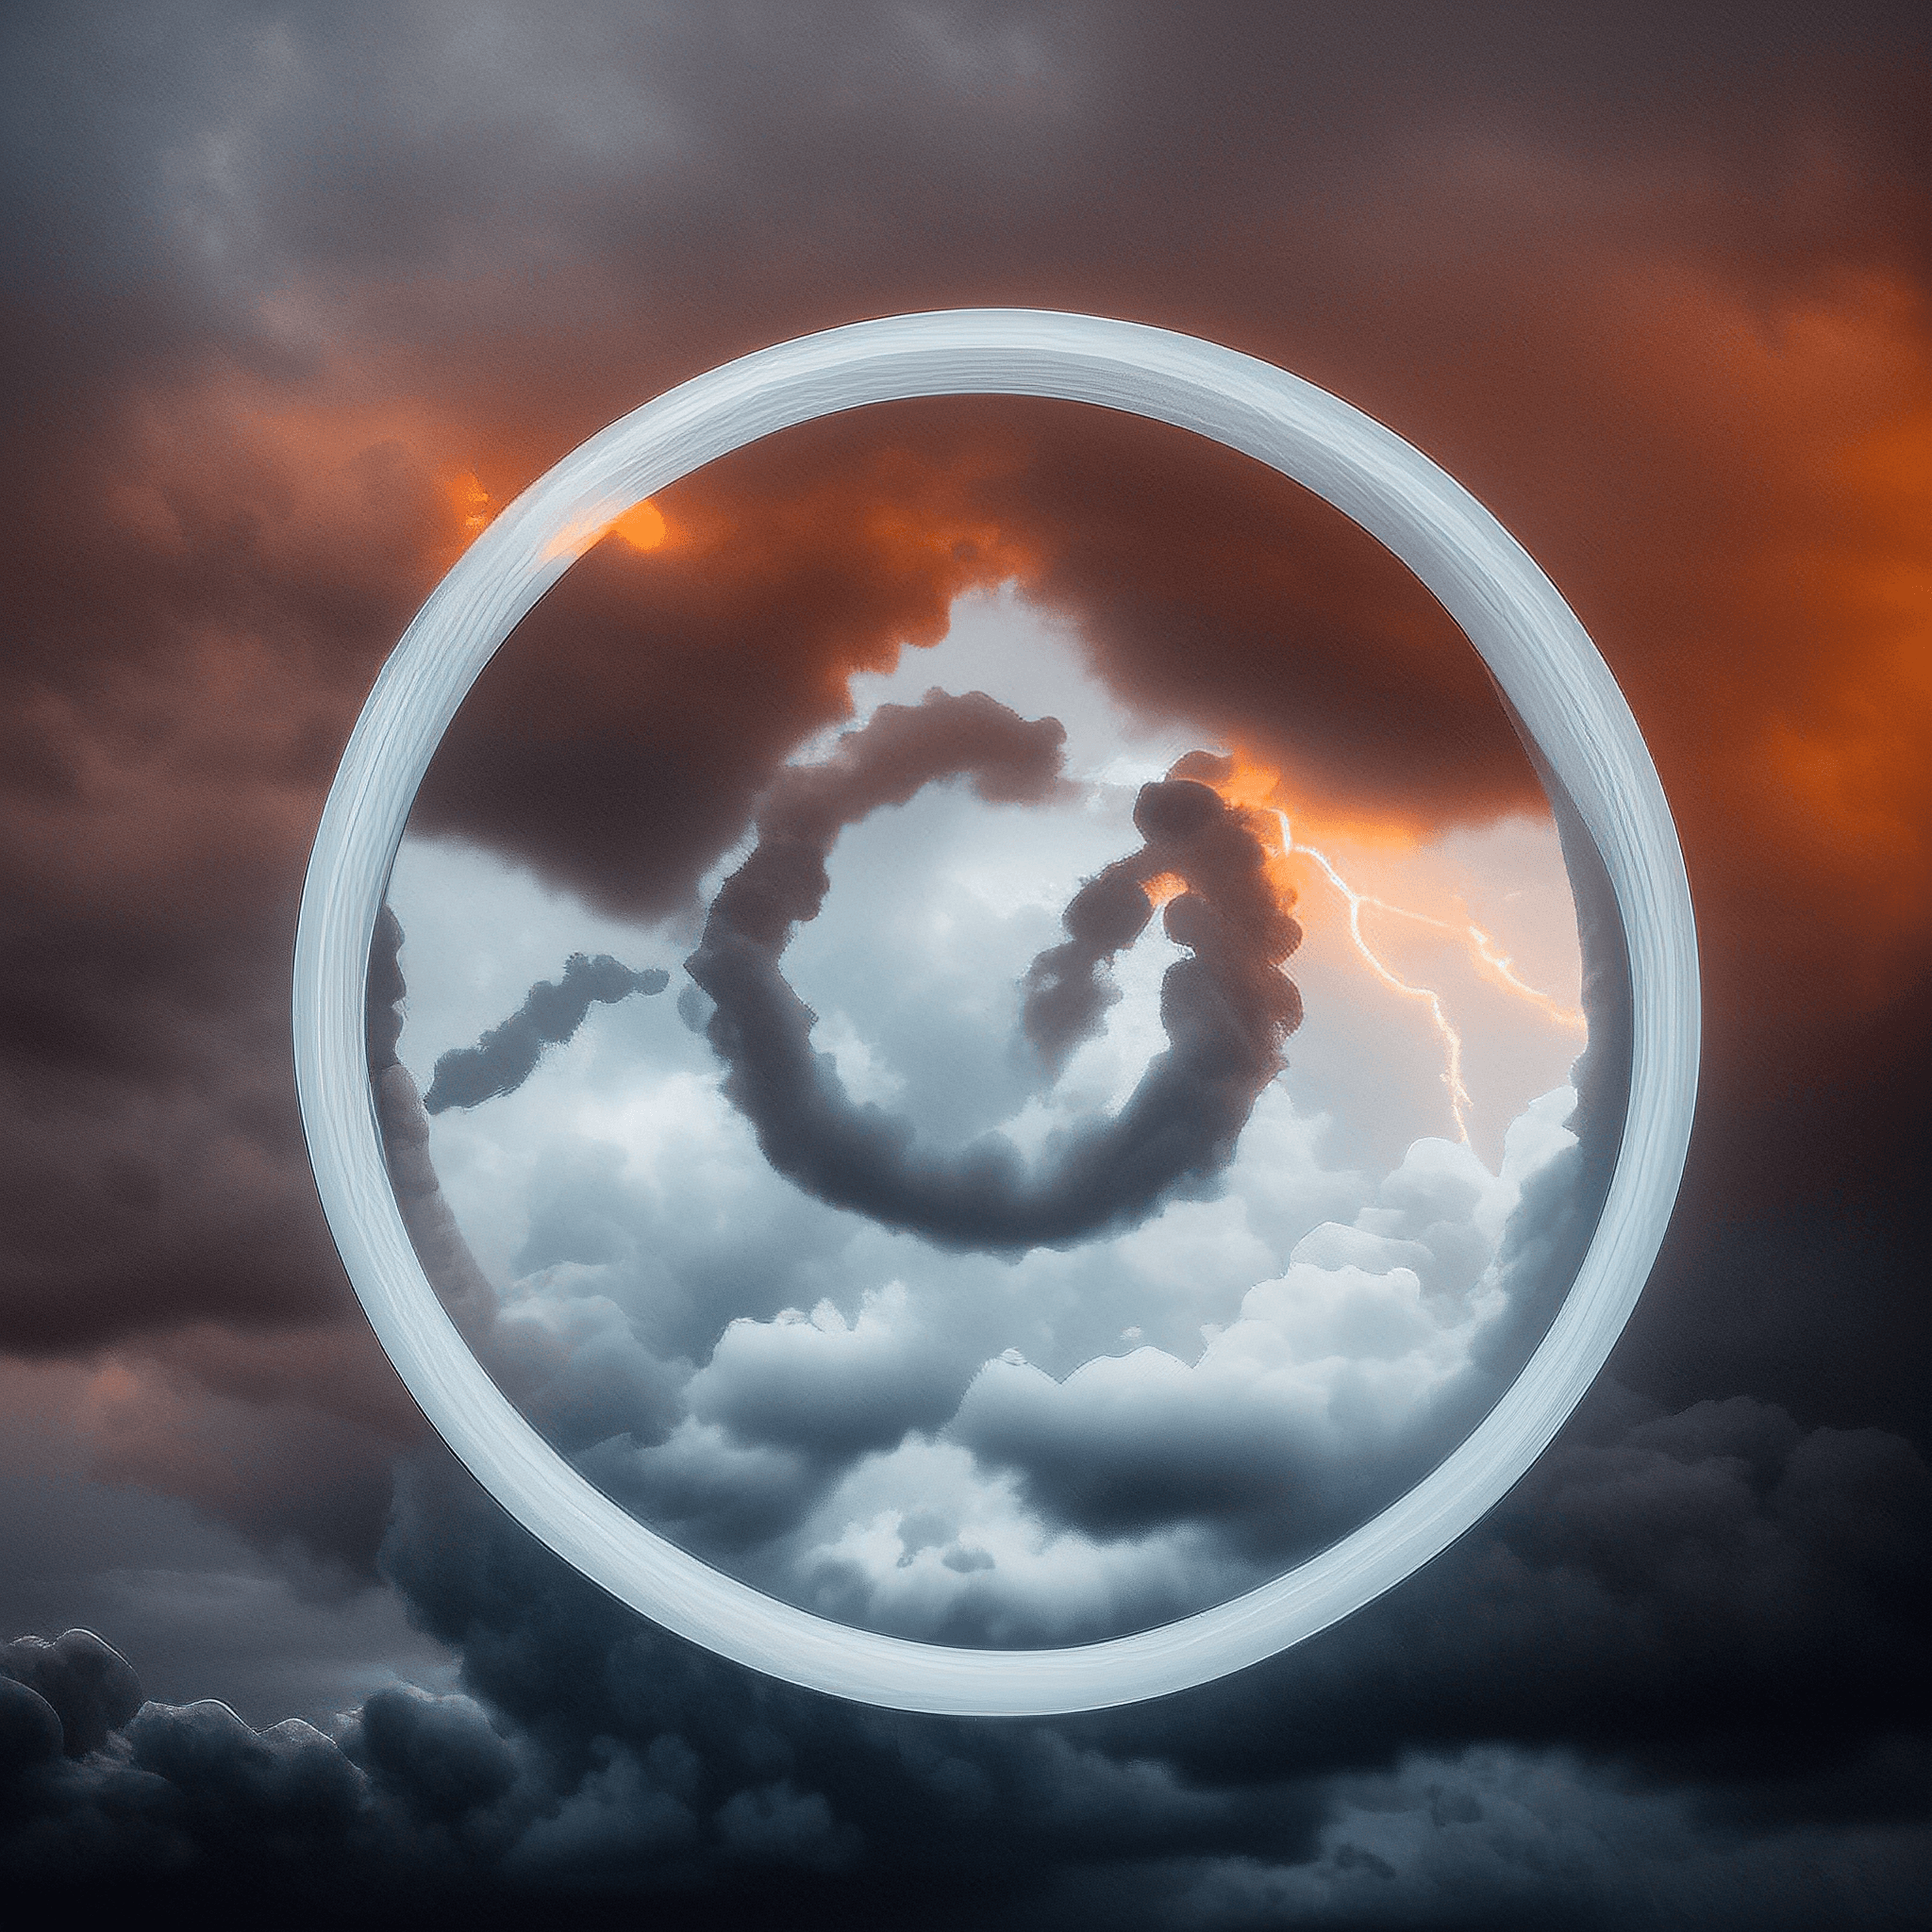
We want more clouds, less logo - so we’re going to set our conditioning end to 0.75 and update our prompt to:professional photo, photo of clouds, dramatic lighting, gloomy, cloudy weather
The result is more realism and a bit less logo.
To finish off the image, let’s upscale it with a super resolution node. Now that’s perfect for my Instagram!
Conclusion
Using AI to create new treatments of your logo that are both unique and reflective of your brand's identity is simpler than ever with the right tools. Odyssey, combined with the power of Stable Diffusion and ControlNet, opens up a world of creative possibilities for designers, marketers, and business owners alike. Whether you're after an AI logo generator Reddit users rave about or just exploring how to use AI to create logo treatments that stand out, the journey to creating eye-catching, AI-generated logos is filled with potential for innovation and creativity.