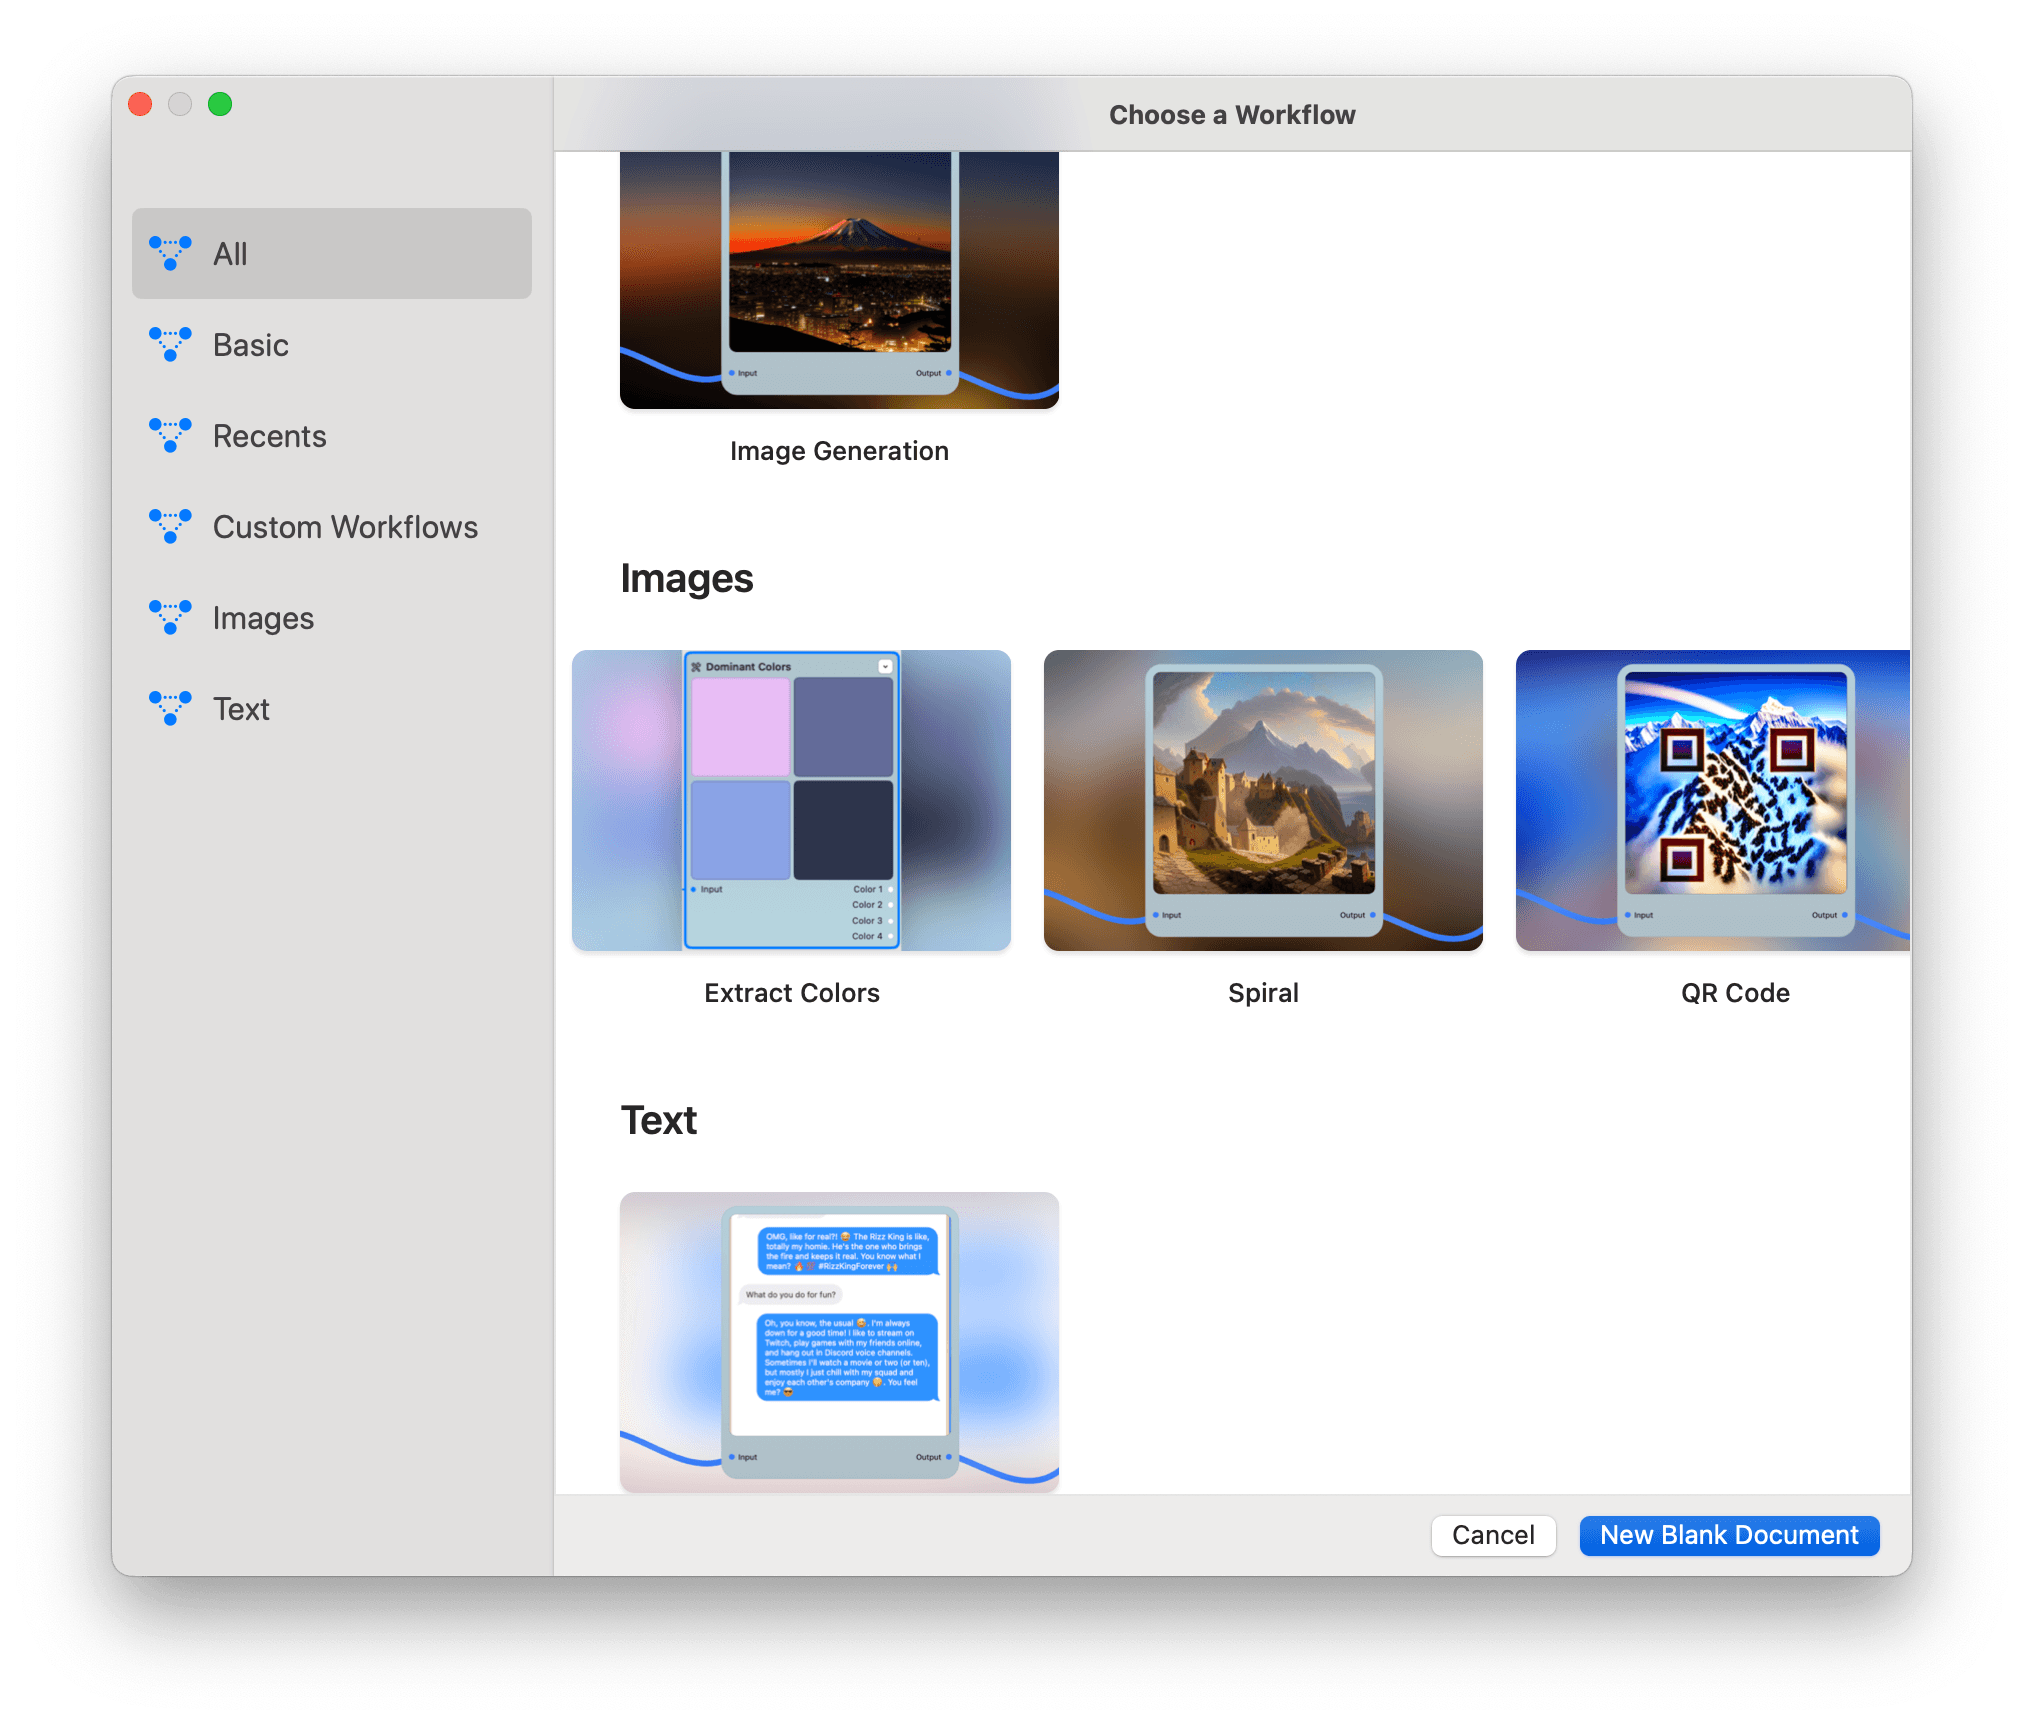
Spiral AI Art with Control Net
In this extensive guide, we'll unravel the step-by-step intricacies of using ControlNet Stable Diffusion to embed patterns, words, shapes, or imagery within AI-generated images. We will start by recreating the spiral town example from Reddit user u/Ugleh with Odyssey to help you create mesmerizing spiral AI art.
If you are new to Odyssey, refer to our essential guides to getting started with Odyssey here.
AI Spiral Workflow
The easiest way to get started embedding spirals in an AI generated image is by using an Odyssey workflow. Odyssey comes pre-loaded with an AI spiral workflow. To get started simply open the Odyssey app and select Spiral
Then click New Document from Workflow.
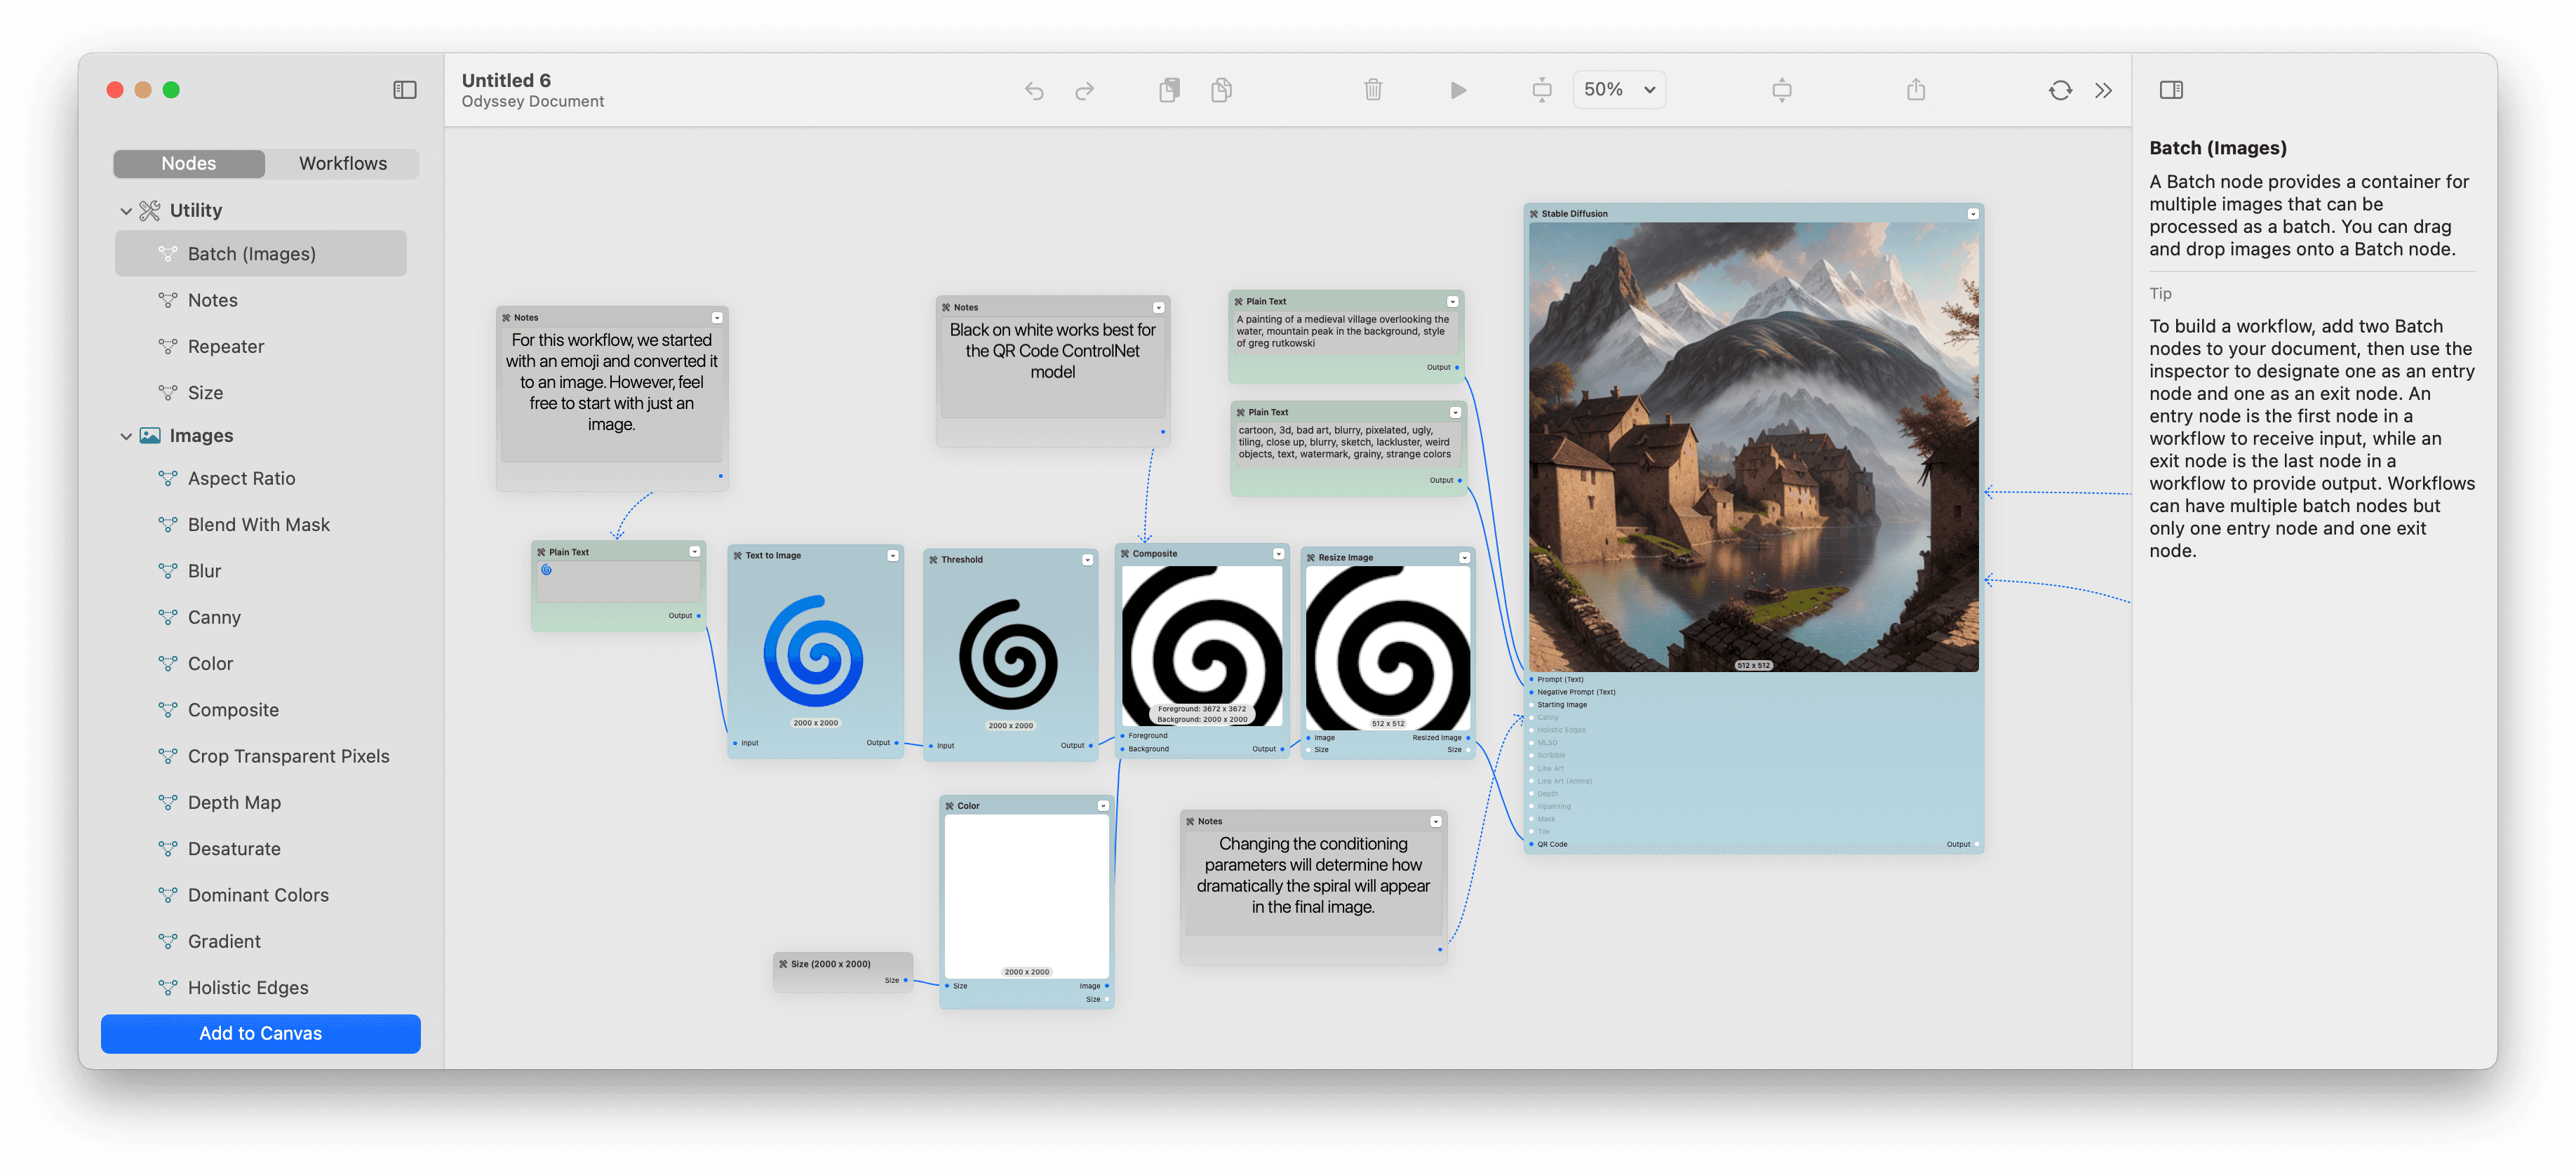
Each Odyssey workflow contains instructions on the canvas for how to change the workflow or run it yourself.
Let's take a look at each step to see how you can make the AI Spiral workflow your own.
Step 1 - Importing a Spiral into Odyssey
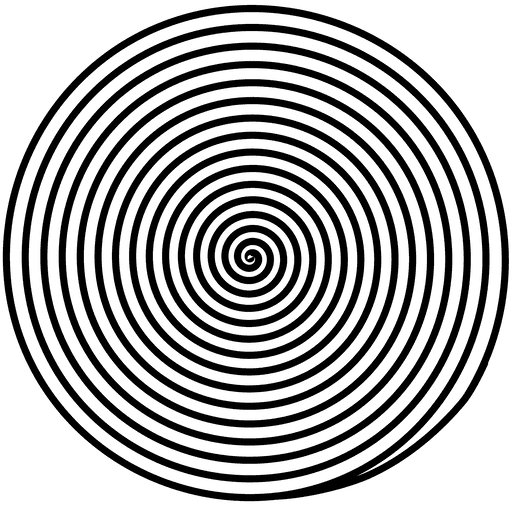
The workflow we include with Odyssey starts with a 🌀 spiral emoji 🌀 that we then convert into an image.
Realistically, any image should work here as a starting point - though the model will do best with patterns, simple shapes, or text.
If you want to pull a spiral into Odyssey, such as the one below, you can simply drag and drop the image onto the Odyssey canvas.
Next, we will need to manipulate the image to ensure it's compatible with Stable Diffusion. With Odyssey, this process is easy since our app is full of simple image editing nodes. Let's take a look.
Step 2 - Adjusting Image Resolution for Control Net Compatibility
For optimal results with Stable Diffusion and ControlNet, it's crucial to use images with a resolution that matches the expected resolution of the models. In this case, we need our image to be 512 x 512 pixels.
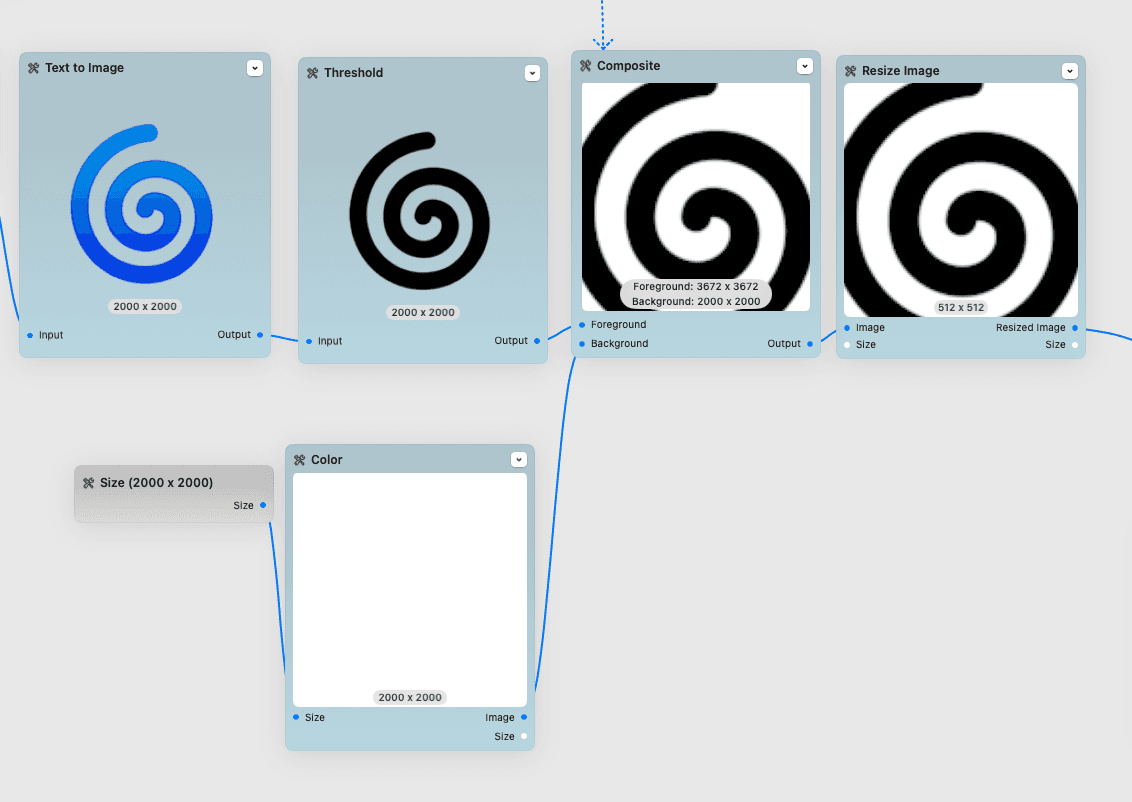
For the spiral emoji, the first step is to convert it to an image with our text to image node then connect it to a threshold node to remove the color.
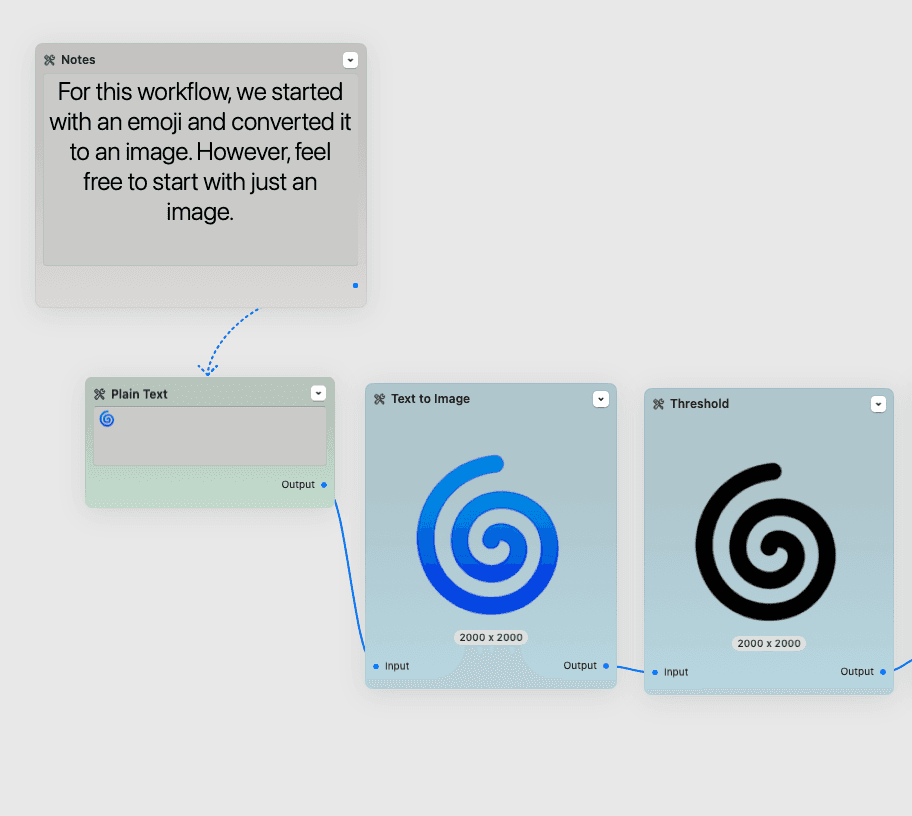
Next, we're going to want the emoji to be black and white rather than having a transparent background. To do this, we took a white color node and then added it as a background to a composite node. We then transformed the size of the foreground spiral to match what we're hoping to see in our image before using a resize node to bring the composite image down to 512 x 512.
Step 3 - Choosing a prompt for Stable Diffusion
Next, drag in a Stable Diffusion node and add a prompt and negative prompt.
Prompt: A painting of a medieval village overlooking the water, mountain peak in the background, style of greg rutkowski
Negative prompt: cartoon, 3d, bad art, blurry, pixelated, ugly, tiling, close up, blurry, sketch, lackluster, weird objects, text, watermark, grainy, strange colors
We wanted a simple prompt just to demonstrate the power of the spiral - but any prompt here will do. It's a lot of fun to play around with different prompts to see how the image reacted to the spiral!
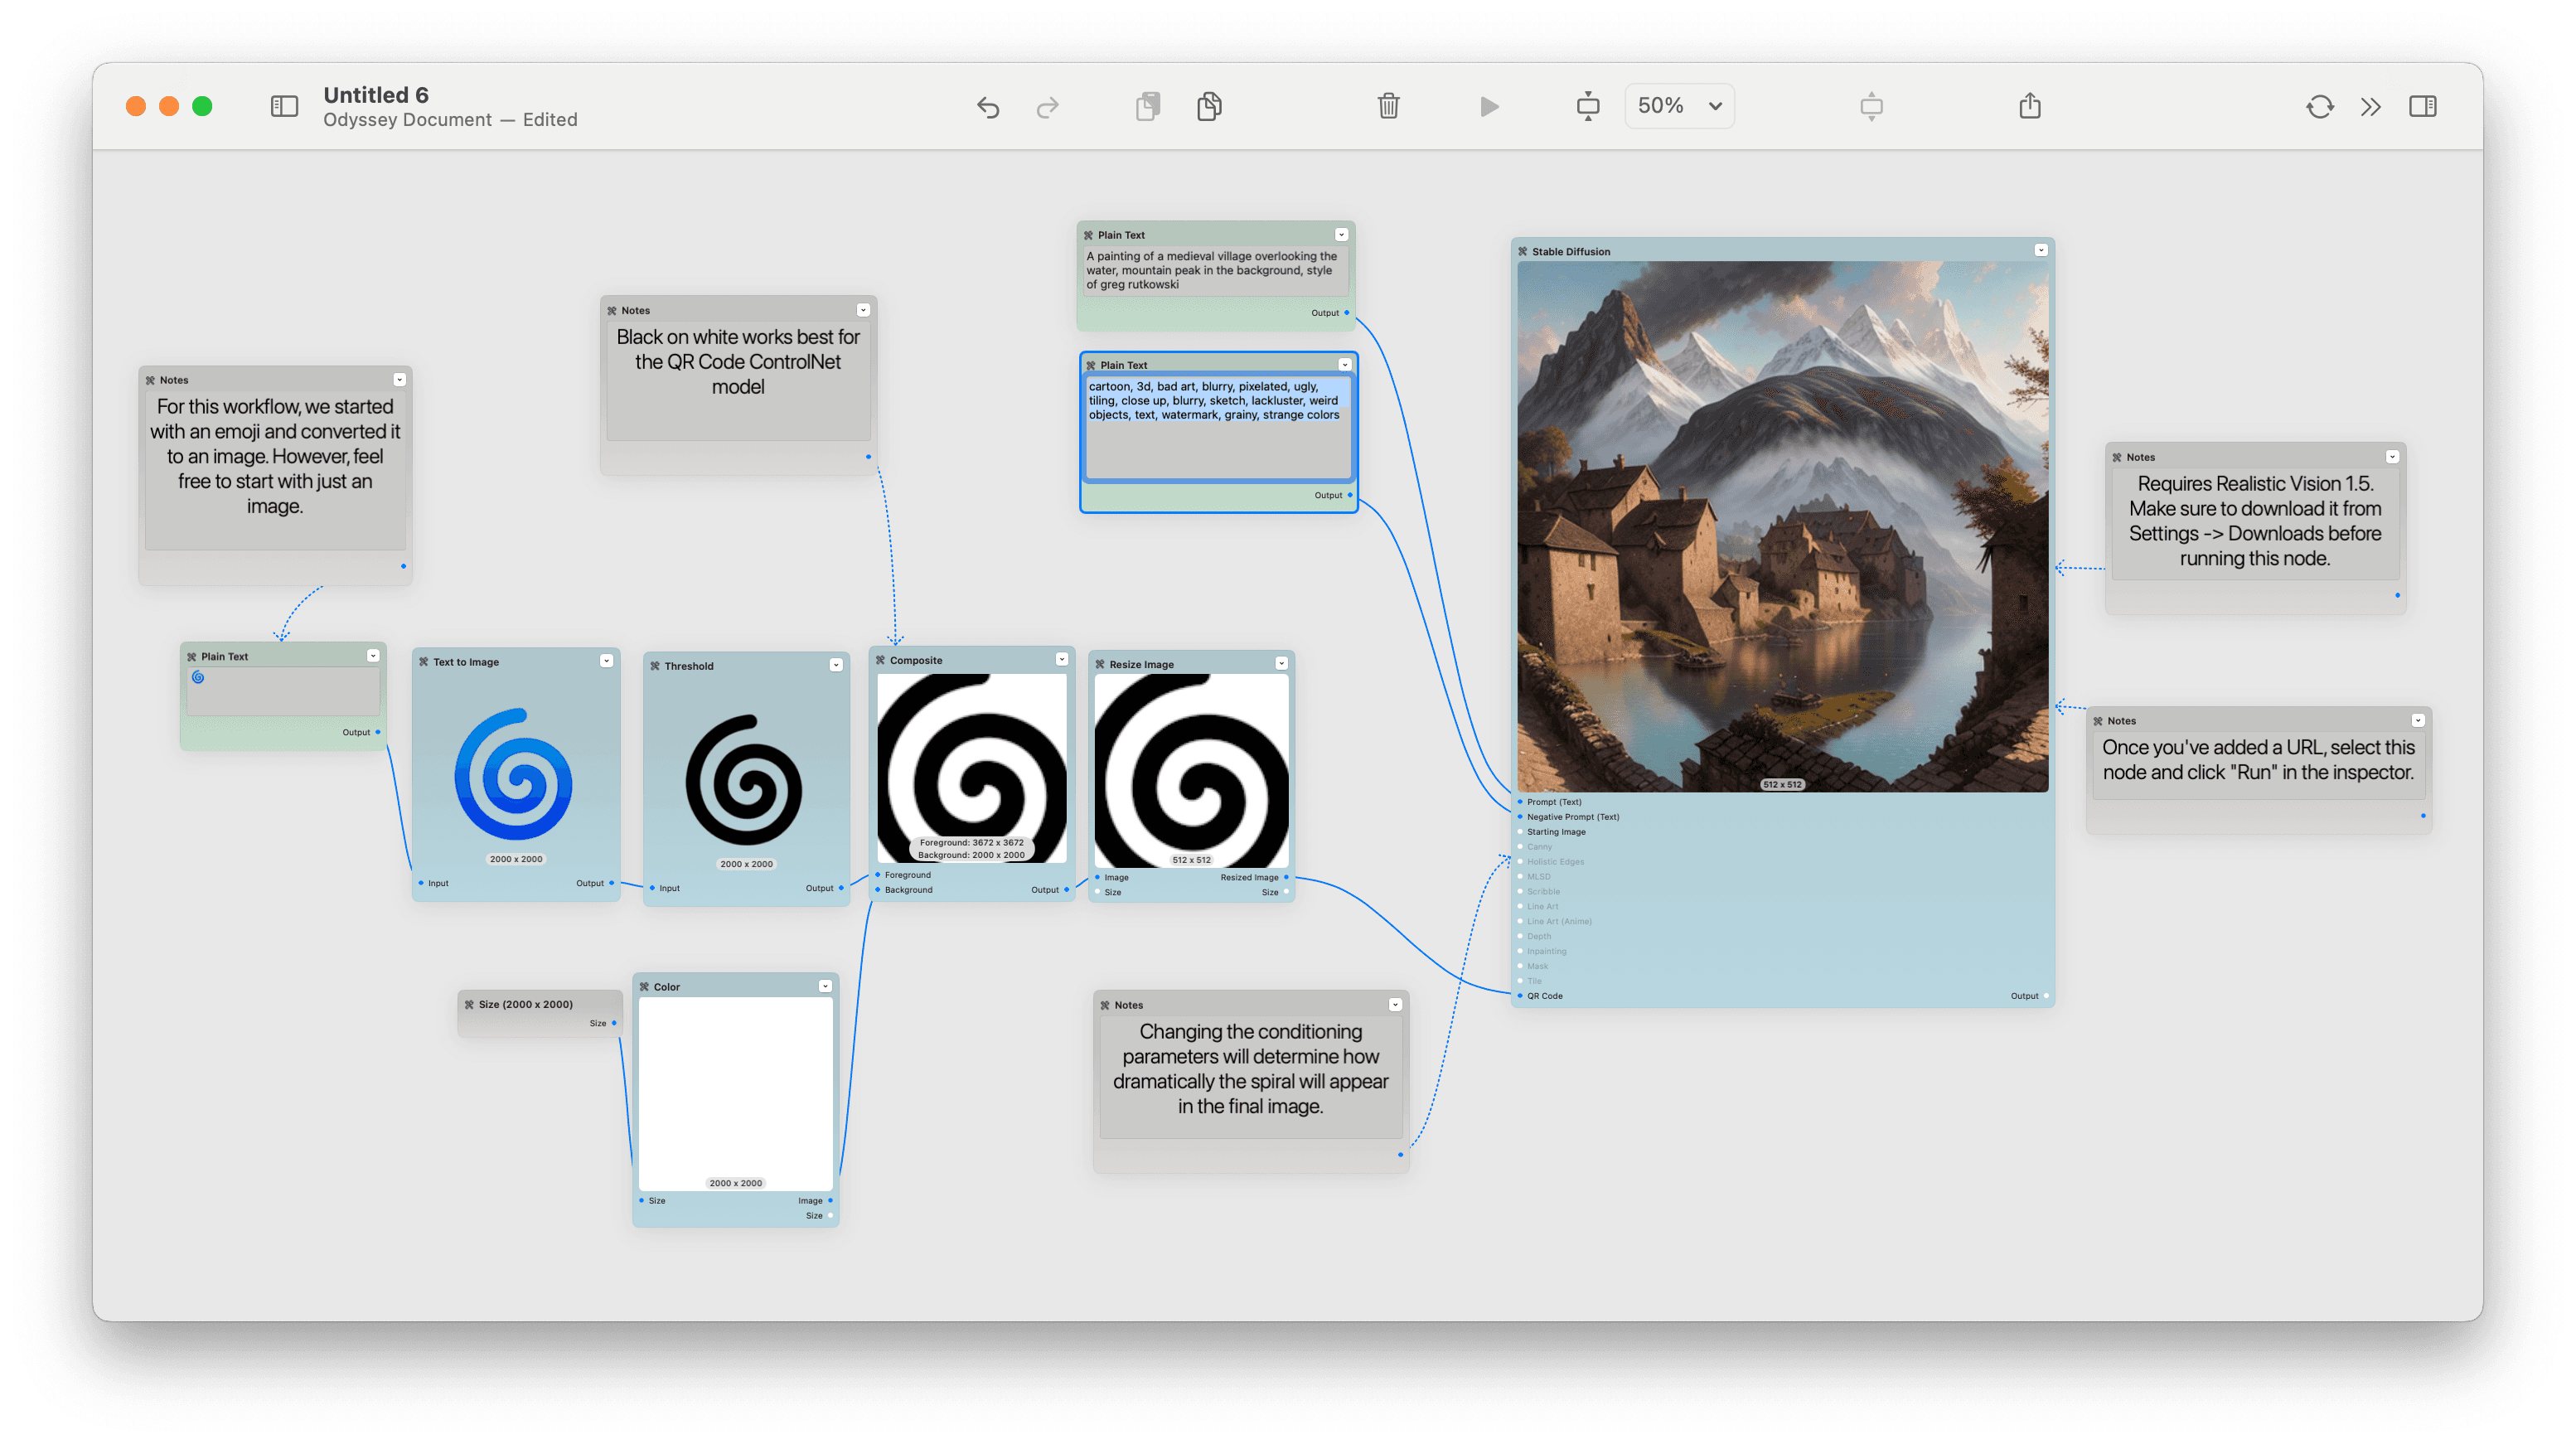
Step 4 - Link the Image to the QR Code Input
To achieve the spiral effect, we are using ControlNet's QR Code Monster model.
This model was originally designed to create cool QR codes that still scan but an industrious Reddit user discovered that the same model could be used to engrain patterns, words, shapes, and more into an image. QR Code monster is now one of the more widely adopted Stable Diffusion ControlNet models - and we use it in a ton of workflows!
Select your Stable Diffusion node and look at the settings on the right hand side. The first thing you'll want to do is select your model.
We've found that Realistic Vision works the best for this workflow since it supports ControlNet and is a visually striking model that works across a wide range of styles.
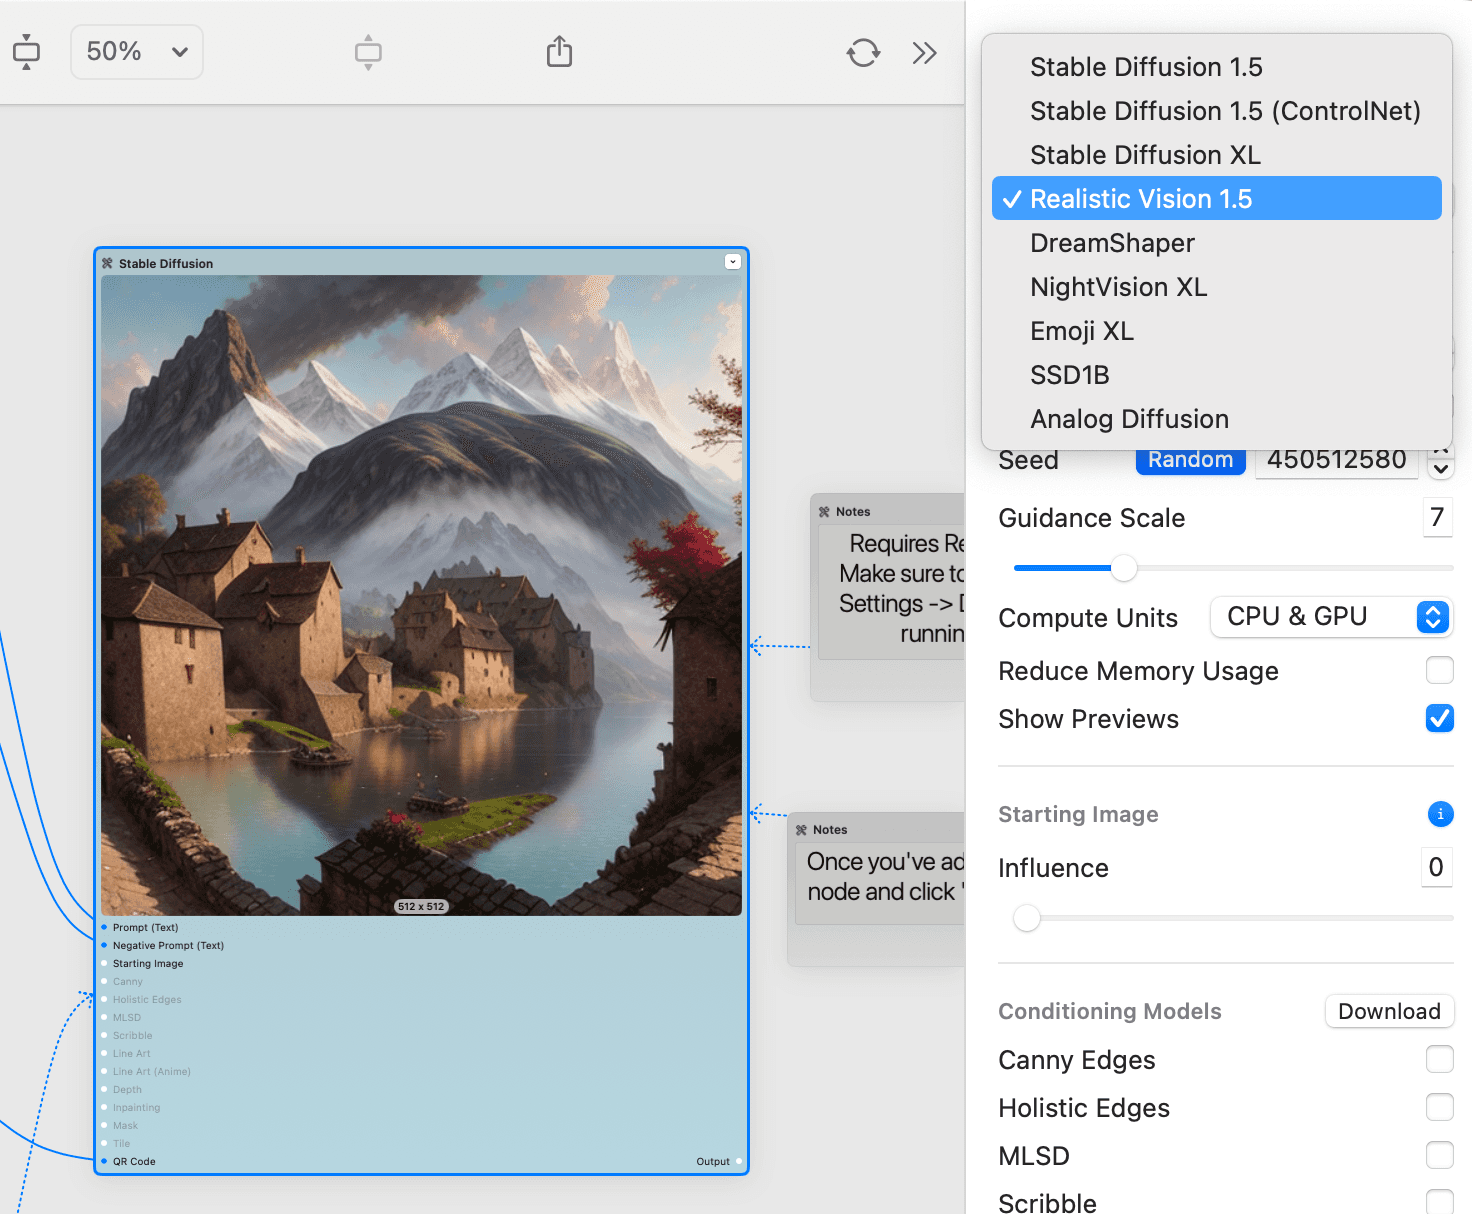
*If you didn't download Realistic Vision when you first launched Odyssey, click Odyssey > Settings (⌘,) > Downloads then scroll to Realistic Vision 1.5.
Once you've selected Realistic Vision, it's time to change your Stable Diffusion settings. The Odyssey workflow starts with the following presets:
Steps: 50 - fewer steps will generate faster but might be lower fidelity
Random seed - randomizing the seed will create more diverse results. If you find a seed you like, simply uncheck random
Guidance scale: 7 - guidance scale determines how closely the image generation follows your prompt
Other Stable Diffusion settings can be read about here.
Next, let's look at the Conditioning Models. First, check QR code. From there, you can change the strength that ControlNet has on the image.
Conditioning start dictates which step your ControlNet input will begin impacting the image
Conditioning end dictates which step your ControlNet input will stop impacting the image
Conditioning strength determines how much the ControlNet input impacts the steps it impacts
Conditioning guidance determines how much the image generation adheres to the ControlNet input. Higher guidance means higher adherence to the input
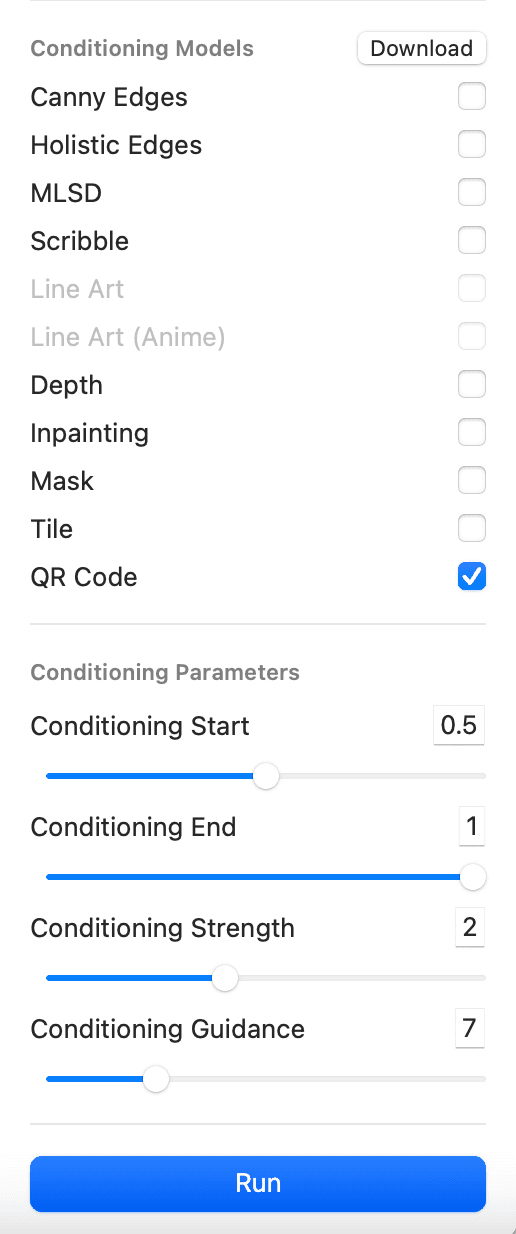
For this workflow, we start conditioning about halfway through image generation and keep the strength and guidance fairly low. The conditioning inputs will dramatically impact the image output and are quite sensitive. If you are getting inconsistent results, use these sliders to impact the effect.
Let's look at how the Conditioning Start and Conditioning Strength impact the same seed value.

Realistically, you can ignore all of this and just connect your spiral to the QR Code input on the Stable Diffusion node.
Step 5 - Run the model
Now that everything's connected, just hit the run button and watch Stable Diffusion generate your beautiful, spiral tinged image!
Further Exploration
While the Spiral workflow creates incredible spiral AI art, you don't have to be limited to just spirals. Odyssey makes it easy to simply sub out a starting input to get a completely different result.
Shapes, emojis, letters, words, and more all work remarkably well with the QR Code Monster model - so hopefully this workflow gives you a foundational understanding of how to create AI Art using ControlNet and Stable Diffusion.
The techniques learned here can be applied to various patterns and prompts, opening the door to endless creative possibilities with ControlNet AI.