Mastering Stable Diffusion: Your Essential Guide to AI Image Generation on a Mac
Table of contents
How does Stable Diffusion work?
How to use Stable Diffusion on a Mac
Exploring Stable Diffusion models
Mac UI
How does Stable Diffusion work?
Stable Diffusion is an AI image generation tool from Stability AI. Similar to Midjourney and Dall-E, Stable Diffusion generates an image directly from a prompt you provide. But how does Stable Diffusion work?
Stable Diffusion is a latent diffusion model - which is slightly different than a standard diffusion model. Standard diffusion models are trained to denoise random Gaussian noise to output a result (for our purposes, an image.) But the denoising step in traditional diffusion models is quite slow - which wouldn’t be acceptable for image generation at scale.
Latent diffusion reduces the time and complexity of diffusing an image out of gaussian noise by generating compressed (or latent) representations of the images. There are three components: autoencoder, U-Net, and Text-encoder. If you want to learn more about the details on how these work, we suggest you check out this Huggingface overview of the technical complexity of Stable Diffusion.
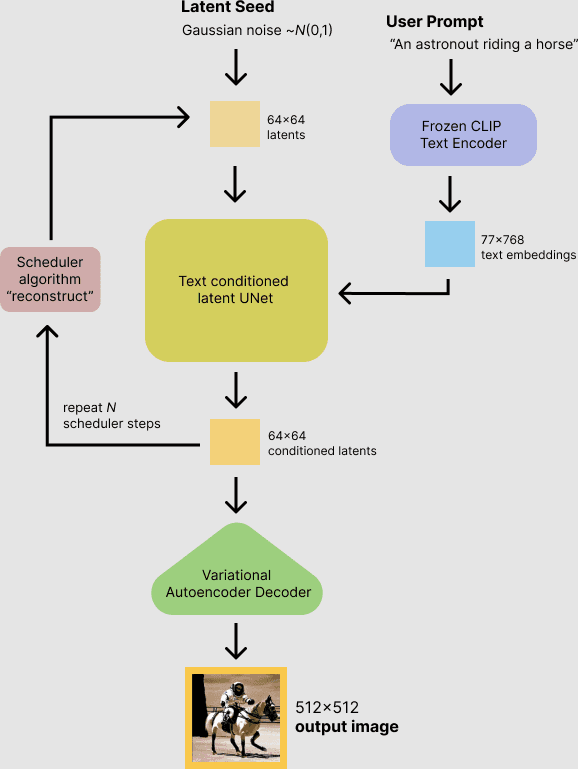
A complex diagram of how all this works courtesy of HuggingFace.
For our purposes, we’re going to oversimplify how this all works. A model is trained on billions of images that are associated with text. When you enter text, Gaussian noise is added and removed to output an image result. You’ll notice when you run Stable Diffusion, with Odyssey you’ll see a mess of noise that slowly turns into an image.
We asked ChatGPT to describe latent diffusion models to us as if we were five and they were a pirate - here’s what we got:Arr matey, so ye want to know 'bout the mystical waters o' latent diffusion models, aye? Well, sit yerself down, pour a dram o' rum, and listen well.
Imagine ye have a map o' hidden treasure, but it's all smudged and blurry, arr. Ye can make out there's somethin' there, but ye can't see the X that marks the spot, nor can ye tell if it's a palm tree or a parrot next to it. That's like a picture that's lost in a sea fog, hard to make out, that be your latent space - a place where images are but shadows of what they can become.
Now, a latent diffusion model, she's like a skilled old sea dog with a keen eye for detail. She takes that smudged map and, bit by bit, she blows away the fog, addin' in the lines and colors, sharpenin' the image until, shiver me timbers, ye have a clear map to yer treasure!
Here's how she does it: she starts with noise, just like a stormy sea, and then, like the calm after the storm, she slowly removes the chaos, layer by layer, until calm waters reveal yer picture. This process, it's like reverse paintin' a ship, startin' with a blank canvas and then, stroke by stroke, bringin' the proud vessel into view.
What makes this wench of a model so powerful is her learnin'. She's been trained with a chest full of gold - that be thousands of pictures - learnin' how to clear the fog and make sense of the shapes. So, when ye give her a new smudged map, she already knows what to do.
But beware, matey, for this magic ain't perfect. Sometimes the image comes out with two heads or a missin' leg, but with enough trainin', she'll be bringin' ye clear maps to treasures untold. And that be the tale of latent diffusion models! Now drink up, me heartie, yo ho!
How to use Stable Diffusion on a Mac
Using Stable Diffusion is fundamentally straightforward. It involves inputting data, allowing the AI to process through Gaussian noise, and receiving an artistic output.
Basic implementations of Stable Diffusion can accept three inputs:
Prompts
Negative Prompts
Starting image
A prompt is a text based description of what you’re hoping to see an image of. The goal of prompting is to be as specific as you can to help Stable Diffusion output an image as close to what you’re looking for as possible.
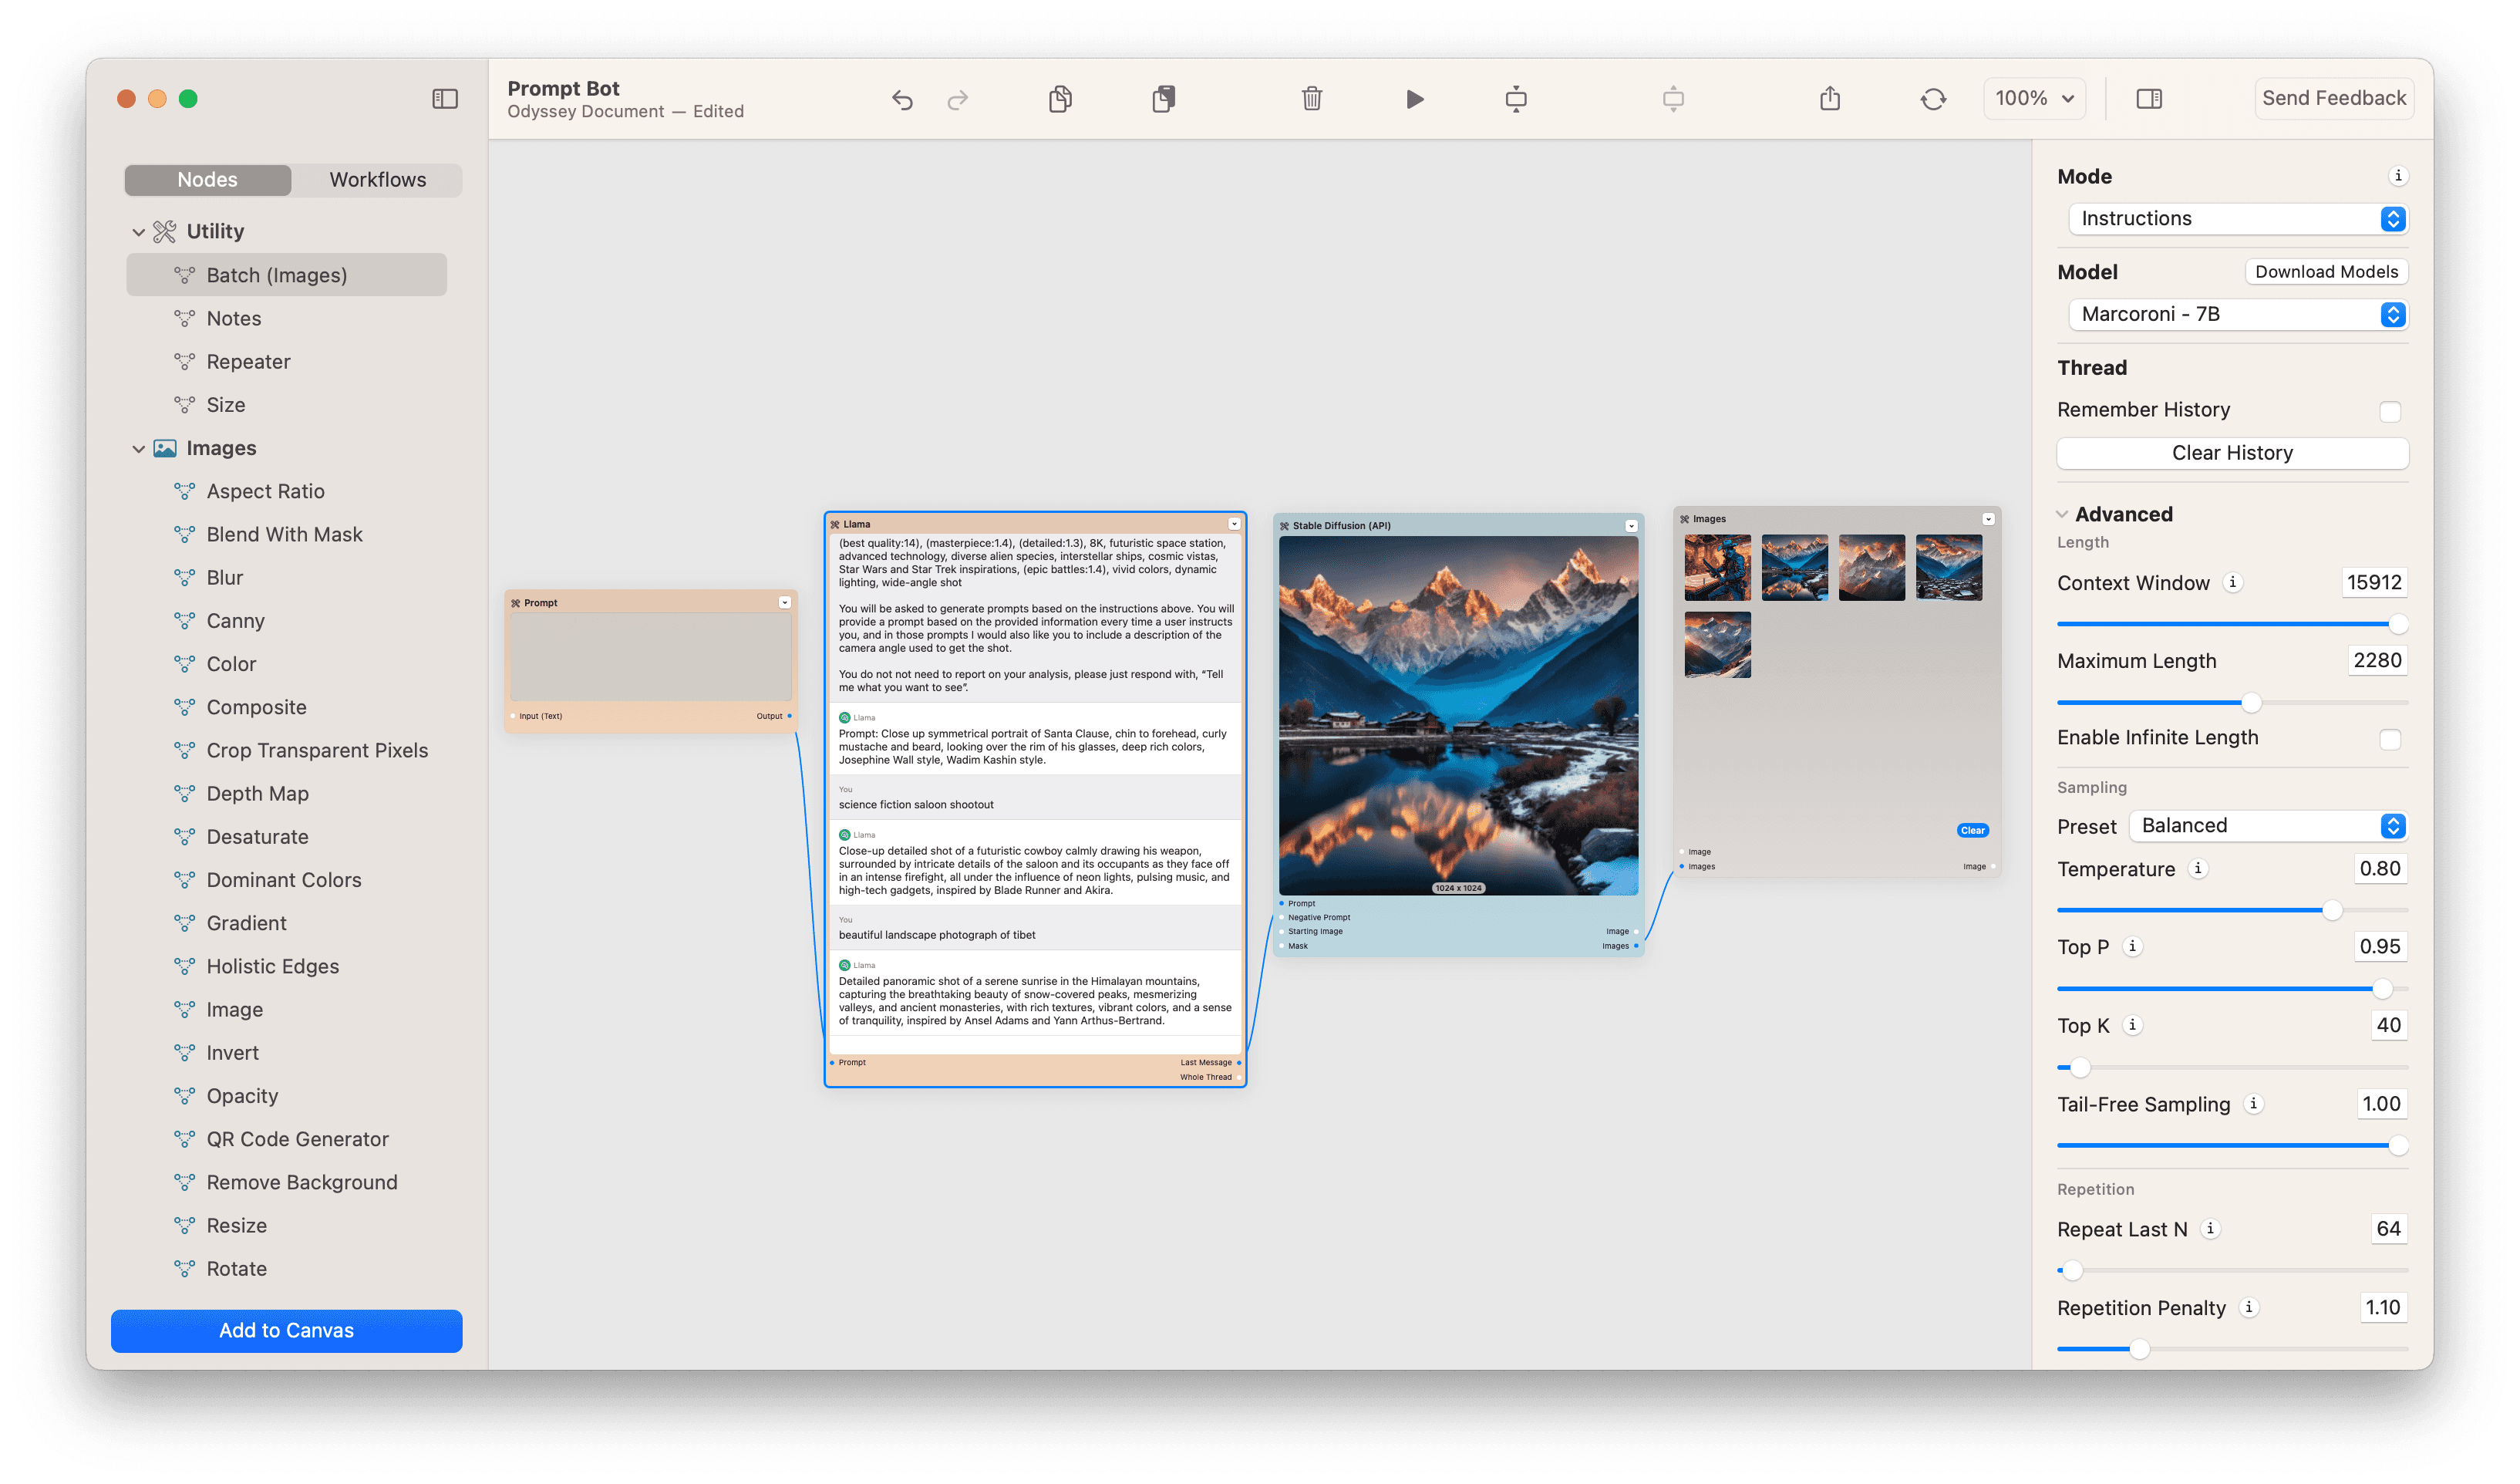
There are tons of guides on prompting. We love PromptHero as a resource and we also have a prompt generation workflow in Odyssey that works quite well.
Negative prompts tell the model what not to output. A negative prompt is a great way to avoid some of the common pitfalls of AI generated imagery (such as weird hands!) and some people simply reuse the same negative prompt with each image generation, such as:3d, disfigured, bad art, blurry, pixelated, ugly, tiling, close up, blurry, sketch, lackluster, weird objects, blurry, text, watermark, grainy, deformed, extra limbs, poorly drawn hands, poorly drawn feet, poorly drawn face, mutation, mutated, extra limbs, extra legs, extra arms, disfigured, deformed, body out of frame, cross eye, bad anatomy, face out of frame, strange face, text
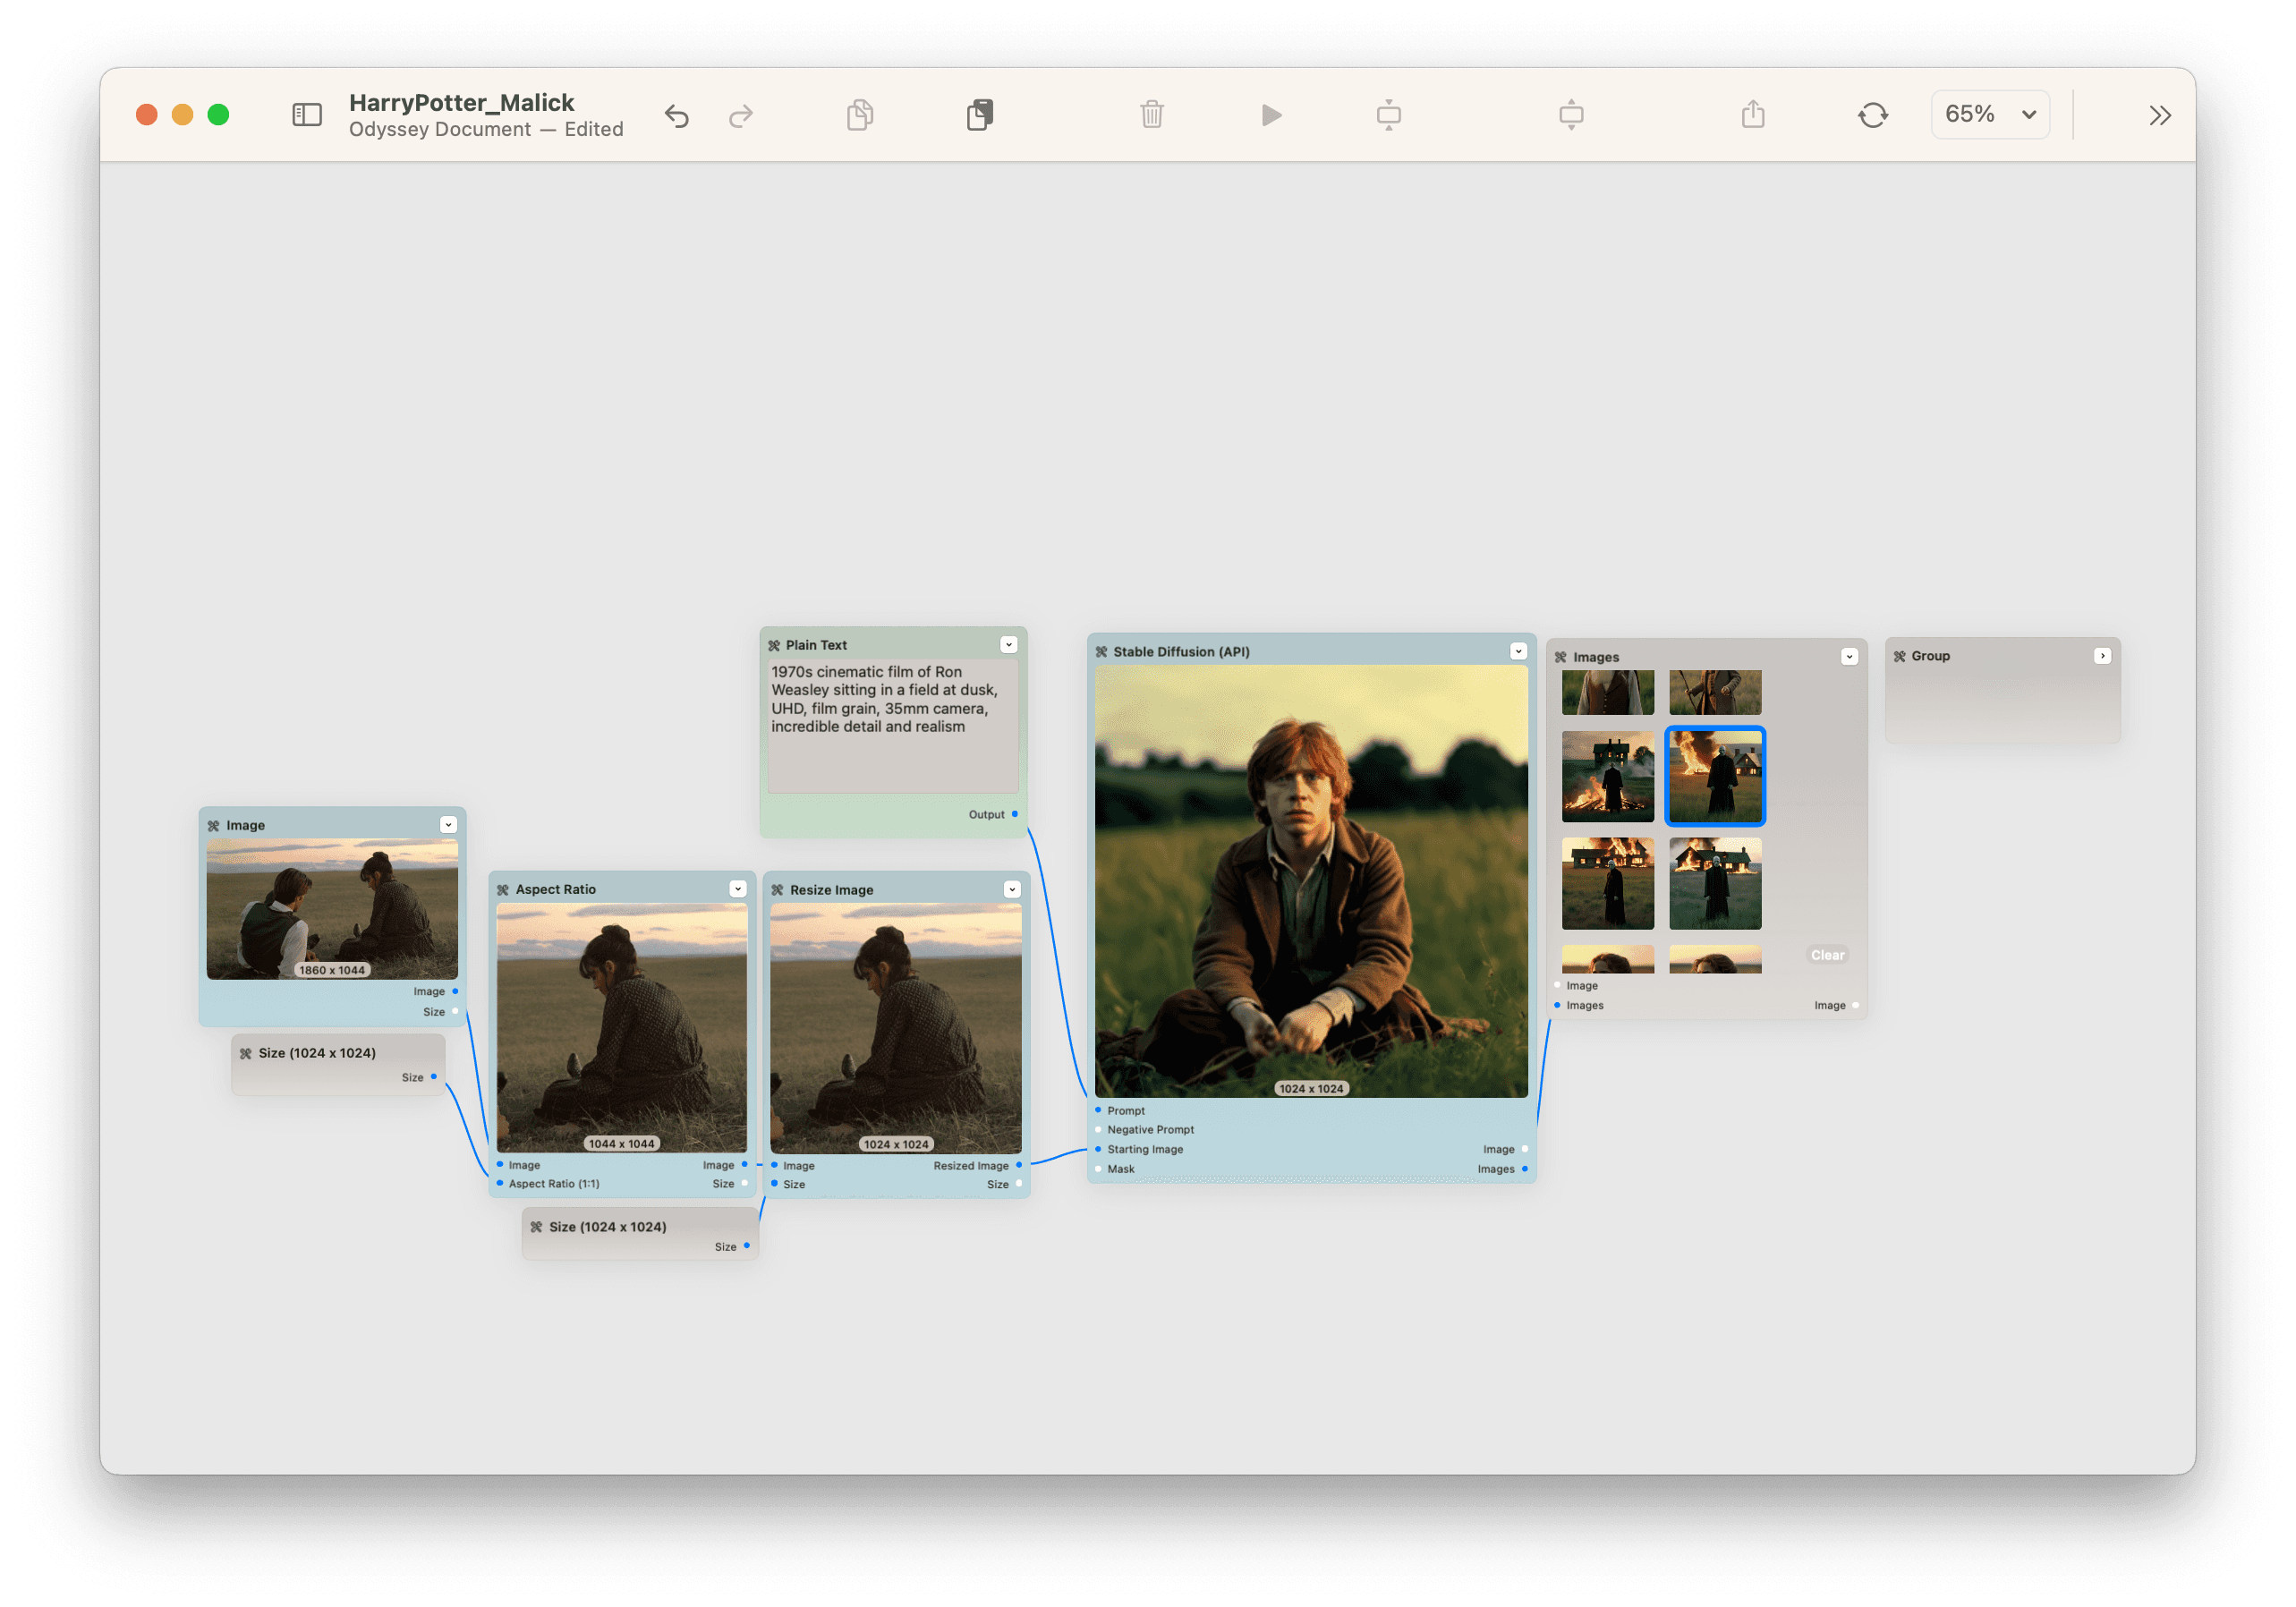
Image to image flows, or img2img, is another way to ensure the output of the model matches what you’re trying to achieve. By giving the model a starting point, your prompt can serve to help augment the end result to better match the input.
Take, for example, this workflow where we generated Harry Potter characters as if they were in the Terrence Malick classic Days of Heaven. We gave the model a starting image from Days of Heaven and then prompted Harry Potter characters - which outputted this perfect mash up.
Really all you need to know to start creating remarkable images these days are the basics. Models like SDXL have gotten so good that if you just type in a really simple prompt, you’re likely to get an image that achieves what you’re after.
That being said, one of the most powerful parts of Stable Diffusion is how much control you can have over it. Let’s take a look at some of the settings:
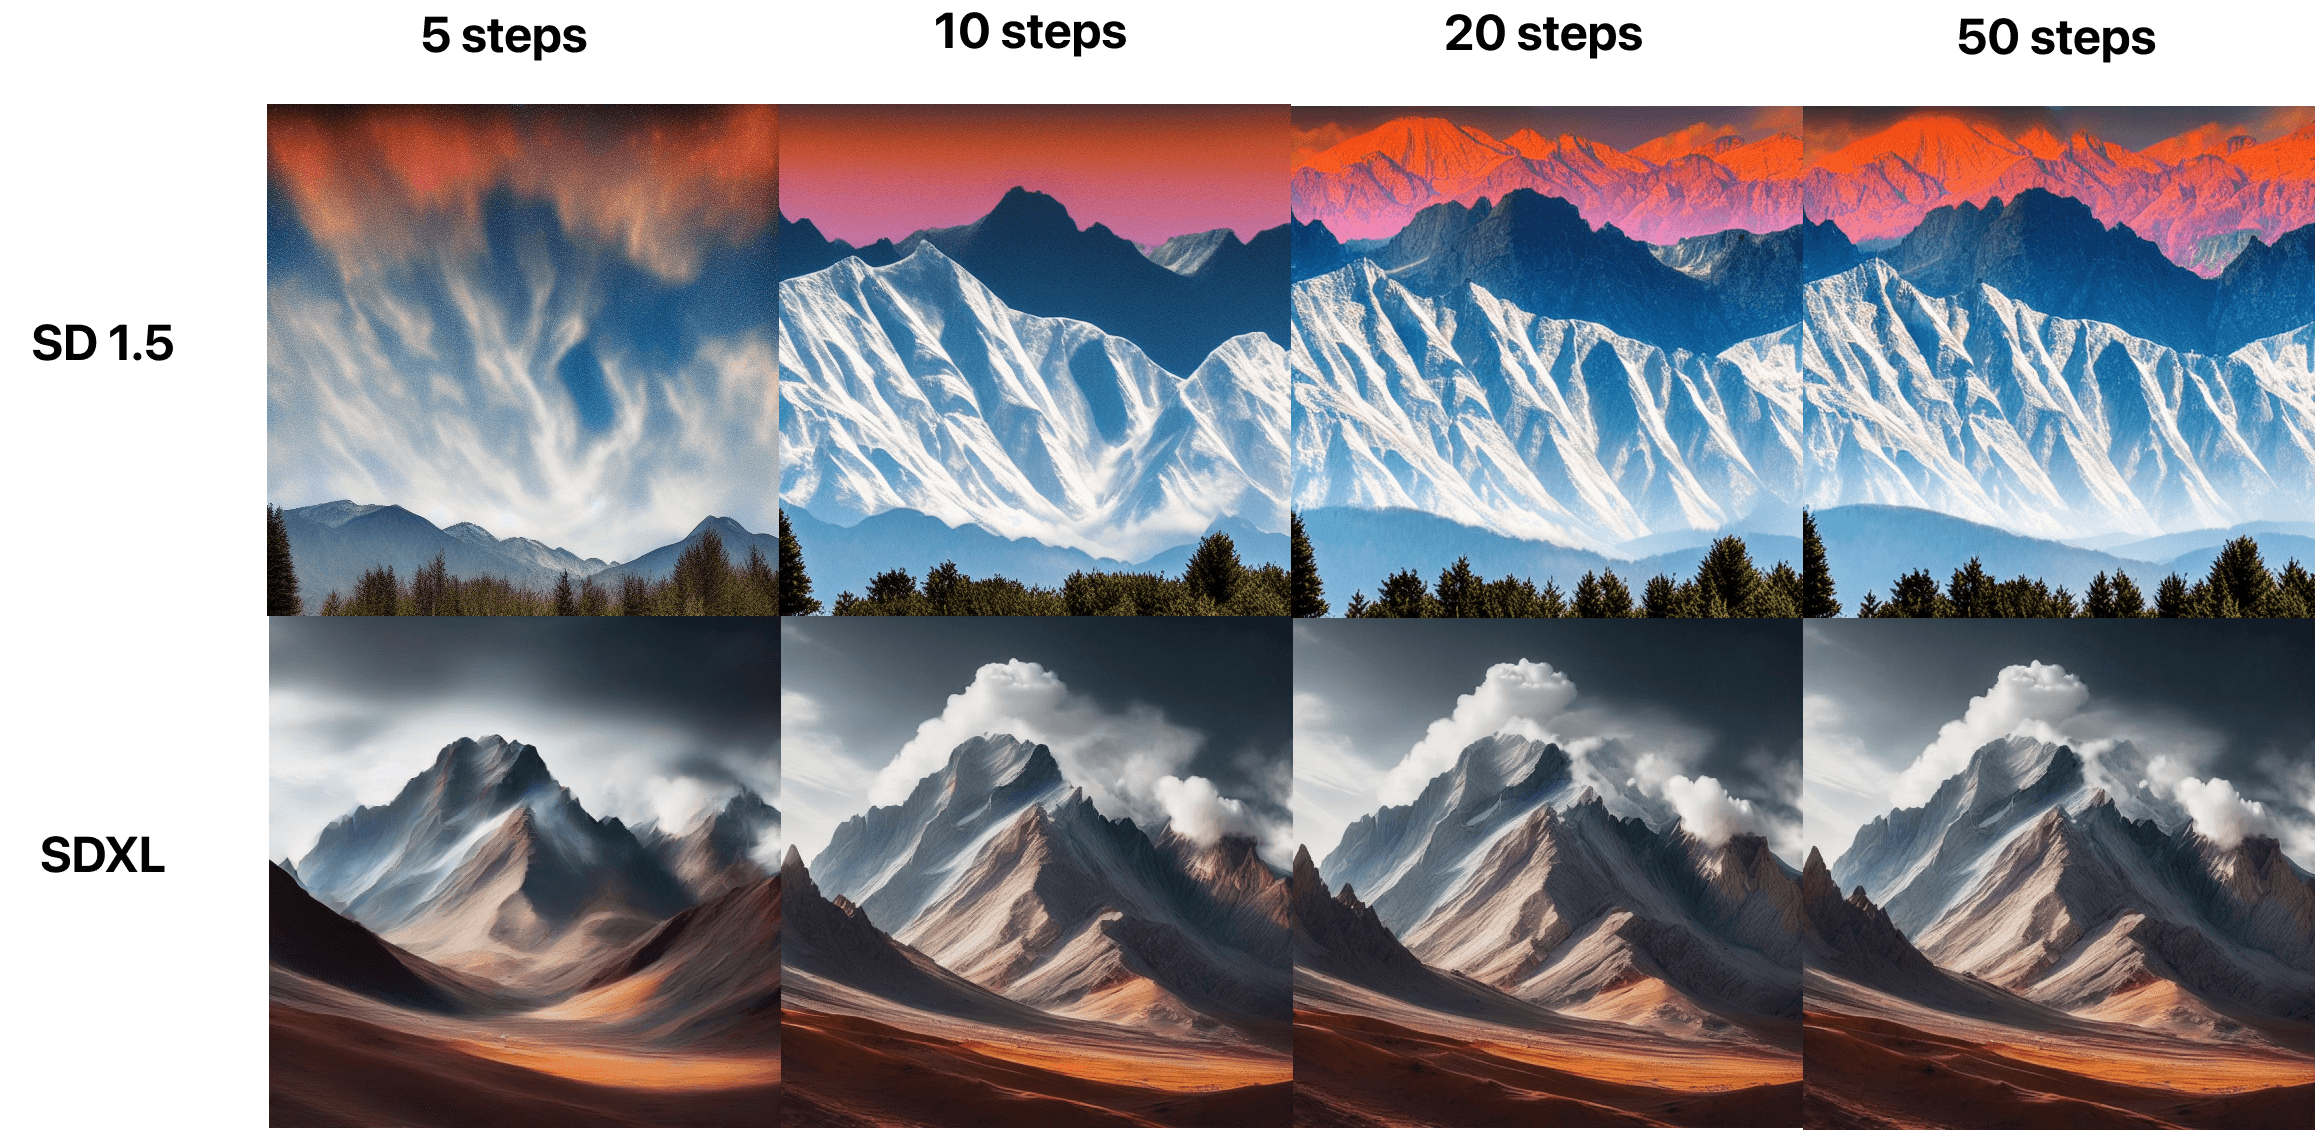
Steps dictate the amount of times the Gaussian noise is diffused. More steps take longer but fill in the image more elaborately. Less steps typically mean there are imperfections to your image. The key is to balance the number of steps - too many and you’re going to sit for a very long time and wait for an image that doesn’t look that much different than where you got to with fewer steps. Too few and your image won’t be usable. Different models need different step counts and we generally try to start with 20 steps until we dial in a prompt.
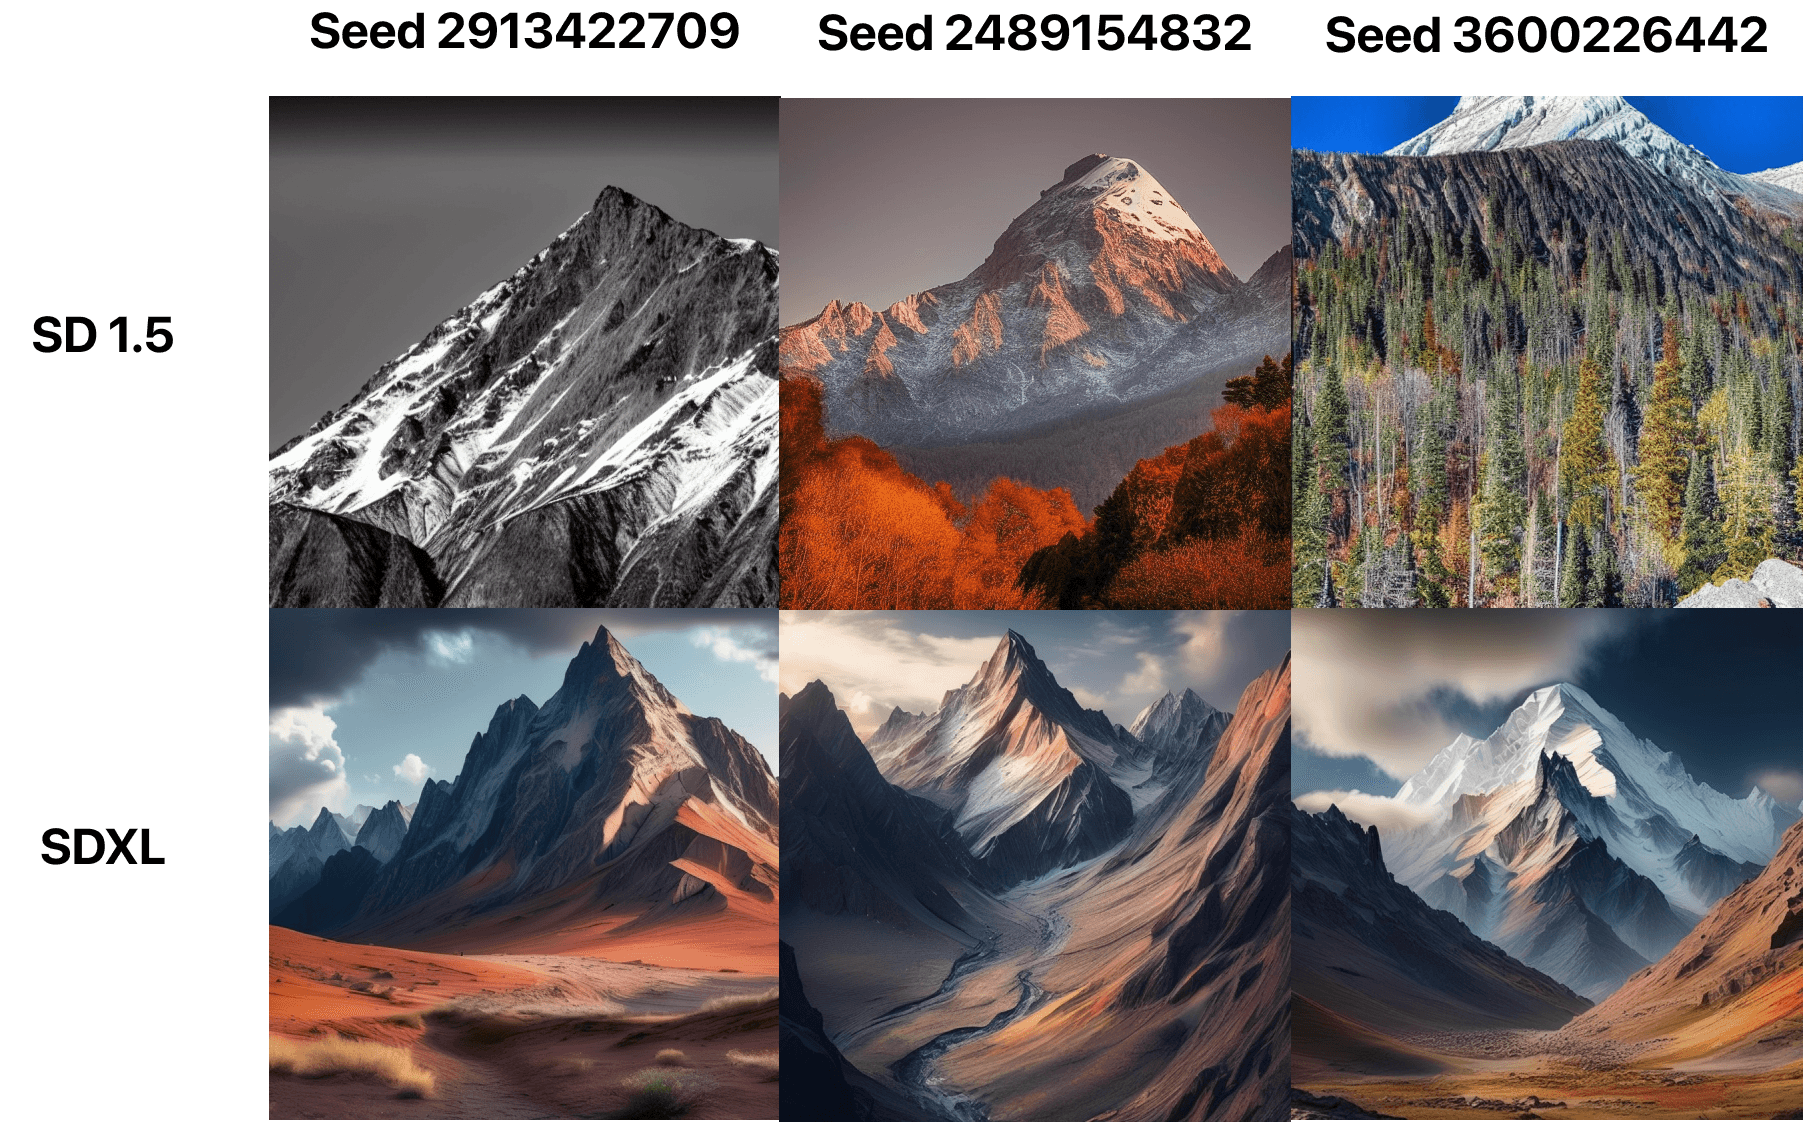
Seed is the number that’s used to start the diffusion process. If you keep the seed value the same, the image result will be roughly similar across generations. Once you lock in a prompt and the number of steps, seed values can give you a wide range of different results to pick from - so most folks that use Stable Diffusion randomize seeds until they lock in on one they’re happy with.
At 25 steps, here are different seed values for the same prompt.
Guidance scale dictates how closely the generated image should follow the prompt. The higher the value, the more the image generation will follow the prompt you enter. Similarly to steps, the key here is balance. Setting the influence too high will lead to a confused result while setting it too low will lead to an image that doesn’t quite match what you’re looking for. We find a range between 7 and 12 is best.
Starting image influence dictates how closely the diffusion model should follow the starting image that you provide it. The meter is essentially the percentage of steps that are directed toward matching the starting image vs. filling in gaps around it. This is a very powerful setting and, if you’re looking for a consistent aesthetic, a great way to heavily control the output and then vary it based on prompts.
To get even more control over your image output, you’ll need to use ControlNet. Check out our comprehensive guide on ControlNet here!
Stable Diffusion models
There are three main ways that creators are using Stable Diffusion:
Stable Diffusion 1.5
Stable Diffusion XL
Custom models
Stable Diffusion V1.5
Released in October 2020 and open source, SD1.5 became the foundational model the Stable Diffusion ecosystem was built around. At the time, SD1.5 was a state of the art, producing some of the highest quality imagery in the burgeoning space. The real advantage, however, came from the model being open source. By releasing the model under a The CreativeML OpenRAIL M license, developers could not only download the model but build on top of it.
This led to development of pre-processors such as ControlNet - which are covered more in-depth in this guide.
Odyssey supports running SD1.5 locally. The speed is quite fast but the quality can vary. While V1.5 was the foundational model at the time of release, the technology has since adapted quite a bit - making the ‘out of the box’ image quality from V1.5 somewhat restricted.
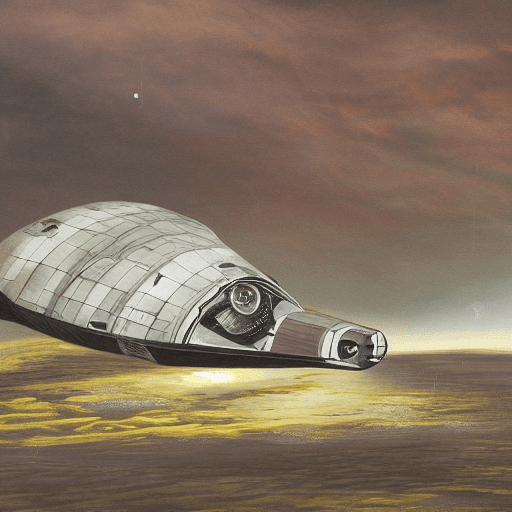
Prompt: painting of a spaceship, UHD
That being said, the power of 1.5 comes from how fast it is to run locally, the control you can leverage over the model with ControlNet, and the ecosystem of custom models that have been built around V1.5.
SDXL
Stable Diffusion XL is the newest model from Stable Diffusion. At its surface, the model is a significant advancement over SD 1.5 – with high-quality imagery being generated with significantly less robust prompts.
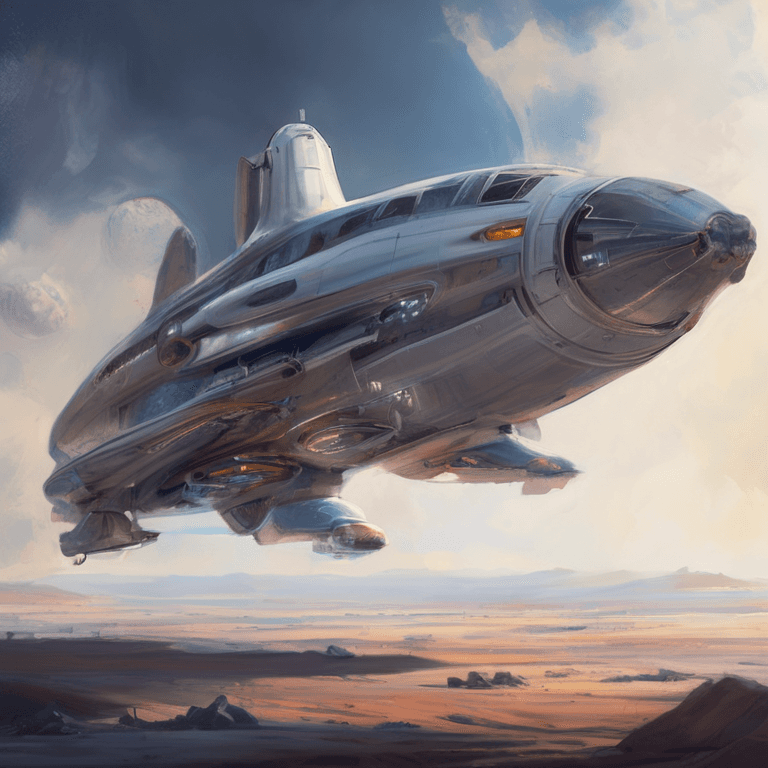
Prompt: Painting of a spaceship, UHD
SDXL is also open source - though the ecosystem that’s built around it is still somewhat nascent. There are fewer custom models, ControlNet support is still being worked on (at this writing), and the generation time is slower - and in some cases, struggles on a Mac.
But these downsides are short-lived. We expect SDXL to overtake SD1.5 as the de facto open source image generation model - primarily because 1.) model performance will improve, 2.) the ecosystem of custom models will continue to expand, and 3.) ControlNet support will become more centralized and easier to use.
Custom models
The power of Stable Diffusions from fine tuning models. Fine tuning feeds Stable Diffusion images which, in turn, train Stable Diffusion to generate images in the style of what you gave it. The reason for this is that Stable Diffusion is massive - which means its training data covers a giant swathe of imagery that’s all over the internet. By fine tuning a model, you can ostensibly focus it on generating a type of image that matches the data you give it.
There are a few ways to train a custom model. For our purposes, we’re going to focus on two of the most popular methods: Dreambooth and LoRA.
Dreambooth
This method associates a name or subject with the model you’re creating. As an example, I gave Dreambooth about 20-30 pictures of my dog Tina, told the model her name was Tina, and then had a way to generate Tina in different styles and settings.

Training can get quite complex - you can do things like start from different checkpoints (base models) or combine multiple checkpoints to get a model outcome. Platforms like CivitAI make this process easy but there’s still a significant amount of time and computing cost that comes from Dreambooth training.
LoRA
LoRA (or Low-Rank Adaptation of Large Language Models) training resolves some of these issues. Rather than retrain the entirety of a model, LoRA adds new weights to the model instead. This makes LoRAs smaller than Dreambooth models and therefore faster to train and easier to run locally.
Similar to Dreambooth models, there are tons of options available on CivitAI or LoRAs and more by the day - so unless you’re looking for something very specific (like a model of your dog!) it can be easier to just track down an existing LoRA and run it.
Running custom Stable Diffusion models
With Odyssey, running custom models is as easy as just subbing out one model for another one. You can read our guide here for running custom models on Odyssey. There are a few things to keep in mind though as you pick which models to use:
Model size - some models, especially ones that were trained with DreamBooth, can be very very large. This can make generation time slow. This is especially true with early SDXL models. While these models can be impressive, keep in mind that they might take a long time to generate images
ControlNet support - some models support ControlNet while others might not. With SD1.5 it’s very common to find models with ControlNet support but, since SDXL ControlNet hasn’t fully been rolled out, it’s a lot more challenging with SDXL. When combining custom models with ControlNet, the results can be incredible - so finding a great model with ControlNet support is key
CoreML support - Odyssey generally only supports models that have been converted to CoreML. The good news is that there are a ton of them in the Hugginface CoreML community. For the more technically inclined, you can also convert models to CoreML by using this tutorial
Safety filters - we’re not here to judge what you’re into and running models locally means what you do on your own time isn’t any of our business. But it’s worth flagging that some custom models do have content that’s not safe for work. Be cautious when generating images and using negative prompts can help stave off any objectionable content you don’t want to see
Here are some of our favorite custom models we’ve come across that work great with Odyssey:
SD1.5
Realistic Vision is an excellent model that uplevels Stable Diffusion V1.5 quite substantially. We use Realistic Vision as a drop-in replacement for Stable Diffusion 1.5 and ship the model with the Odyssey app. This model supports ControlNet - so it’s excellent for just about anything but particularly excels at realism.
Prompt: RAW photo of a [subject] 8k uhd, dslr, soft lighting, high quality, film grain, Fujifilm XT3
Dreamshaper 8 is also supported directly through Odyssey and can be downloaded at start-up. Like Realistic Vision, Dreamshaper supports ControlNet - so it functions quite well in any workflow that leverages ControlNet. Dreamshaper is a bit more “all-purpose” - and leans less toward realistic images than, as the name suggests, Realistic Vision
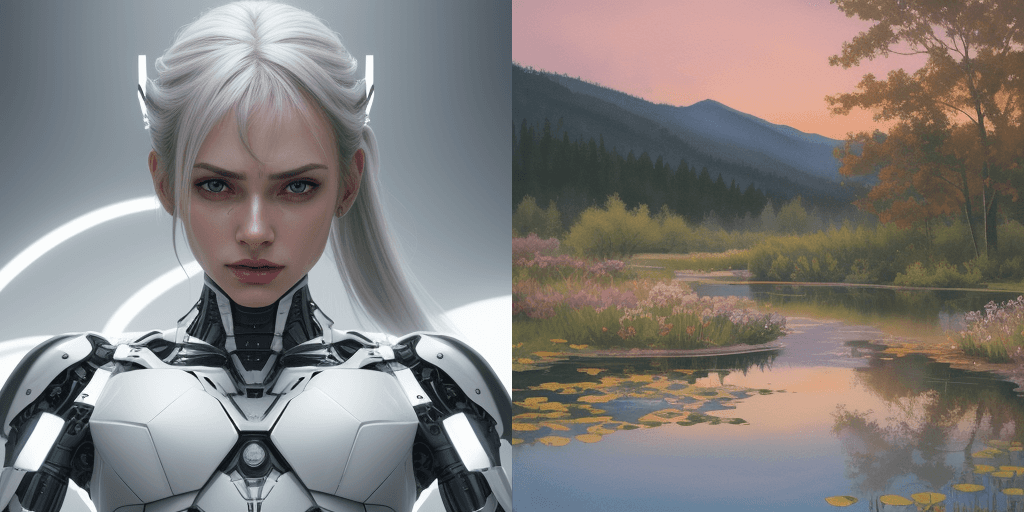
Prompt 1: gorgeous realistic portrait of a half woman half cyborg, terrified cyborg in a bright white room, realism, 8k, UHD
Prompt 2: gorgeous watercolor of a beautiful pond at sunset, beautiful colors, brushstrokes, incredible quality
Analog Diffusion does not ship directly with Odyssey but we love the retro, stylistic photos it produces. It’s a fun one to load in as a custom model if you’re looking for a specific, artistically retro or cinematic look.
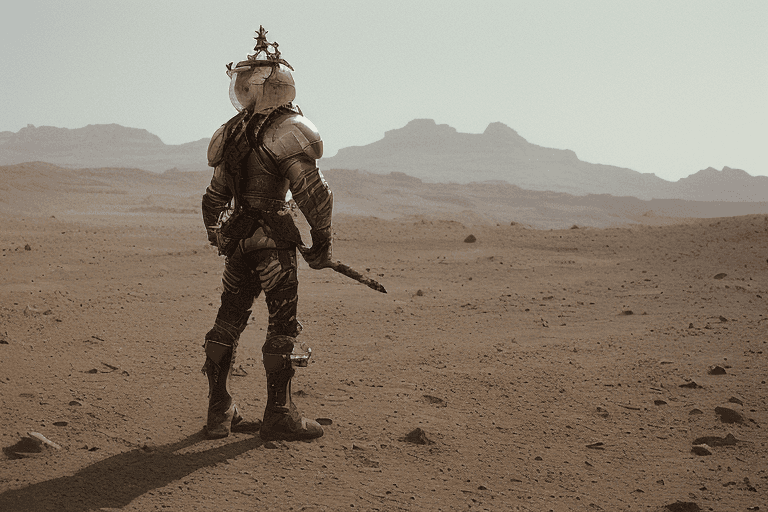
Prompt: analog style portrait of a knight on Mars
SDXL
Custom SDXL models can be a bit challenging to run locally on Macs. We’ve found that you can get very different performance benchmarks depending on whether you have an Intel Mac or an Apple Silicon Mac (M1, M2, etc.)
With Odyssey, we’ve included models that work regardless of your specs.
SSD 1B is the default SDXL model that comes with Odyssey. We made this decision because we’ve found the results from SSD 1B are about 95% as good as SDXL while the generation time is about 30 seconds per image (on an M2 Mac) compared to 3 minutes for pure SDXL on the same computer (without the refiner.) On an Intel Mac the times come down a bit - but the results just didn’t seem to warrant running the full SDXL model. You can download it here and add it as a custom model if you’re interested. All that being said, the results from SSD 1B are pretty remarkable regardless of the size of the model.
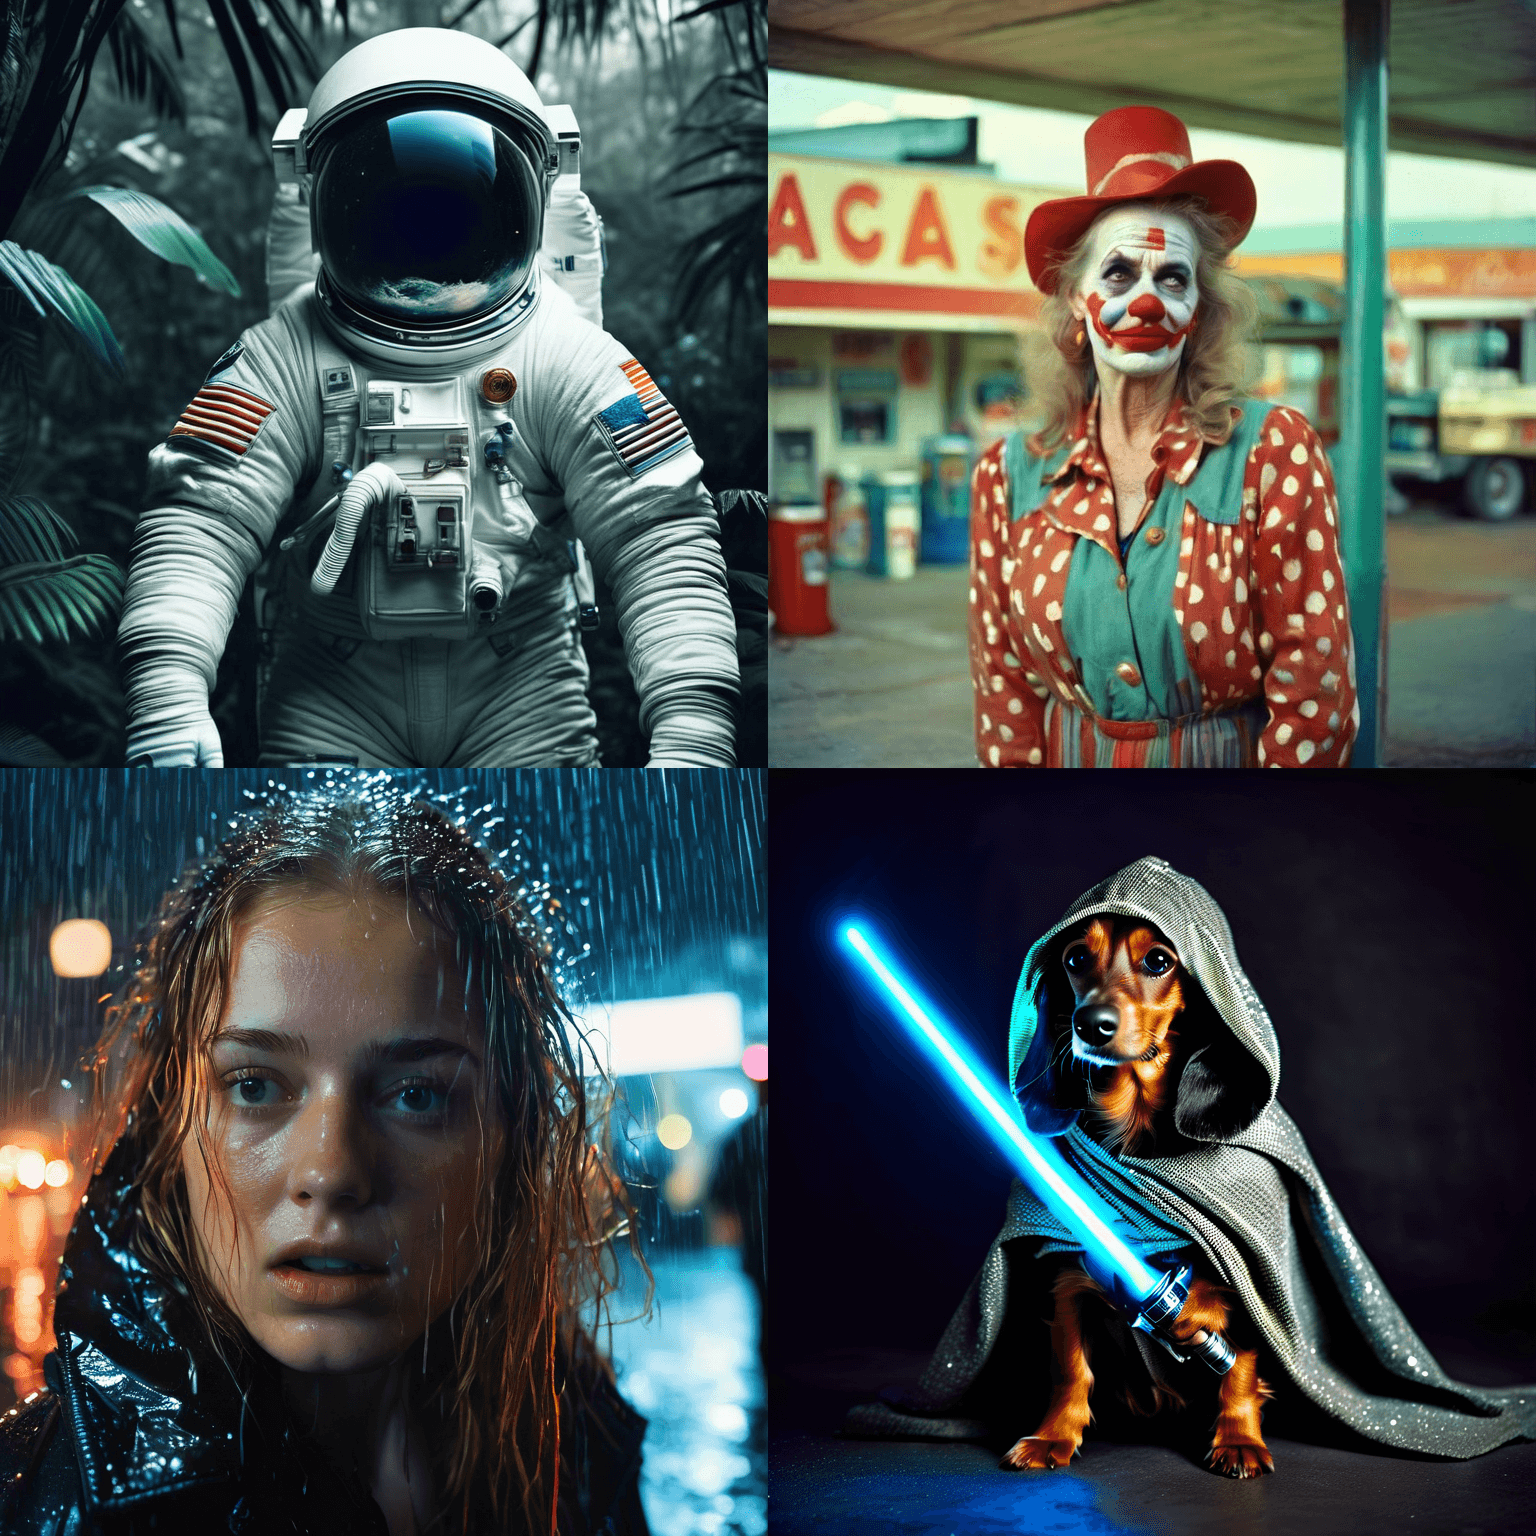
Top left: Astronaut in a jungle, cold color palette, muted colors, detailed, 8k
Top right: breathtaking portrait of a fifty year old female redneck at a gas station, big head, female, clown costume, sad expression, kodachrome, by William Eggleston. award-winning, professional, highly detailed, intricate details
Bottom left: A hyperrealistic close up photograph of a young woman looking frightened on a rainy night, rain dripping all around her, neon lights of a city in the distance, UHD, 35MM, hyper realistic, film grain, gorgeous night time photography, Leica camera, style of annie liebowitz
Bottom right: a master jedi dappled long-haired dachshund in star wars holding a lightsaber, wearing a jedi cloak hood, dramatic, cinematic lighting
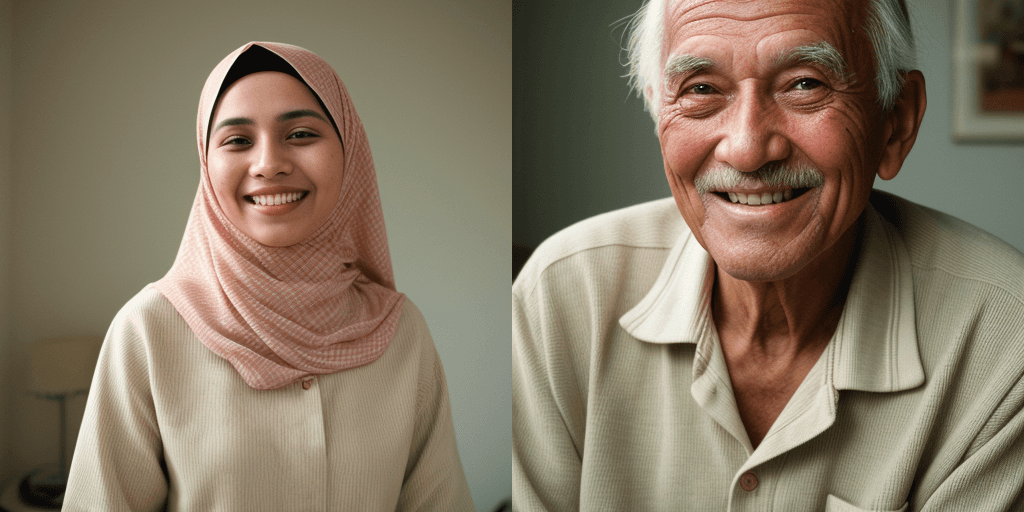
Nightvision XL is incredible at realistic and surreal portrait photographs. There is a wide range of stylistic flourishes that Nightvision excels at - but to get the most out of the model it’s best to focus on portrait photographs. This model works well with Odyssey since it does not require the Refiner to generate remarkable images. Nightvision doesn’t support ControlNet at this time - but comes included as a download with Odyssey.

Prompt 1: realistic portrait photograph of a half human half cyborg woman with freckled skin staring at the camera, moon shininig in the background, incredible realistic photography, 35mm, leica camera, ultrahd, melancholic
Prompt 2: portrait of a furious French chef standing over a steaming stove in a beautiful Michelin starred kitchen, quietly fuming, on the verge of tears incredible realistic photography, 35mm, leica camera, ultrahd, intense and dramatic
Emoji XL is a fun model that focuses entirely on, you guessed it, emojis. The model is similar to SSD 1B, where it runs much faster than SDXL, which means you can generate emoji-style images very fast. While the model doesn’t support ControlNet, it does support img2img. The higher the guidance scale, the more “emoji-like” the image will be. Will this model win you any award? No. But it will delight your friends and family with emojis of your pets? Absolutely.
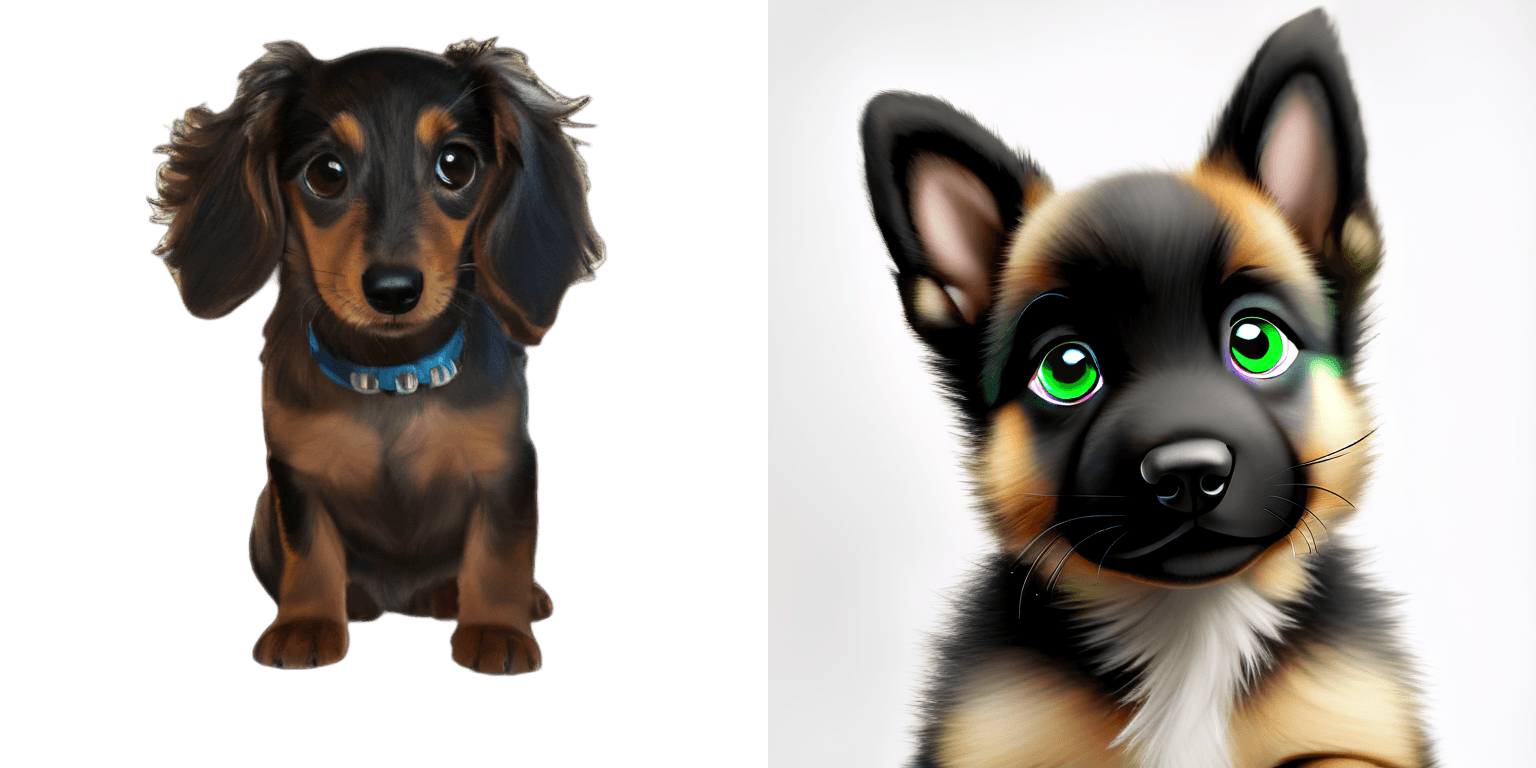
Emojis generated from puppy photos with img2img.
Juggernaut XL and Dynavision XL are also remarkable SDXL models but, at this writing, they’re a bit challenging to run on Macs and don’t work well with Apple Silicon. We’re looking into alternate approaches to bring these models to Odyssey.
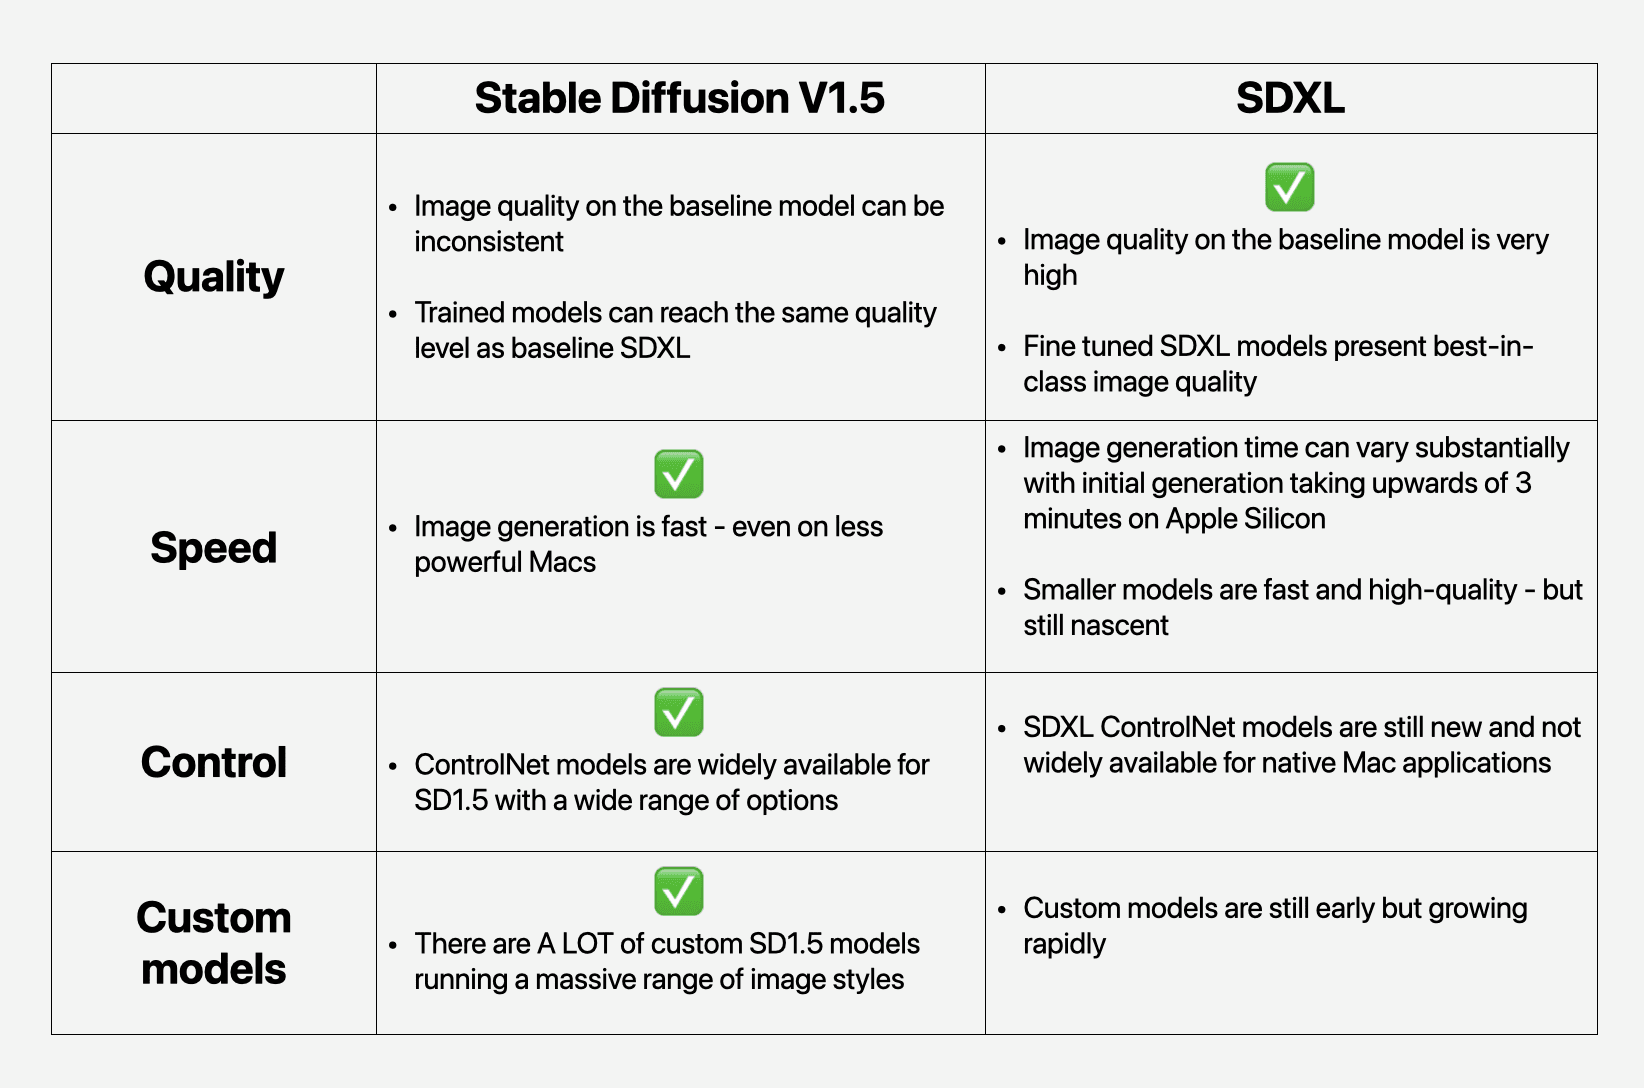
Model comparison
Why use a Mac over a Stable Diffusion web UI?
Most of this guide has covered running Stable Diffusion on a Mac. You might be wondering - why run the models natively instead of in a web UI? There are a few reasons:
Control - when you download and run models locally, you can control the entirety of the experience. The models are ostensibly yours, on your Mac, which means when you load them into an app like Odyssey, you can granularly change your ControlNet settings, run img2img, and more
Cost - running models locally means you don't need to pay for GPU time. If you're using a web UI there is some concession here - either you'll be capped on the number of credits, you'll be paying per image, or you're paying for server costs. There's no cost associated with running each individual model locally - which means you can generate as much as you want without worrying about the server costs
Privacy - running AI models locally means none of your data is shared to the model provider and what you generate isn't shared with the service you use. Everything you do is completely private and secure - and that's a big plus if you're doing work for clients
Experience - with Odyssey, we've put a lot of work into making sure the app is the best possible experience for leveraging AI models. We've sweat over the details - from a comprehensive and smooth undo/redo stack to a simple and intuitive custom model upload. A true native app feels better than a web UI - and we think it drastically improves the experience